Archives for category: green

Today has been our Christmas meeting at Seata. We had a different format this year, a Sewing Bee type challenge. We knew in advance that we could use the word “Tree”, “Snow”, “Star” or “Gift” to produce a piece of work that didn’t have to be finished, and that would be judged at the end of the day by Alex, our Chair. We could work out our design, even draw it up, but no stitching was to be done in advance.

Predictably I couldn’t make up my mind what to do but, seeing a picture of an embroidered tree on a Christmas card yesterday, it gave me a starting point.

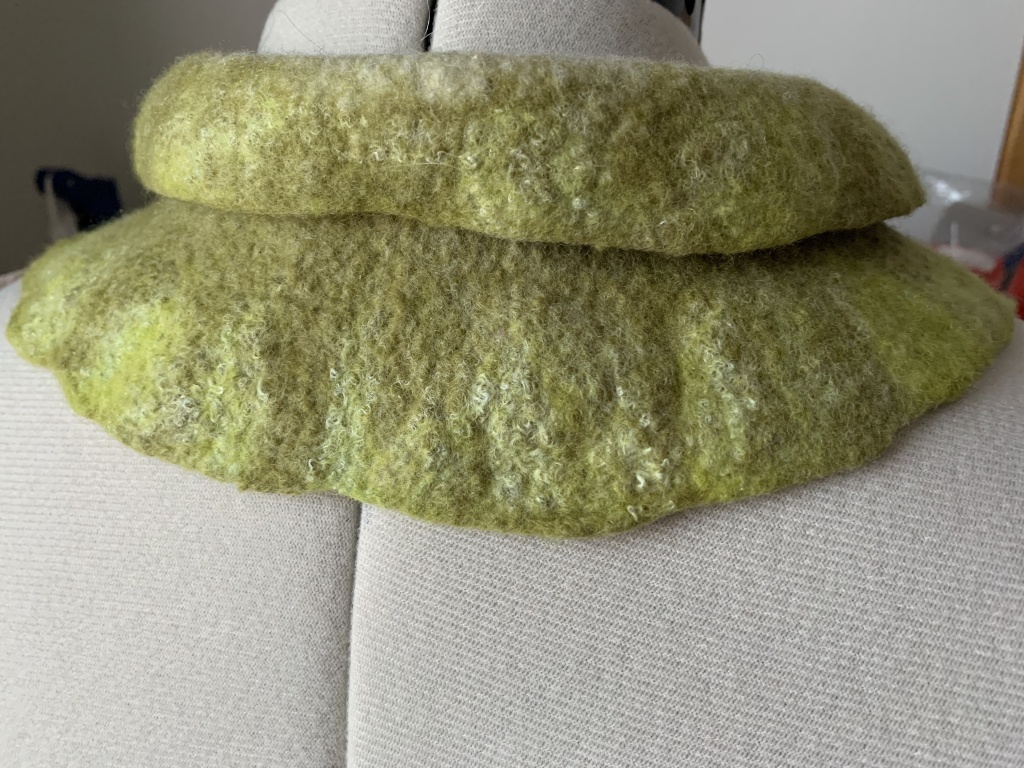
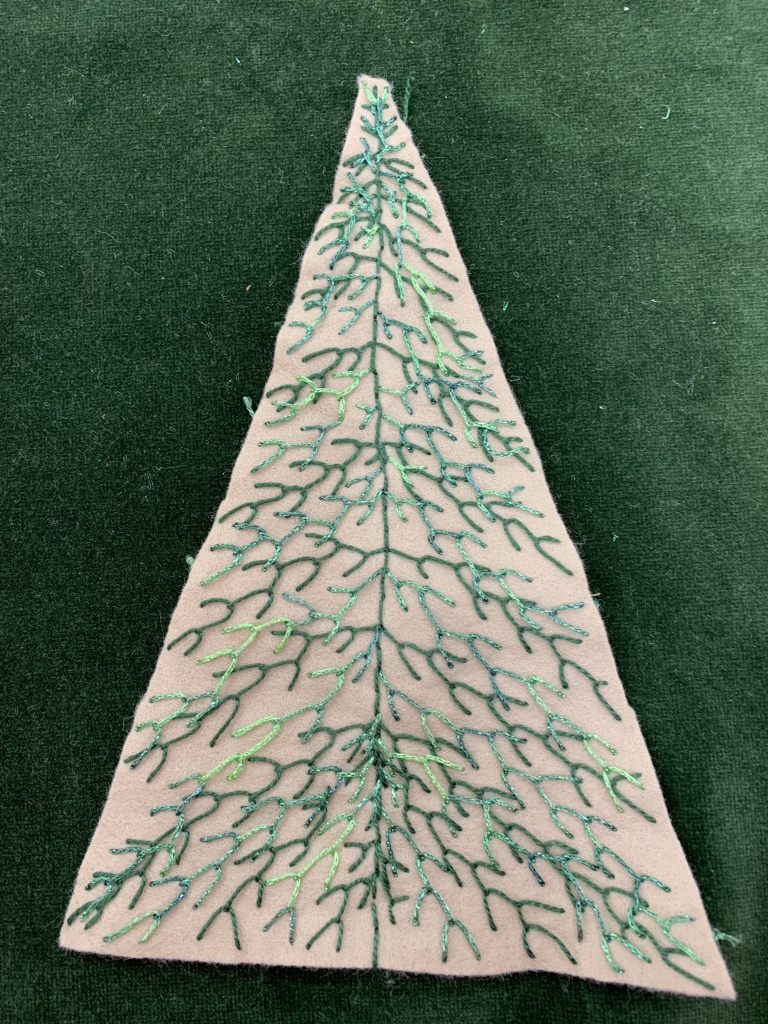
What to use as a background? Having a rummage last night I found a lovely piece of dark green velvet. Perfect. I also wanted some lighter green felt to cut out a triangle to stitch on. No joy, it seems to have disappeared into the black hole with calico and bond-a-web. A beige piece was the best I could find, even after a better look this morning. So the only prepping I had done was to cut a piece of velvet and put masking tape round the edges. A zigzag on the sewing machine would have been better, but no time for that. Then to make a pattern from a folded piece of A4 paper, cutting it from the top fold to the bottom corner, and then cutting a couple of inches off the bottom, and finally cutting a triangle of felt.

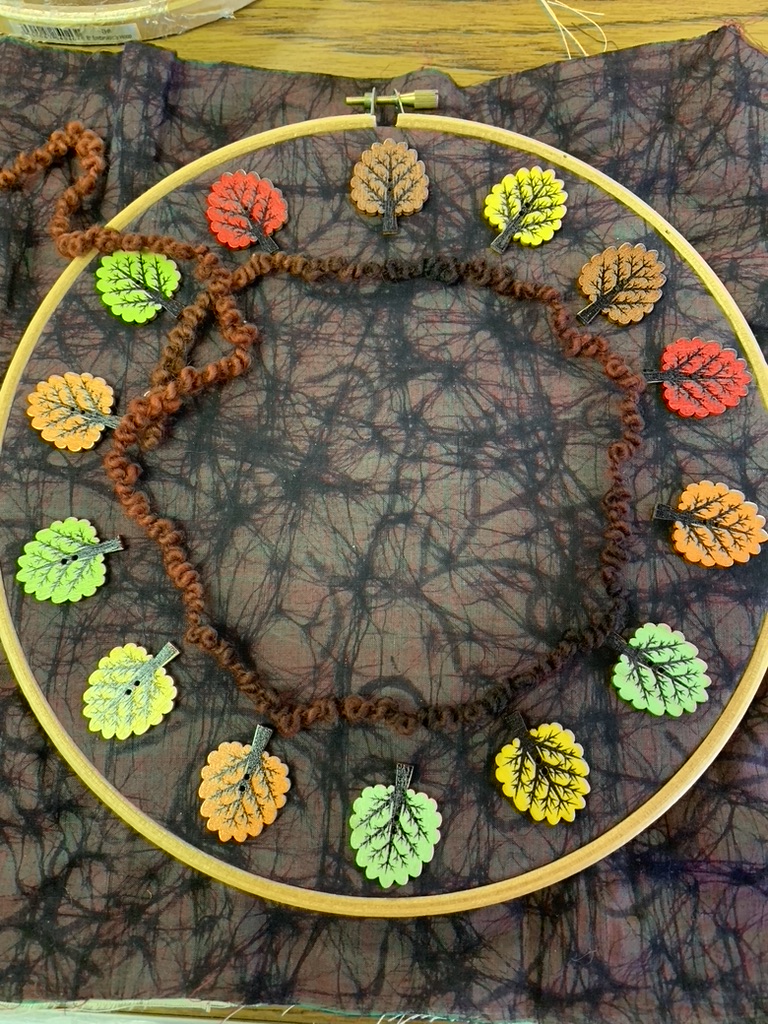
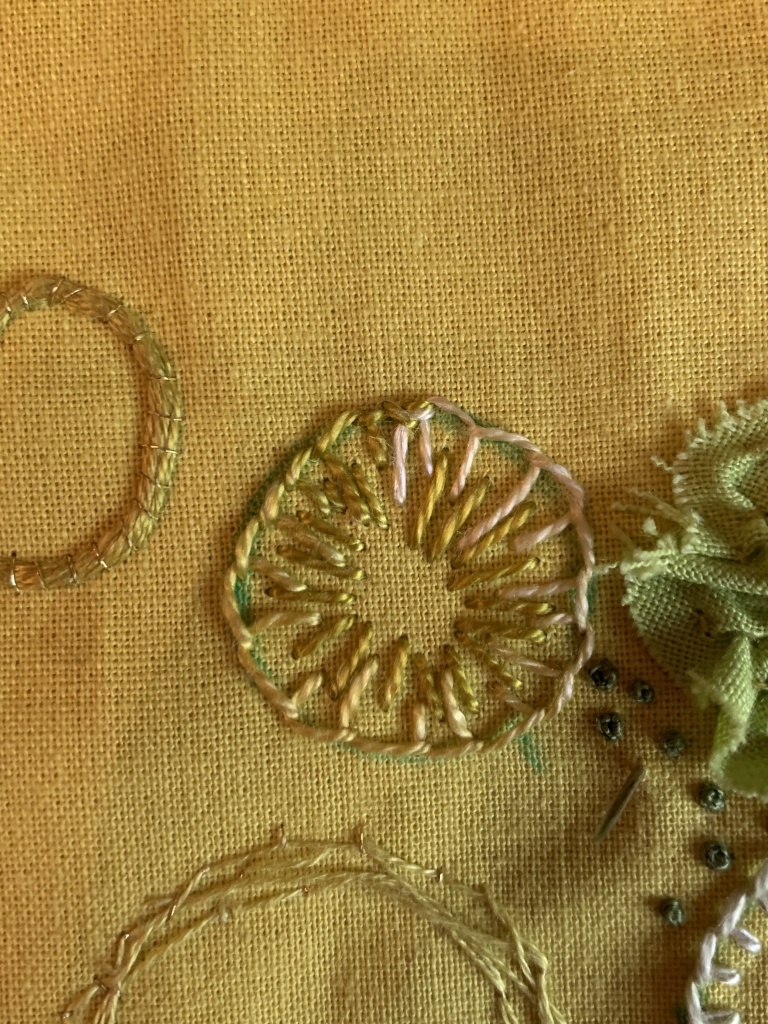
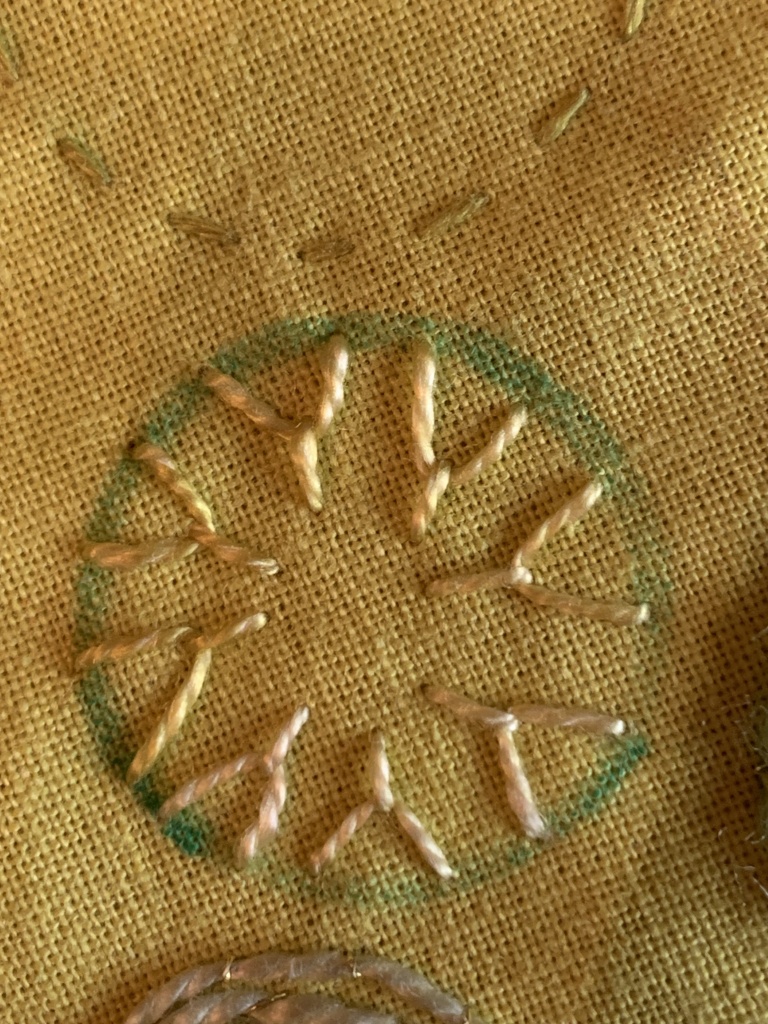
I used a green perlé to start feather stitching to a faint blue line of water soluble pen. So far I have only stitched the felt, I’ll attach it to the velvet later. It’s all random, to try and give a more realistic tree. It’s certainly not precise and mirror-imaged.

I added another layer of branches in a variegated knitted thread, and this is how far I’d got by lunch-time.

We had a very nice shared planned “Potluck” lunch. Several of the members find it far too stressful to be potluck, and don’t trust that it will work. I’ve been in several groups over the years where it has always worked beautifully, with a good balance of savoury and sweet. To me, it’s more of a challenge to think what I want to cook / bring so far in advance!

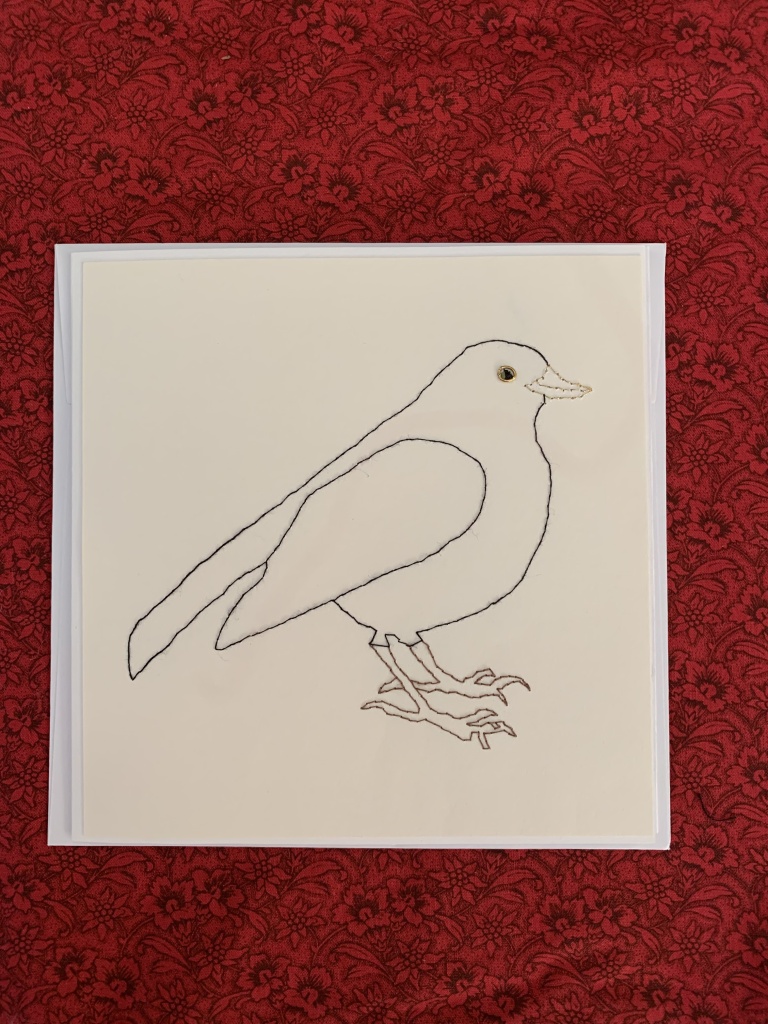
We had all voted during the morning with the usual 5 beads for the Chairs Christmas Challenge, “The Twelve Days of Christmas ” made as a card. The ones who wanted to take part had a lucky dip at a previous meeting. I got four calling (coley – black) birds. I started it several weeks ago, but only finished stitching it this week, attaching it to the card and finishing it off last night!

As my starting-point, I used a photo I took from a friend’s window last December of a blackbird eating cotoneaster berries. After several sketches, looking at books and online to get the legs right, I used a lightbox to prick through the outline on to thin card.

Then I stitched in black thread for the body, some gold for the beak, brown for the legs, a gold jump-ring to outline the eye, and a tiny black sequin for the beady eye.

For the inside, Christmas wishes in the shape of a Christmas tree alternating the letters in red and green……

…….. and the words of part of the chorus on the flap of the card.

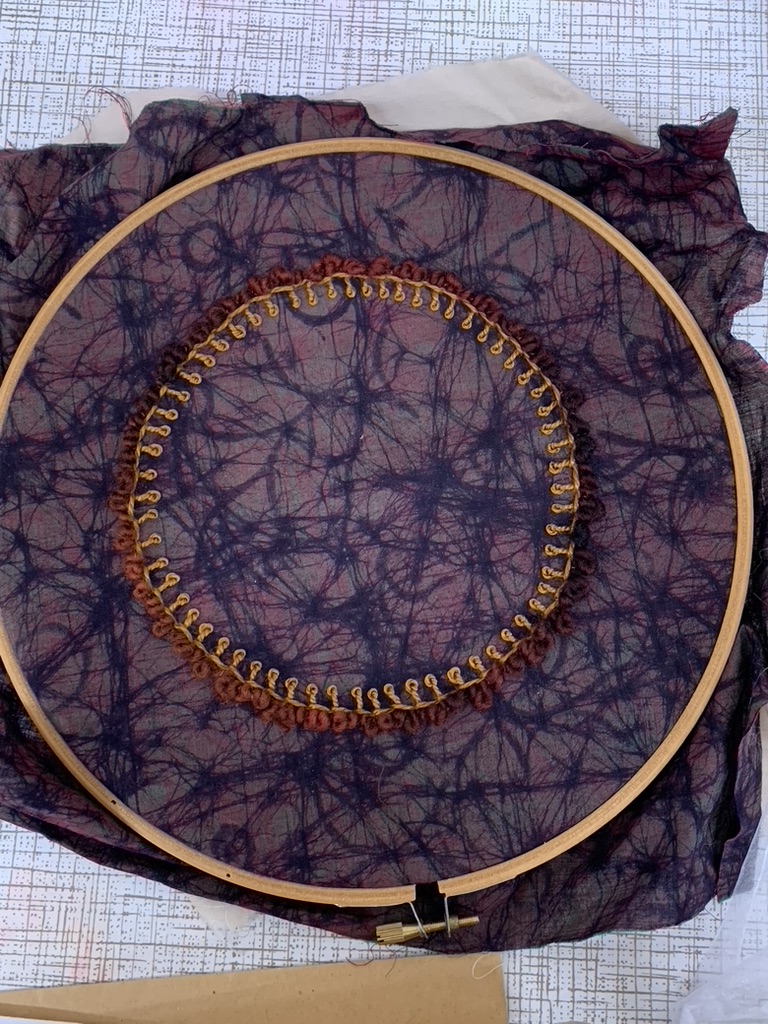
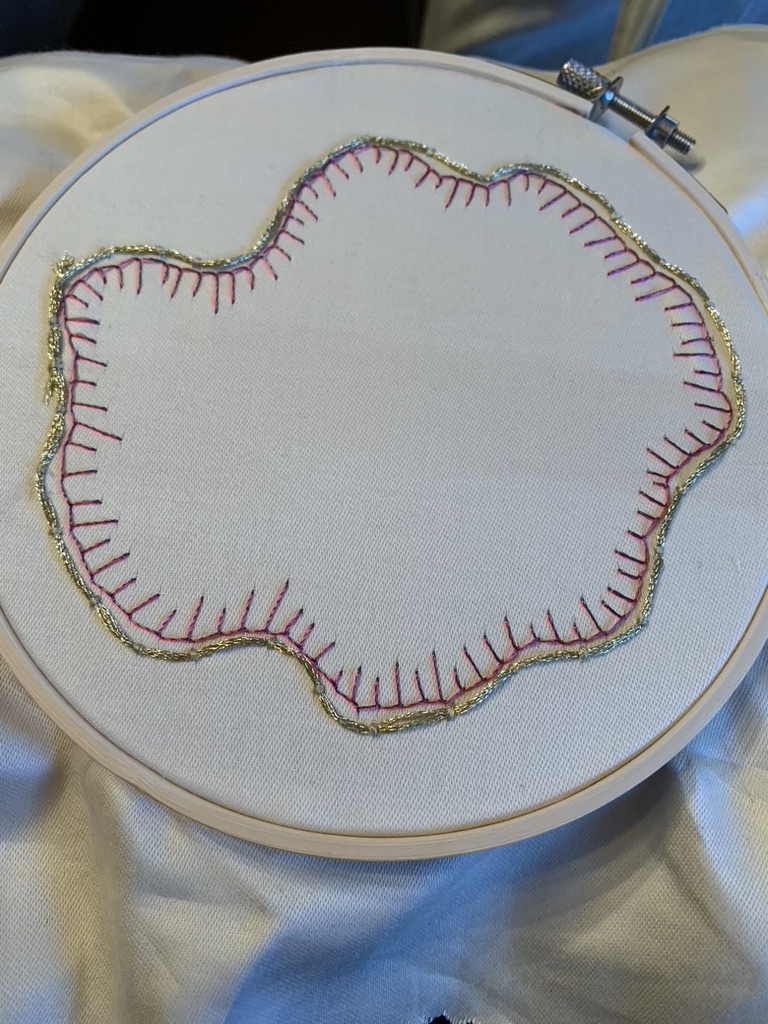
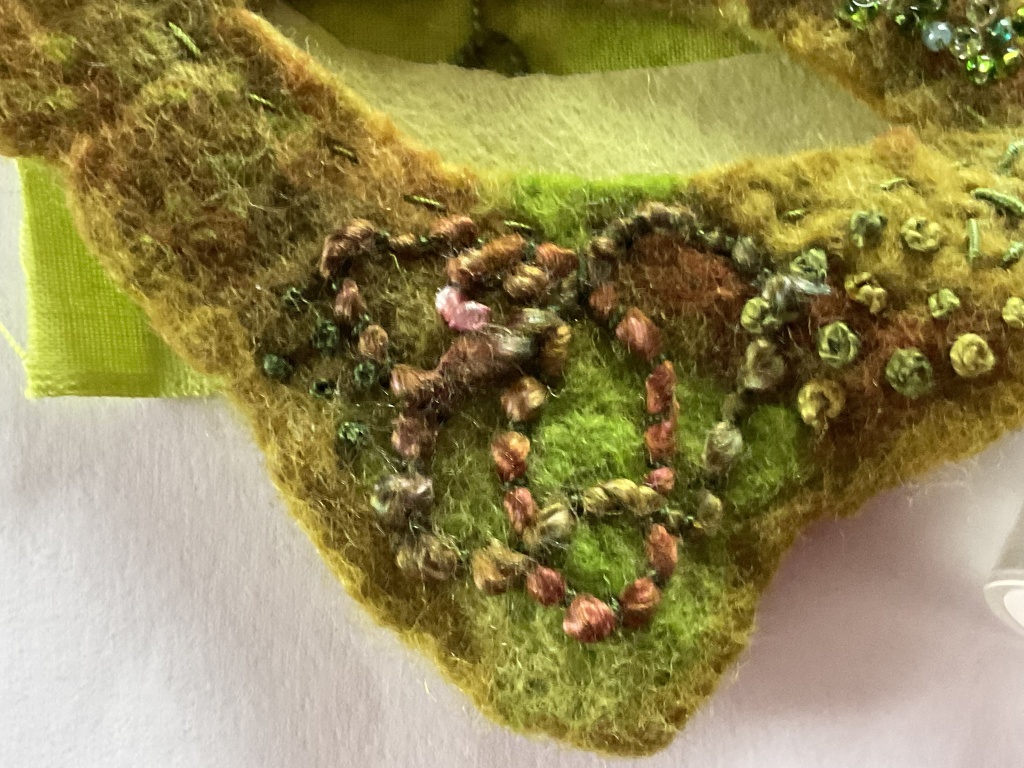
After lunch we went back to stitching. I wasn’t sure whether to start decorating with beads and sequins, etc. at this stage, as time was running out rapidly…..

……. or to carry on adding more layers of feather stitch, which I decided was the better option. There was no chance of finishing, and it would be better to finish the fly stitch first. Not the first Christmas project that has taken a while – sometimes years – to finish!

It was decided in the summer that the SEATA group would do geodes as well as travelling books, starting at the September meeting. The travelling books group had got much smaller. I opted out a while ago. When the format changed, I found that it didn’t spark my imagination in the way responding to what was already in the book had done. Two pages on a drawn-out topic just wasn’t the same.

All the participants had to set up a 6″ or 8″ hoop with a background fabric of their choice. Then put it in a bag with a little notebook, pencil and any guidelines or instructions (stitches or colours for example), and add any threads or notions if they wanted to, ready to be picked up by somebody else taking part. The idea is to work one row, inside the previous row make a few notes in the little book – stitch, thread used etc., and SIGN the page, so we know who has done what on our geode, put it back in the bag ready for it to be passed on next month.

This is where the travelling books fell down sometimes, if somebody wasn’t at the next meeting to pass on and collect the next one on the list. We tried various ways to try and reduce the problems, but some groups got in a real muddle at times. It was decided that if you missed a meeting, just to do another row and pass on next time with the geode.

I was dithering on my background fabric but, while looking for something else, I came across a little paper bag with these autumn-coloured tree “buttons” in, long forgotten my original intention with them. However, I decided they would make a perfect border for my finished wood / forest / trees geode on this dark background fabric.

I found this variegated slubby yarn …..

….. and couched it down. I’ve put the trees in the bag, so they can be stitched down at the end. (They would catch on threads while stitching if I’d put them on at the beginning.)

This is how it looked at the October meeting, thanks to Sue.

I chose this lovely green hoop for my first pick, and by chance it happens to be Sue’s. The only confusion so far seems to have been that some of us had done our own first row and some hadn’t, but not a problem. I used this dark purple thread to do Coral knot stitch, deliberately not making it a perfect circle.

The one I picked up at the October meeting was Lorraine’s, with the gold (the top photo) already stitched. She wanted shiny and blingy, so I’ve used a deep pink Anchor Marlitt for a random buttonhole stitch.

I don’t know who took mine last month, so it will be fun to see how it has progressed.

Nearly there! On the photo above, you can see three (?) blue pen circles when I ran out of time to do any more that day. I’d been trying to finish before I’d got to stop, so I could wet the water soluble pen ready to start the sequins when I got back to it.

I’ve finally started adding sequins, deliberately altering which way up I’ve stitched them. Some have two stitches and some three to anchor them down.

I’ve also added some tiny glass beads ……

…….in places, with a mix of different colours, shapes and sizes.

More sequins,

………lots of them, but a long way to go. They are catching the light beautifully.

I’m trailing them through …….

……..the whole piece.

But there’s still a long way to go, some more beads and french knots too. My aim is to finish it before the next Lincolnshire Textile meeting, but the garden is calling and the wisteria is out.

As anyone who has been reading my blog for a while will know, I dream of lying in the hammock under the wisteria. The weather and time rarely come together, so I managed half an hour in the hammock when my body was crying out no more gardening today! Then I carried on.

Blue sky with fluffy white clouds, and my favourite spring green. I really should grab some more sessions over the Bank Holiday weekend. For once, the weather forecast is good.

I have been working away at my “bubbles ” piece over the last few weeks. Having been stitching on the widest middle section, it didn’t seem to be making much progress. It’s only when I looked back at going round in circles and bubbles that I realised how much I’ve actually done, also how much the light has improved and lasted longer in the day over the last few weeks. The colours of my photos now look much more how the piece looks in reality.

I’ve done a mixture of new and familiar stitches with some made-up or improvised ones, continuing to use a range of textures, in a narrow range of colours, as requested. I’ve added some more threads to my original selection.

I’ve used this lovely slubby one …..

……. to couch down the thick section with the thin section.

The chain stitch ring on the left was a stitch new to me, and it works like magic! Two different shades of green perlé threaded into the same needle, a normal chain stitch alternating the colour you wrap round the needle, and pulling through. I really couldn’t see how it could possibly work at all and, if it did, I thought the threads would knot or tangle as I pulled the needle through. No, it really worked easily and magically. I want to try it with more threads in my needle. And as you can see from the tacking lines I have nearly got down to the point.

I was pleased with these random long stitches across the ring so much….

….. that I did a smaller denser one.

Simple lazy daisy stitches ……

….look quite different when they are done much larger, and are arranged to look flower-shaped.

I’ve done some more french knots to use up the ends of some of the threads in my needle, and a whole bubble of french knots (see back at the top of the post). This is how much I’ve done so far. I can see other uses for some of the stitches, and better ways to use some – it’s sort of become like a big sampler. I’m still being patient and not putting on the sequins……. nearly there.

I’ve continued with my Going round in circles from last week. In my stash I’ve found iridescent sequins that will work well with it, but have resisted the temptation to stitch any on yet. I know from experience that they will catch my threads as I continue stitching, which is so annoying and time consuming: patience.

I’ve caught down a cut out circle to gather it into folds, which may have some beads added later. The one below is blanket stitch in a perlé 5, you can see the water-soluble pen behind. Again the light is awful, and makes it all look much more yellow than reality.

This one makes me think of a slice of kiwi! I have also started to add some french knots…….

……… some fly stitches, again with water-soluble pen behind…….

…….. a tiny ring of seed stitches in a variegated thread.

Blanket stitches come out from the circle with more french knots around it, with one, two and three wraps around the needle and various weights of thread to add texture.

The spaces are gradually filling in with more circles and french knots. It’ll look different when the water-soluble pen is removed. It’s a bit unwieldy in a two-foot hoop, but at least I can see the overall shape and how the “bubbles” relate to each other.

I’m back working with my favourite shades of spring greens. It’s quite fitting some days, other days it still feels like winter. At Lincolnshire Textiles we are working on another communal piece for an exhibition in summer 2024. The cartoon was there last month for us all to pick a section to work on. It’s mainly blues, and apparently only four sections are green. Of course I chose one of the green pieces. Not only is it one of my favourite colours, but also I would have a suitable piece of background fabric and threads in my stash.

The pattern pieces were all drawn out with a directional arrow showing which way it needs to be worked, and a snippet of painted paper or a piece of thread to show the colour to use. I’d thought about it on and off over the month, sorted out fabric, backing fabric and threads, found a big hoop to work in, and traced my pattern piece ready to stitch round. None of my ideas for a design had seemed quite right until the middle of the night before last week’s meeting, when it just popped into my head: bubbles, circles in different sizes, textures, threads and stitches.

I’ve not got a finished picture in my head, but it is evolving as I go along, and it will, each circle responding to what is there so far.

I was just about to start tacking round the pattern shape, when Jo came and asked if I would like the same piece of green fabric that the other three green sections are going to be worked in. Yes, please! The piece I had, I didn’t really want to use, as I liked it so much and I’d been trying to place the pattern to leave as much as possible for another project. Also the piece that she’d offered is cotton and more stable, and will be easier for the assemblers to work with.

The bottom circle was my first. I wanted it to look like a pencil sketched circle that you keep going lightly round until the shape is right, but doesn’t translate to stitch. I tried to couch down where the threads overlap, but it just looks botchy. The one on the right, I tried putting in a few tiny stab stitches and then threading the single strand of stranded cotton through the stab stitches, nearer to what I had in my head, particularly after adding some tiny gold couching. The small circle, I wrapped round my finger and then couched it down with fine gold thread.

I’ve couched down a loose spiral in a perlé thread, a blanket stitch circle and a running stitch one.

This one was a tiny strip left over from a quilt. I did a running stitch up the centre and gathered it up, joined it into a ring and stab stitched it down.

More bits left from a quilt were cut into circles and attached in two ways using running stitches, another one made into a tiny suffolk puff, a ring of detached chain and one of a slubby yarn couched down on the bottom right.

This where it’s got to so far. As I’ve taken photos, the light has changed so much during the day that you would think it was four different background fabrics. Lots more to do yet, but it’s finally on its way.

I did a felted collar workshop with Karen Lane last week with ladies from Region 8 of the Felt Association.

I have plenty of fleece in lots of different colours, but all merino, and we needed super-fine merino tops for the best result.

Lamorna very kindly gave me some super-fine merino tops in my favourite green, some cream, and some silk / viscose for decoration.

It was an early start and a long drive.

After some initital instruction from Karen, we were all keen to get started.

The fleece was laid out after drawing a pattern on the bubble wrap. As usual when felting, I become so engrossed in what I’m doing that I forget to take photos. It’s ready to start adding water and soap here.

Starting off slowly and gently, the felting process begins.

This is the wrong / inside of the collar at the pre-felt stage.

We had further instructions from Karen for the felting (fulling) and shaping.

And after much rolling and pulling, this is the finished collar at the end of the day, when it is still damp.

Karen showed us a variety of brooch techniques for us to choose from, before we all started one to fasten our collars. Mine isn’t quite finished, I’m going to add some beads and stitching.

It sits well at the back too. The silk shows up better now it’s dry. I’m really pleased with the colours and the lovely soft texture. I’ve already worn it a couple of times this week and, as it is very light weight, it will be a while before the weather is too warm to wear it. Thank you, Karen, Lamorna (and Graham for driving) and Region 8 ladies. The results were well worth the early start and the long day.

These two elements inform most of my work from nature. I particularly love the autumn colours, which have been especially good this year. Often the weather is grey and wet during the English autumn, but this year we have had a lot of blue skies and sunshine. The beech trees that I can see from sitting at the kitchen table are rapidly losing their leaves this week, we have had a lot of blustery days. At the beginning of the week, the tree on the left had as many leaves as are now left on the right-hand one. All three will be skeletal until the spring and we will soon have fabulous sunrises behind them and the church.

The leaves are falling rapidly from the wisteria as well, lovely yellowy greens ….

…. which are the colours I was working with earlier in the week.

It’s barely got past the planning stage yet.

I spotted several interesting textures and colours when working in the garden.

This one is reminiscent of some wet felt that I’m stitching on…..

….. from Felting with Karen Lane. The biggest piece that I made has more texture now, running stitches in a variegated perlé, some crumpled gold velvet, French knots ….

….. this beautiful variegated yarn ….

…. is meandering with some couching around the edge.

I’ve used one of the other pieces for a hair-slide for one of Alex’s Springboard (Cut) projects in classes at Scunthorpe library. I’ve cut out the middle and a piece of painted pelmet vilene the same shape and size.

I find the copper slide one of the best things for keeping my unruly mop out of my eyes when I have my hair loose, so thought I would use the same principle to make one. It’s not got very far yet, bullion knots, French knots, beads ….

….. more couching.

Hopefully it will work, once it’s finished. I didn’t want to cut more of the felt than was absolutely neccessary, as I like the soft edges. The centre cut bit might need a bit more felting to strengthen it.

As I mentioned last week, the recent body of work for Grasby Embroiderers was called “Altered images”. I started with thinking how images could be altered, and jotted down words and phrases on a scrap of paper. When I do this, I have words coming in to my head so fast that it’s just a case of getting them down, spelling mistakes and all, before the next one takes me in a different direction: lots of possibilities.

Around the same time we were playing / experimenting at the painting class (still on Zoom, I think), and I came up with this, based on a peacock feather. It hadn’t quite worked but I liked some of the mark making effects and the colours, except they were real peacock feather colours.

What would happen if I used complementary colours on the colour wheel? It certainly played tricks on my mind, so I did a rough sketch and labelled the colours I needed to use for each section of the feather.

This is a very crude water colour and acrylic inks trial piece. I liked the size and the crop, and the flow of the directional marks of the purple section.

Here’s another attempt, using bright yellow and lime green for the “eye” of the feather. I was very happy with this one, so much so that it actually had stitching added to it and became a finished piece.

I decided I’d do a tryptich, and marked three rectangles on the same piece of calico, with enough “waste” between each one to cut them out and mount them individually, then stretched it on to a frame. I wet the fabric in places and added purple acrylic ink. Now to be patient, walk away and leave it to dry.

I was surprised to see how much it had bled and become much lighter, much more so than on watercolour paper, but I was happy with the result. I had an idea already in my head for the middle one. The “eye” was a padded felt teardrop shape, that would be covered in gold glass beads. The top two are not glass and catch the light quite differently.

It was a long, slow process, the beads deliberately going in random directions. Several migraines later I finally finished the beading.

I then started adding strips of purple velvet, fine cotton and silk stitched down the centre of each strip.

The light catches the beads altering the colour of them.

More strips were stitched down, following the directional lines of the painting.

I ended up painting a piece of silk to get the “right” green.

The green dried more or less the same shade, but again the purple dried much lighter. The piece was then torn into strips, with the green packed up close to the beading.

I’ve also added some teal coloured velvet and some pinky sari strips of silk. The painting still wasn’t stitched at this stage. We had one of our monthly meetings before I’d stitched the purple silk and it was suggested that I leave them loose. I did, but not as loose as shown here. More strips were needed as well.

I did have some ideas for the other two panels, but as Jean got up to leave she caught sight of the back and suggested that I just did minimal running stitches to emphasize the painted lines. It sounded a good idea to me, as this one had already taken a lot of stitching and still needed more. To be continued….

This week I have been flitting about from one thing to another rather a lot. The usual thing for me, trying to fit too many things in too little time. However, I have managed to have a couple of walks with our Ukrainian friends, the first to Twigmoor Woods where the rhodendrons are starting to flower; it’s become a regular haunt over the years.

We are very lucky to live a ten-minute drive away, close enough to go several times over the six to eight weeks that the rhodendrons are flowering, depending on the weather. They are late this year looking back at my old photos, no colour at all showing yet on the common purple one above, taken in early May 2003. In the one below, on 2 May 2007, the leaves on the trees are further out than this year too.

The light has not been good on either occasion we have been this year, in the early evening after dinner before Miles and Lera and their two “sunflowers” headed back to York. That’s why the photos are all from previous years.

I have said over the years that we need to go once a week to catch the huge variety of colours at their best, not something we have ever managed to do. But it could happen this year, and hopefully the light will be better too.

On another evening, Katya and I also had a walk in Broughton Woods, and we had the rare treat of seeing a deer, which stood and posed for us for several minutes, before crossing the path in front of us and disappearing into the trees.

And much to Katya’s delight we saw a hare in a field a bit further on in our walk. No surprise that it was too fast for a photo!

However, I did get this good shot of a well camouflaged moth on a hazel branch.

It’s good to get back in the woods for more regular walks than I’ve managed for a while. Observing the changes in nature taking place so quickly is good for the soul, particulary at this time of year, as well as giving me inspiration for my art and textile work. I just love the fresh spring greens, especially the new beech leaves.