Archives for category: Fabric

The talk last month at Seata was by Gillian of PingWynny (Handmade Textiles). It was also a “Show and Tell” of a huge range of her beautiful work, quilts, cushions, pictures / panels, 3D vases, mainly in bright, vibrant colours and fabrics, a mix of machine and hand stitching. Gillian also told us about her workshops and classes, one of which is a 15-minute drive away once a month…. and the one on Wednesday evening this week was on fabric painting, something which I love and haven’t done for ages. Too good to miss.

The only thing I needed to take was fabric, either silk or cotton, and frames / hoops. Last minute as always, I was scrabbling about for suitable cotton and my frames. I’d bought a box of slot-together ones from a sales table for 50p, already coloured with paint, so not going to mess up good ones. Perfect.

Gillian was providing the paints, brushes and salt, mainly Setasilk and a few Maribou (which I have previously used on silk). I wasn’t aware that they could be used on cotton. They are all iron fix.

After a quick demonstration and showing us some of her examples, we were ready to start.

Rather than cutting my fabric, I attached my strip to two frames and made a start, with the green and yellow one first, basically in blobs, and adding salt at the end, then the middle one working the colours out from the centre before adding salt. These two were done on damp fabric (just a fine spray of water). Gillian lent me a hoop for the bottom one, which was done with spirals of colour on dry fabric and then wetting the darker areas to encourage the paint to spread. I was so engrossed in what I was doing that I forgot to take photos, so these were taken when the salt was removed once it was all dry.

The wrong (?) side of the fabric gives a more subtle colour.

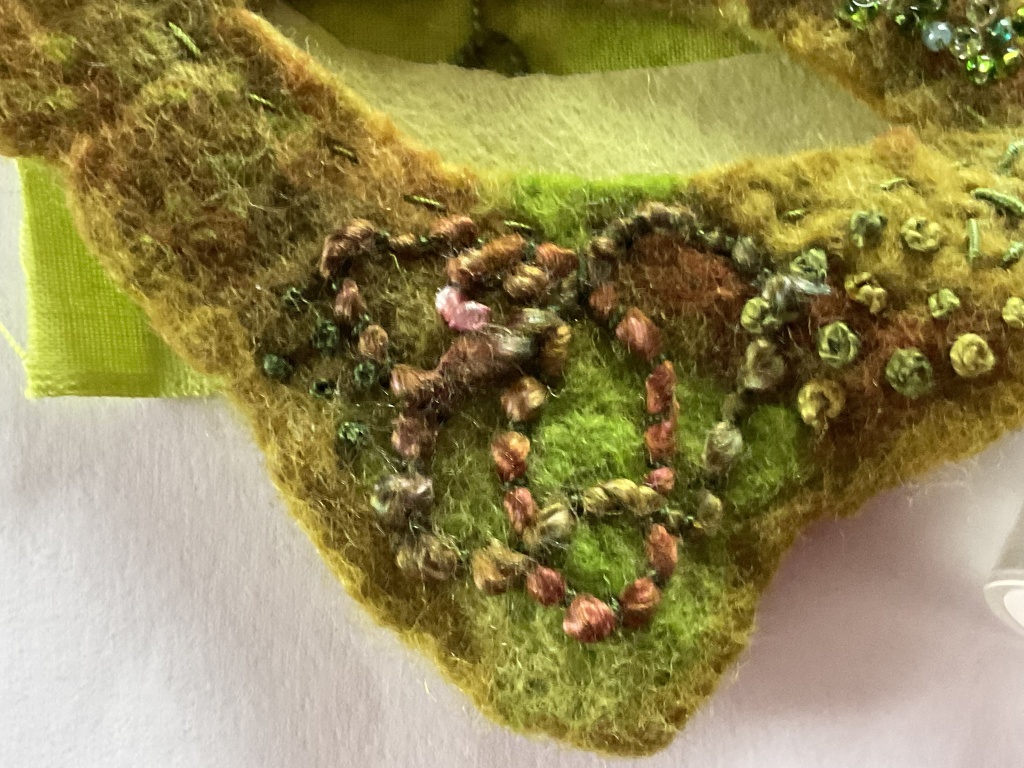
I’m especially pleased with the spirals.

I’d also taken a very large frame with a fine piece of calico stretched over it, which Gillian asked if I was going to use. Yes, using some of the techniques again with a different palette. I blobbed colour and then sprayed with water, which made the paint spread into interesting tendril effects.

More paint, more water ……

…… more colour……

…… another colour, I needed to be careful that the purple wasn’t too close to the yellow, because I didn’t want mud!

Well, a little mud. It was very wet at this stage, so a little salt, and then a hair drier to move some of the water. I was really pleased with the results, but had to put it in the car to bring it home.

And by the morning, it had become this. I still like it, just not quite so much.

It’s a shame that very few of the tendrils remain. That’s the nature of the beast, you never know exactly how it will turn out, but it is also what makes it fun and exciting. It all needs ironing now.

Last Saturday at Seata we had an all-day workshop with Jess Grady. We had a late start as her train was cancelled, and Julie very kindly fetched her from Doncaster station.

Fortunately there was a good sales table next to where I had sat. Good news and bad, as even after I had a good rummage through at the beginning, I kept spotting other things of interest because more was added as other members put things on the table. Bargains too good to miss!

When Jess did arrive, she soon had her samples set out for us to look at and be inspired by. After a quick outline of the plan for the day (we’d had a talk by her pre-lock down, so had an idea of what to expect), we got started on flowers / abstract gardens. Jess came round to each table to guide us and make suggestions on how to push our own ideas further.

I’d chosen a neutral background of a soft, fairly heavy fabric, and used what I think was the wrong side because I liked the effect of the weave. I’ve no real idea what it is, possibly a cotton / linen mix. I’m sure it came from a sales table at some stage, but it’s good to stitch in to. Jess had brought a huge bag of recycled ready-cut circles in various fabrics, papers, metals and plastics (many packaging of some sort). I decided to work out of my comfort zone with the pinks, and then picked out a couple of threads that don’t stitch easily, the rainbow-coloured ribbony one and a slubby knitting yarn.

I made petals by folding and stitching down the pink and purple circles, folded smaller pink paper circles in half, made them into little cones and put them in the middle, and then a tassle-like centre in some mauve shiny rayony thread.

Then I twisted more fabric circles in various weights and textures, and stitched them down.

I went for another rummage and look at Jess’s samples, and she was working on gathering up a strip of fabric / ribbony stuff. She said it was a good way of using things that won’t stitch through the fabric. I tried unsuccessfully to reproduce her effect, but was very happy with the way the slubby yarn gives the impression of clover or lilac. I think it will be a very useful technique.

I twisted the rainbow-coloured ribbon into petal shapes, and put beads in the centres.

Jess was having another look at what we were doing, and suggested twisting some crepe paper. I didn’t like the pink she was carrying with her, but she said there were other colours at the front. I wanted mauve or purple really, but a yellow picked out the yellow in the ribbon. It worked well with several layers of petals and coiling up the last bits in the centre.

Jess also suggested using twisted wire to make some leaf shapes, but this is as far as I got by the end of the session. Another work in progress!

The top photo shows the variety of work achieved by the group by the end of the day.

At S.E.A.T.A. (Scunthorpe Embroidery and Textile Association) last Saturday, we had a lino-printing workshop with Hannah Turlington. I was keen to get started so had signed up for the morning session.

Hannah showed us some of her work, and talked about a few ways of repeating the design. She demonstrated two techniques for us to try. Firstly, some soft cut lino, then cutting out shapes from styra foam which was stuck on to a piece of card.

I started on the lino, drawing a section of a simple doodle from a sketchbook, before realising that it wouldn’t repeat. I managed to remove the lines with a bit of elbow grease and water on a paper towel.

The whole doodle is only about 3 inches square.

While it was drying, I started on the styra foam with a simplified version of a lupin leaf I’d drawn en plein air last summer.

Hannah had done a geometric design, and cut several pieces before sticking them on to card. I was about to cut each petal individually, but realised it would work better to cut out the whole flower. This is after I’d finished printing with it.

In my head I had figured out my design for the lino to make it repeat on the corners. Here’s the block after printing with it.

There were three colours to choose from: deep pink, a dark blue and a deep turquoise. I soon started mixing the pink and blue to get various shades of purple on my test pieces. The lupin leaves became over-printed flowers on a scrap of fine cotton. It would have worked better if I’d had the patience to iron it first!

The lino print worked as a repeat, making another flower in the middle…….

…….but less well as a brick (half drop).

We each had a canvas bag to print on, and a piece of lining paper to put inside to stop the print going through. On the first side I used a mixture of both blocks. It’s rather messy where ink that I’d got on the card has left marks around the flowers, and the lino could do with a few bits carving out. The over printing in the middle didn’t work quite how I expected either.

The second side was a happy accident, as the lino block slipped out of my fingers as I went to place it for the first print, and landed at an angle. I continued with it, to make each print at an angle to the previous one leaving negative space in between. It was a bit tricky to get it right where it touched two other prints, but I liked the way it turned out and deliberately left white space on opposite corners. I’ll just have to make sure that I carry it this way out!

As usual I learned a lot, and want to do more. Thank you, Hannah, for sharing your knowledge and enthuasiasm.

When Alex first talked about the Spring Board Project I was really keen and fired up about it, a different word each week to prompt a small piece of work which would cumulate into a finished book of some sort. Each week in her newsletter Alex sent us some images and links for the following week’s word. We could all interpret it in any way we chose, something new or not, a stitch or technique, simple or challenging.

Somehow I got off on the wrong foot, having missed a couple of weeks at the beginning of the term, and then often felt over-whelmed by the amount of choice and possibilities for each word that I wanted to try.

I tended to try something experimental that didn’t necessarily work very well, then started working on the pieces of felt I’d done with Karen Lane last summer. It was a bit of a cheat really, using several words on each piece Colour and texture and “Moving on”

Then I found an vintage inspiration pack at Hemswell. The colours caught my attention (the photo at the top), and when I turned it over and saw the fern it just had to come home with me.

It has already been opened and has sparked ideas for the book, and made me want to start with the words all over again. It all needs ironing, of course, but just this piece will do the covers (stretched over mount board) and a couple of pages.

The whole lot talks to me. The more I look at the one on the bottom left, with the rusty coloured hazelnuts, the more it seems familiar. Something my Nanna had in the early 70s? The only one that doesn’t (at the moment) fit in with my vision for the project is the top left fabric. The hanky may become “Fold” and some of the other fabrics layered and stitched for “Cut”. That was another problem I had with it, some techniques cover more than one word, it could also be “Layer”. Decisions, decisions.

I also looked out some paper and old paintings that might be incorporated.

I made a start on some of the words again. “Scrunch”, a piece of hand-dyed scrim from my stash on a piece of brown felt.

It works up very differently from silk velvet which I have used previously with this technique. A few beads or not?

I also remembered that at a S.E.A.T.A. session last summer I tried a tiny piece of weaving in just the right colour. It’s about the size of a 2p piece, and the purple on the left might get taken out or changed in some way.

It has felt like starting a new project, exciting and stimulating, but it’s still a PHD (project half done), and I haven’t started anything new yet this year.

These two elements inform most of my work from nature. I particularly love the autumn colours, which have been especially good this year. Often the weather is grey and wet during the English autumn, but this year we have had a lot of blue skies and sunshine. The beech trees that I can see from sitting at the kitchen table are rapidly losing their leaves this week, we have had a lot of blustery days. At the beginning of the week, the tree on the left had as many leaves as are now left on the right-hand one. All three will be skeletal until the spring and we will soon have fabulous sunrises behind them and the church.

The leaves are falling rapidly from the wisteria as well, lovely yellowy greens ….

…. which are the colours I was working with earlier in the week.

It’s barely got past the planning stage yet.

I spotted several interesting textures and colours when working in the garden.

This one is reminiscent of some wet felt that I’m stitching on…..

….. from Felting with Karen Lane. The biggest piece that I made has more texture now, running stitches in a variegated perlé, some crumpled gold velvet, French knots ….

….. this beautiful variegated yarn ….

…. is meandering with some couching around the edge.

I’ve used one of the other pieces for a hair-slide for one of Alex’s Springboard (Cut) projects in classes at Scunthorpe library. I’ve cut out the middle and a piece of painted pelmet vilene the same shape and size.

I find the copper slide one of the best things for keeping my unruly mop out of my eyes when I have my hair loose, so thought I would use the same principle to make one. It’s not got very far yet, bullion knots, French knots, beads ….

….. more couching.

Hopefully it will work, once it’s finished. I didn’t want to cut more of the felt than was absolutely neccessary, as I like the soft edges. The centre cut bit might need a bit more felting to strengthen it.

Yesterday at Lincolnshire Textiles we had “Creative Corners”, a series of in-house mini-workshops. Five members had all volunteered to share a skill with other members of the group. Predictably, I wanted to do them all, but we could only choose two, one for the morning session and one for the afternoon. The one I signed up for first was only in the morning and limited to eight people: “How to dye/die with shaving foam” (sic) with Clare Lee. My name was first on the list!

Lorna had shown us how to marble on canvas with shaving foam at the Market Rasen group some time ago, but I had missed the session, along with a few other people. So, earlier in the year she had done another session for the ones that had missed it and the members who were new to the group. I’d had great fun, so was keen to have another go.

Clare’s approach was a little different. We put the shaving foam directly on to the table rather than a cat litter tray (there was plastic sheeting taped down to the table when we arrived). This means that you are not limited on size, although it was suggested that we used fabric cut to approximately A4 size. Also we used acrylic inks rather than acrylic paint.

Clare gave us a demonstration to begin with: how to apply the shaving foam to the table, spread it out and add the ink, swirl it around, lay the fabric on top, gently rub in both directions, carefully lift off the fabric, (and use an old credit-card to scrape off the excess foam, putting it into a plastic tub to re-use later on another piece of fabric, which works really well to stitch into).

I was eager to get started, having seen that the ink was more controllable than I’d realised. However, it’s still a surprise each time you lift off the fabric. I started with a sunflower in mind, and used a dull yellowy cotton fabric, brown ink in the centre and yellow petal shapes on the shaving foam. In hindsight, I should have added some green.

I then used the remaining foam on a white piece of fabric, but this wasn’t very interesting.

I added some blue and green to the shaving foam, and tried it on a dark brown fabric.

What was scraped off was added to the yellow and brown piece from above; this was much more interesting.

This was left on the foam, which I smoothed out…….

…… added some red dots of ink…….

……. and using a kebab skewer pulled the red out from the centre in petal shapes.

Clare gave us another demo at this point: how to do allium type flowers and a wave-like curve. I was really excited by this, as I tried (not very successfully) to take some photos of crashing waves in Cornwall back in 2008. I still have the image in my head, and I thought this may be the way to capture it.

I continued with the petals, but the red had sunk into the foam and wouldn’t pull out in the same way, so gave me different shape petals (the ones on the left). However, leaving it for a few minutes before use didn’t affect the print quality. The right-hand side is the scrapings applied to the rest of the fabric. It looked very Monet with the first layer, but I unfortunately added more.

We were rapidly running out of time by now but I wanted to have a go at the wave effect. It was rather rushed but gave me the general idea. I’ve also used the scapings over the top. It’s certainly something to have another go at.

It was a really good session. Thank you, Clare. Also thanks to Brenda Scarman, for organising “Creative Corners”. I’m eagerly looking forward to the next one at the February meeting.

Last Sunday twelve members of Lincolnshire Textiles did a full day of Collagraph printing with Sinclair. We had a talk on the Saturday afternoon for the whole group, which served to whet our appetites.

We were all keen to get started on the Sunday morning, prepared to get messy, so wearing old clothes and / or an apron.

Sinclair started by demonstrating how we should prepare our “plate”, a piece of mount board that had textured items attached with sticky-backed aluminium foil tape. 

As stitchers many of us had fabric and threads, as well as twigs, leaves, sandpaper and mark-making items: coins, lego, knitting needles, wire, etc.

I’d had a quick scavenge round the garden before I set off, grasses, sage, rosemary, textured leaves and petals. I also found a bag of fabric scraps: net, canvas, linen with a machine stitched zigzag edge, even a cape gooseberry skeleton.

A die-cutter was used as a press and some things were embossed into the foil tape before it was stuck to the mount board (cape gooseberry skeleton), and other bits were put on the mount board under the foil.

The mount board could also be scored into with a knitting needle, wire, ball point pen, or have parts of the top layer of mount board peeled off; there’s a whole range of techniques to change the surface. Smooth, rough, raised finishes all take the ink differently, giving variations in tone.

We spent the morning making three plates each, which were then put through the press dry to make sure everything was well stuck down. It also then showed the textures better.

After lunch we had a demonstration of how to apply the ink and put the plate and dampened paper through the press. We were all given a palette of red, yellow, blue and black ink to apply to our plate, a couple of toothbrushes and off we went with a quick reminder of mixing secondary colours.

Once you’d inked up the plate the excess ink was rubbed off on some cotton sheeting. I was over zealous on the first two and rubbed off too much. I got some good textures though.

I got so engrossed in what I was doing that I never even gave a thought of taking photos. This was probably a good thing, as my gloves were soon inky, and were tricky to get on and off once the plate was inked up and picking up damp paper ready to print. 

The die cutter could have the pressure altered, which was needed as we had all got different things on the board. Some were much thicker than mine, which generally gave better results.

It was very much a learning curve getting the amount of ink right; sometimes it was possible to put the plate through twice, and the “ghost” print was sometimes better than the first.

I mainly printed on paper, but did two of the plates on fabric. Unfortunately I  had rather too much ink, but never mind, they will get stitched into sometime.

The inked plates are often beautiful in their own right too.

I had a great day and was very pleased with the results overall. Some I really like a lot. It has also  shown me a way of printing at home which I’d previously thought was very costly or not very practical.

Sinclair Ashman’s website is well worth a look.

The above photo shows the finished needle lace. It looks rather messy, with all the loose ends, knots of the cords and fraying edges, and it needs cutting down to the pattern shape. But before I dared to cut it, I re-machined with a small machine stitch over the existing pale blue machine stitch outline, that I’d used to hold the cords in place, with a thread that matched the background fabric. The fabric frays fairly badly.

I checked the original piece with perlé threads. This really was the stitching in thin (mid) air, between the sides of my improvised plastic-coated wire frame work the size of the finished piece.

I offered them up to check the two matched size-wise. The photo just shows them together.

I used my rotary cutter, quilting ruler and a cutting board to cut as close to the machine stitching as possible. I then went all round the edge with watered-down PVA, left it to dry, and just to make sure I’d not missed anywhere put on a second coat. I also did two coats on the back piece, making sure it was all covered but not too gluey, which might have left dried bits of glue visible. It all seems fairly secure and shouldn’t fray either.

I used blue pony beads to raise the stitched-in thin air piece on the back of the shard.

I made a twisted cord (much too long, so lots of spare) to stitch around the two long sides. The stitching was a bit tricky with the glued edge. I resorted to a thimble in the end, as I was making holes in the end of my middle finger trying to push it through. This meant I didn’t get it finished last week in time to hand in. The assembly team want the bottom to be left as it is, so they can make any adjustments as they put the whole lot together on the framework.

A close-up of the finished point, it worked better than I expected.

On the back I’ve left the extra threads at the bottom. I think it must have stretched a little with the glue, but it can be cut off or not as they see fit. It’s already to hand in next month.

I’ve been living up to my blog name this week, dipping into various projects, as mood / inclination, light, time and inspiration have struck: bits of progress on several projects but nothing major on anything.

Last week’s pomegranate dyeing has dried with some surprising results, in particular the nylon lace which started out white and silver. Originally looking very cold, it has resulted in really warm tones, the silver becoming almost gold.

I’ve wound some of the hanks of perlé on to cards, a quiet, mindless task that I can do while talking or watching the telly, or it can become quite meditative, untangling my thoughts as the tangled threads become smooth and ordered, and appear far more appealing to stitch with.

I’ve also started putting the lining of the dress together with long machine stitches, with the intention of using it as a toile. The long stitches will make them easier to take out if any alterations are needed. I have used small tacking stitches to put the zip in, just so I can get the fit right. It really needs a concealed zip, and the lining will be hand stitched to the zip so the fabric doesn’t get caught in it. (This is something that can be a real pain, especially if it’s on the back and you can’t see where it’s caught.)

It still needs a couple of seams doing, the back princess seams, the side seams and the shoulder seams. No rush, as I don’t know when I will see the friend it’s for. I’m considering sending it by post but not sure if I’ll be able to tell on-line if the fit is right or not, nor sure that I trust the post to get it there and back to me. So, I’m stalling a little with it so I don’t have to decide yet! For some reason my photos won’t all download, so sorry, no pics of this.

I’ve also started doing a little more than just thinking about the next travelling pages for Scunthorpe Embroidery and Textile Association next week. The title is:

I noticed the piece of cushioning that you get at the bottom of soft fruit packs feels almost like fabric. It has a regular pattern on it, similar to Aida, and I thought it could be used to stitch on to. I’ve got black and red pieces, and having started reading “The Strawberry Thief” by Joanne Harris this week and liking the book cover design, I realised that the red could be used to cut out strawberries. Reading further into the book last night there’s a reference to the “Strawberry Thief” design by William Morris. I love his work, but haven’t researched it for years, so that will also reference the title for the travelling pages.

When I was learning to draw we were encouraged to work from life rather than photos, so I brought in a couple of leaves from the garden as well as taking a photo of the strawberry plant.

So far, it’s just a quick sketch to get shapes. I was thinking a stylised strawberry plant, but haven’t drawn up anything yet.

I’ve cut out a few strawberries, and some leaves from the flower wrapper that I used for my tulip leaves for the Grasby Embroiderers Exhibition at The Old Rectory in Epworth. It’s much stronger than tissue paper and took machine stitching well when backed with silk. I’ll try hand stitching into it.

Nothing finished this week, they’re all works in progress.

I went to peel a beautiful large red pomegranate early in the week, only to discover it was going soft on one side and the seeds going brownish. It looked most unappetising, much to my disappointment.

I remembered that I’d used pomegranate (with lemons and manky-looking oranges) to dye some fabric quite successfully back in April 2014. I found the instructions on my blog post – Natural dyes – pomegranates.

I boiled it up for an hour, and strained this mess into a Pyrex casserole dish.

Then I added a white fine cotton blouse, covered it and gave it 10 minutes in the microwave; I left it to cool overnight.

The blouse has come out a lovely pale caramel colour. The photo doesn’t look as good as the reality, as with most of the photos at the moment the light is not good.

I added more water to the mush and boiled it for an hour before straining it, and adding lots of bits of fabric, cotton, linen, silk, embroidery anglais, and some perle threads, including some mid-blue ones. As an afterthought I added some of the scraps of Procion dyed turquoise from the dress lining of last week’s blog post – Brave, and lucky. Then I covered it, gave it 10 minutes in the microwave, and left it to cool overnight.

Rinsing in the kitchen sink.

I gave it a good rinse in the sink.

The turquise has left a couple of faint marks on one of the other pieces, so I separated the wet fabrics into the neutrals.

And the blues. As back in 2014, the silk has taken the colour most. They just need to dry and be ironed.

The turquoise hasn’t changed much, just slightly greener. (Artificial light below, the one above is nearer the wet colour, in daylight.)

As well as the lovely soft colours, I like that the fabric doesn’t need pre-mordanting because the pomegranate contains natural tannins.