The Seata workshop today was with Karen Lane making seedpods or leaves with Tyvek fabric. I’d previously done a seed pod with her at a Grasby Embroiderers workshop in October 2022, and I was very pleased with it. My intention today had been to use greens and yellows to make a similar one. I’d made my colour choice yesterday and taken only four bottles of acrylic ink with me.
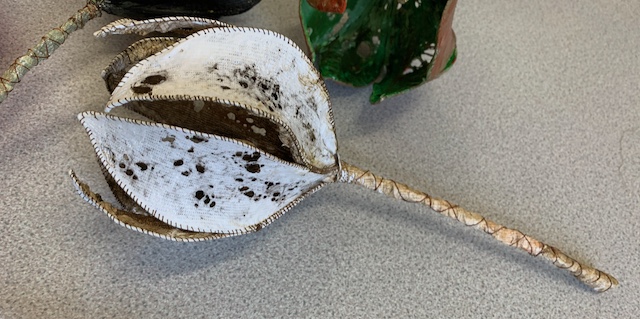
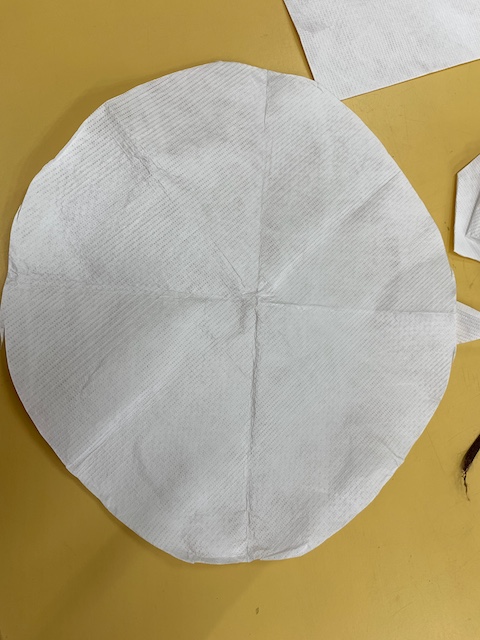
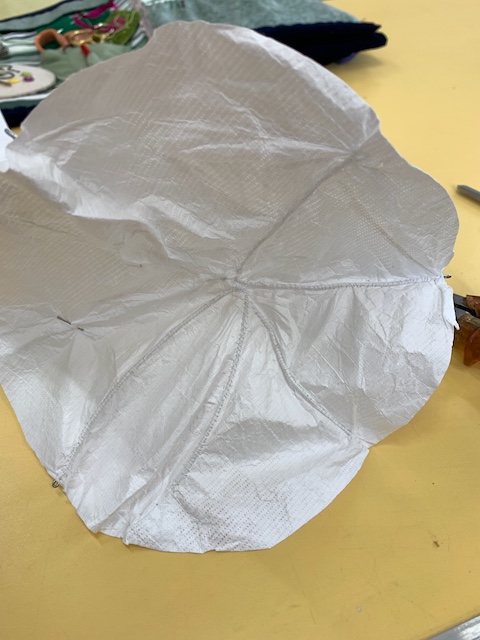
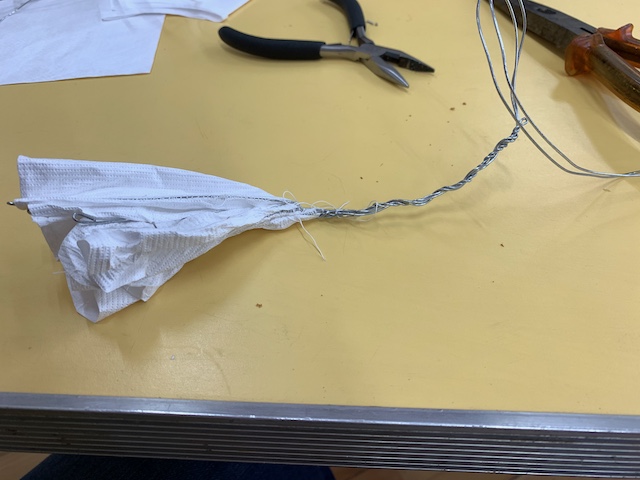
But, having seen some circular flowers that Karen had done, I decided to go “off piste” and work on a roughly circular piece of Tyvek, cut by folding and folding.
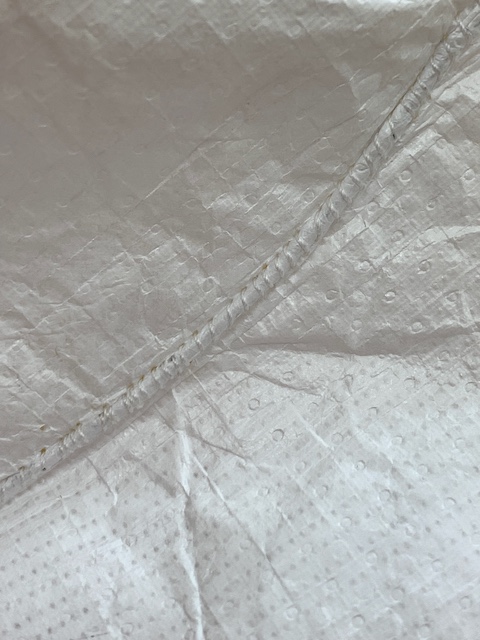
Then it was time to start stitching wire on the back, like the spokes of an umbrella, with tiny stitches to encapsulate the wire.
I worked asymmetrically.
A couple of the wires from the spokes, twisted together, became the stem.
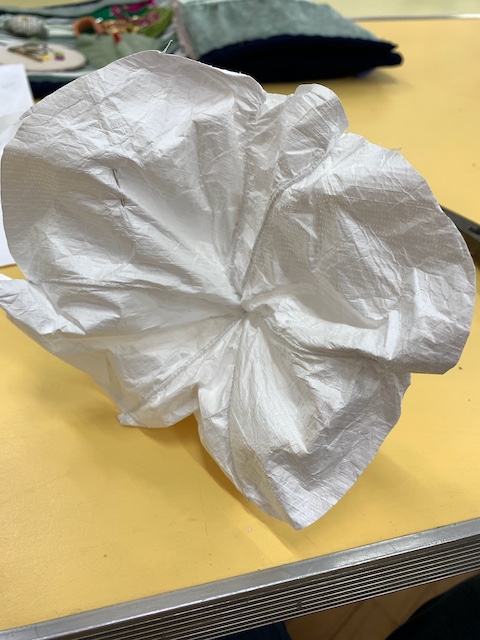
A few more spokes, and it became this.
Everybody else had painted theirs and used the heatgun to shrink and make holes in the Tyvek, but I’d only just finished the stitching by the end of the day. Several thought mine looked like Morning Glory. I’d thought Convulvulus (bindweed). I’m happy with the shape but not sure what colour/s to paint it, so will enjoy it as it is until I decide.
Another great workshop with Karen (thank you), and some fabulous results by everyone, all very different from each other. Photos on FaceBook (Scunthorpe Embroidery and Textile Association).
After our “Out in the garden” exhibition last year, what were we doing and where were we going as a group this time?
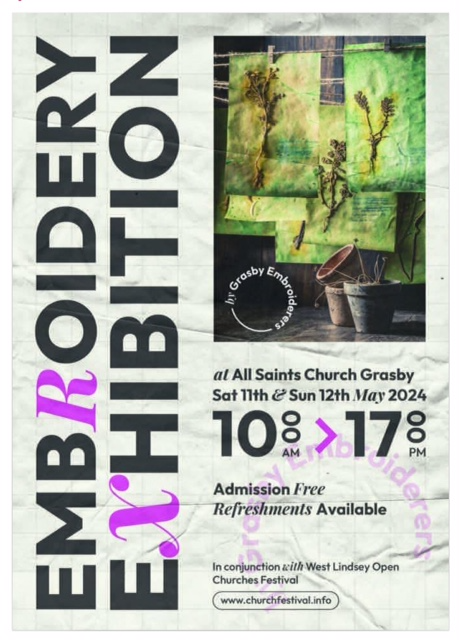
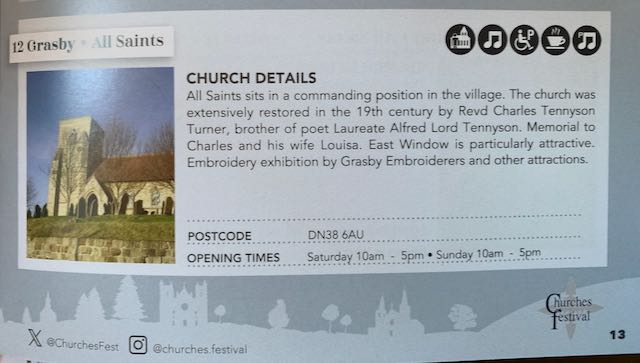
It was suggested that we did an exhibition at All Saints Church in Grasby as part of West Lindsey Churches Festival.
Although the Festival is over two weekends in May, the Grasby Church and our exhibition are open only on 11 and 12 May, 10am-5pm.
As for “what”, we took a new title of “Botanicals”, which has been interpreted completely differently by each of the six of us, as always. In the end, my pieces were inspired by this photograph of hydrangeas that I took many years ago.
We’ve all done a piece in a black frame called “Putting the garden to bed”, based on taking down the “Out in the garden” exhibition last August. Some of the pieces are from “Out in the garden”, but will look completely different in the different setting.
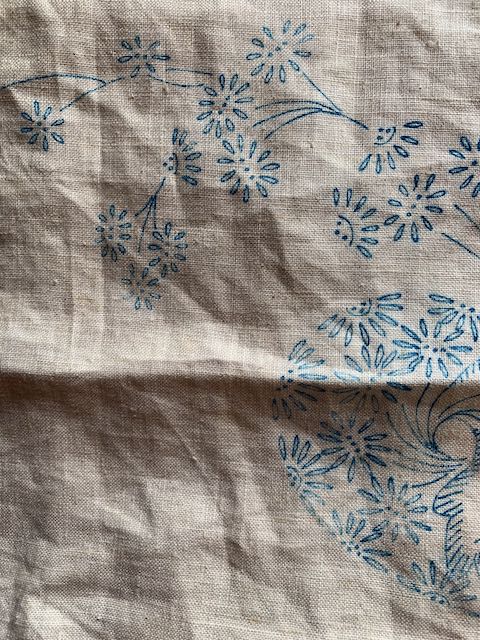
Jean gave us all a lovely piece of vintage linen tablecloth with a pre-printed design, and even with so much the same starting point, we have six very varied finished pieces of work.
We all had 8-plus labels for our own work at the last meeting, and there is also a large communal piece to see, that we’ve all contributed to.
Local ladies are providing refreshments (but there’s no loo, so don’t drink too much tea!). We are taking turns with the stewarding and answering any questions about the work. There are fabulous views over the Wolds from the church porch, and if the weather is clear enough you can even see Lincoln Cathedral.
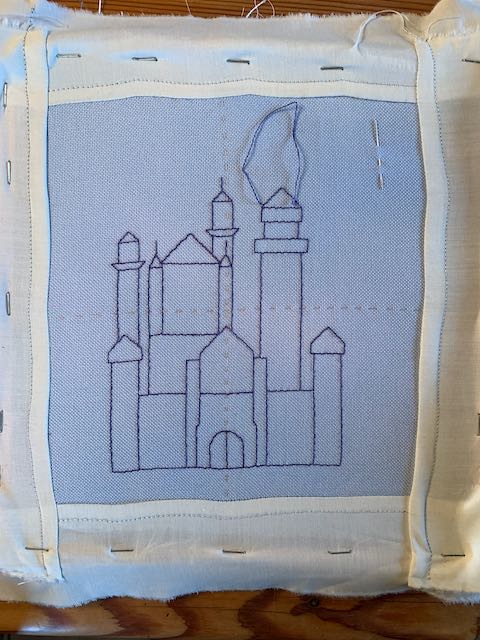
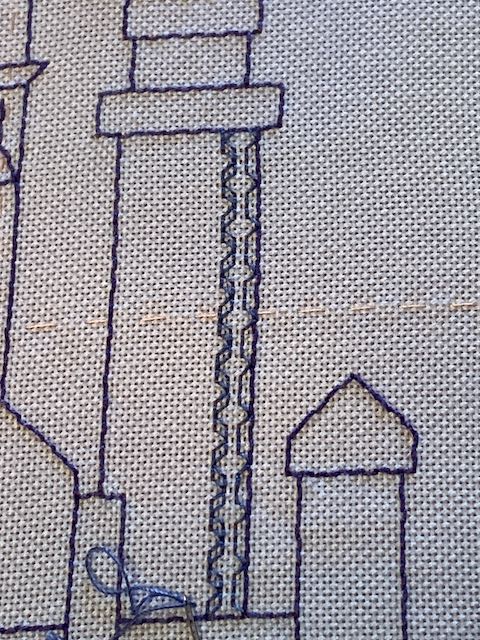
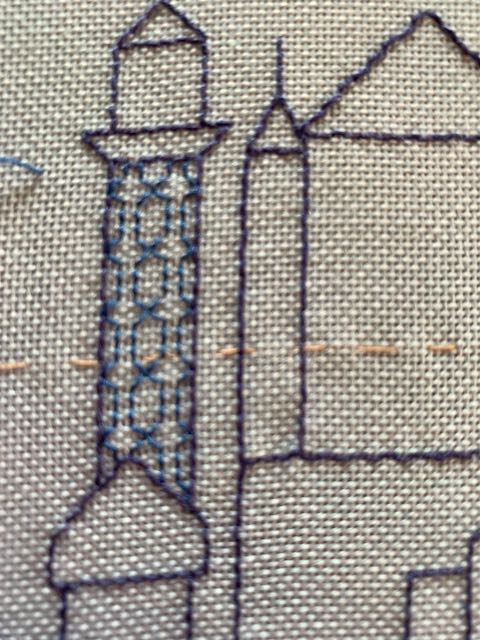
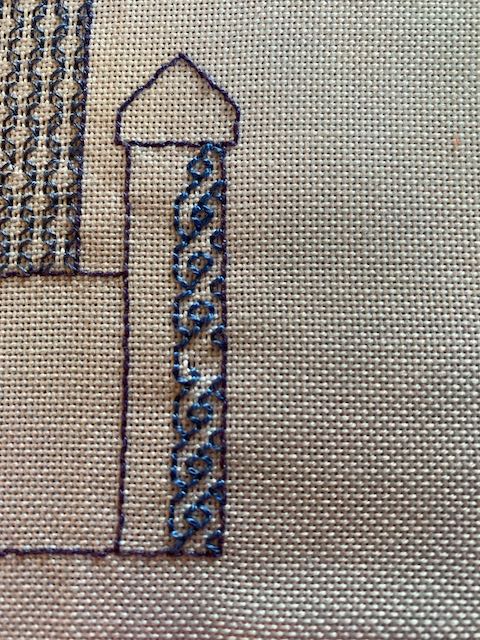
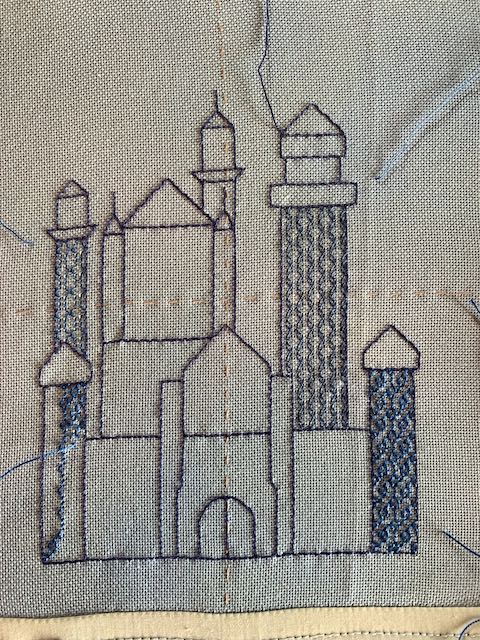
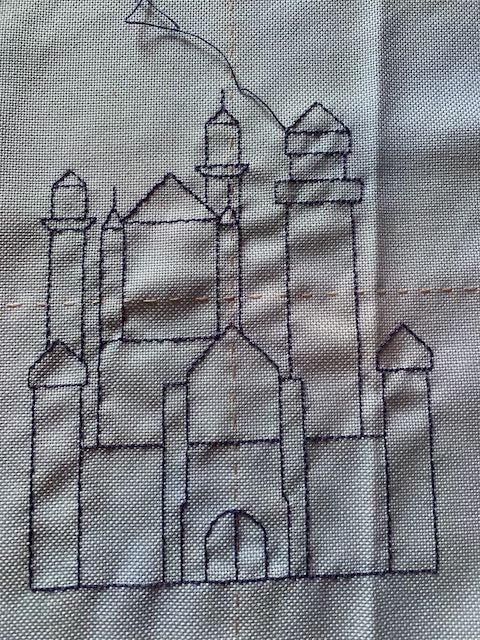
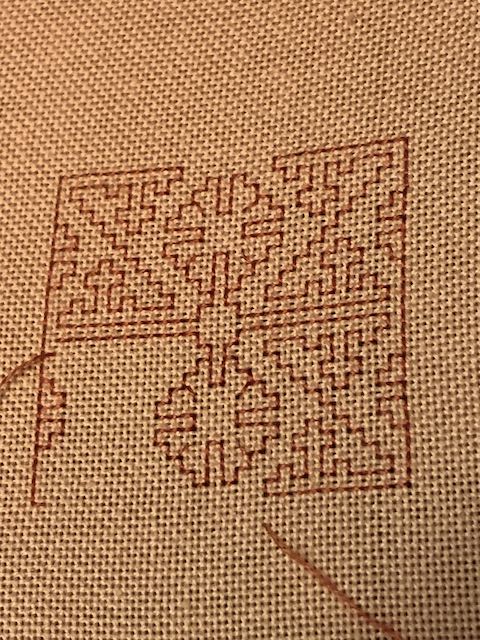
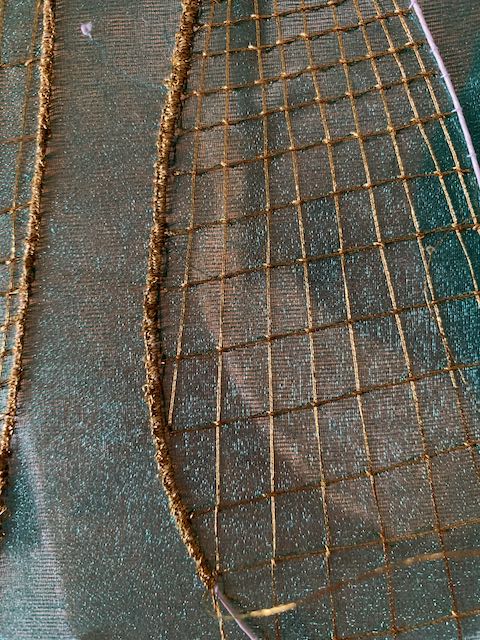
I’ve continued working the diaper pattern from last week, and realised I can do variations of this one pattern on several of the castle towers, getting quite different effects.
It will look quite different if I have the diagonal stitches touching, rather than off-setting them, also whether I put in a horizontal stitch at the top and bottom of each rectangle.
I was keen to try out variations, but realised that the castle really needed to have some fabric strips putting round the edge of the blue background fabric, to stop it fraying any more…..
…….. also to be able to stretch it on a frame and put it on a stand, making it much easier to work on, with one hand on top and the other underneath.
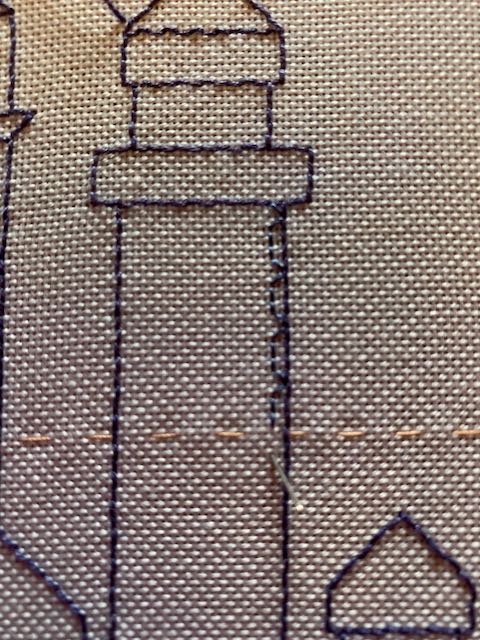
I’d counted my backstitches and worked out how many repeats from one side to the other. I was being too impatient to get stitching, so started at the top rather than working out from the middle and outwards from there. I was also playing thread chicken with an old wooden reel of Coats Satinised Machine Twist.
I was really pleased with how it was looking, and continued stitching…..
……. only to find that the last pattern was two threads short of the backstitch edge. I’d had about 6 inches of thread to spare. I was happy with the colour, so didn’t want to unpick and start again and, on looking at it, realised the darker effect on the right hand side and lighter on the left makes the tower appear rounder. Phew!
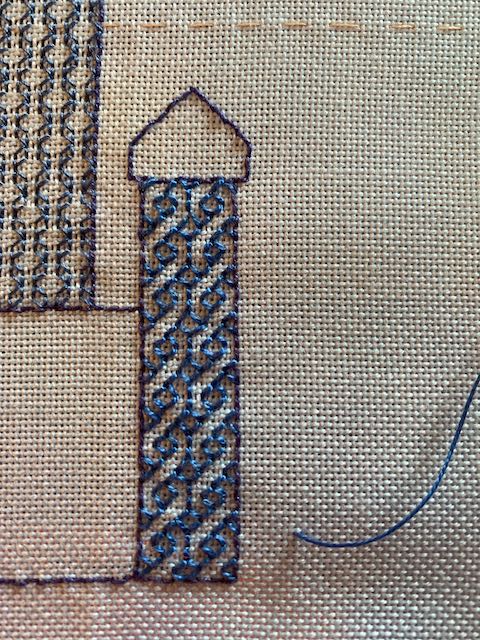
I then did two rows of the same pattern, but with the diagonal stitches touching on a narrower tower.
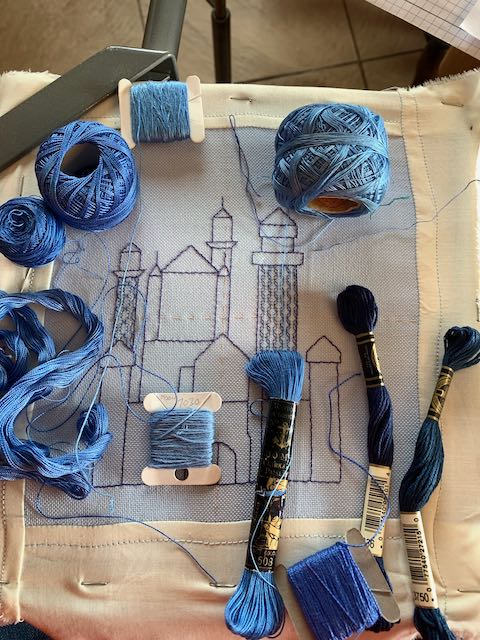
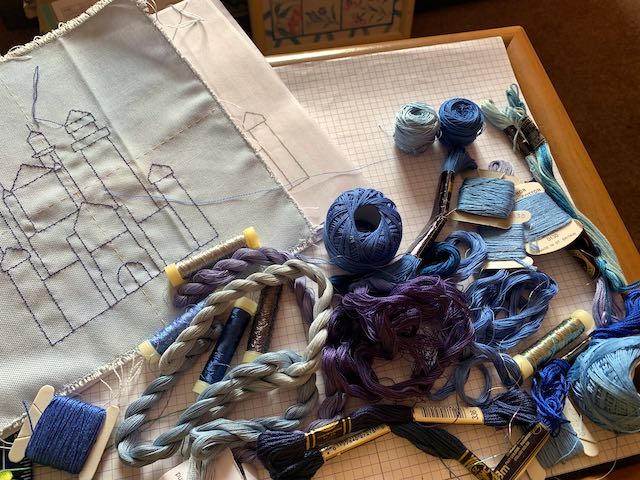
I’ve reassessed the threads I’m going to use in better daylight, eliminating some for being too light, too grey, too mauve, or too turquoise. This is the selection to choose from at the moment.
I’ve started with a thicker perlé in the foreground.
It’s also slightly brighter.
I’ve also made the decision to use the same thread and diaper on the symmetrical blocks, so the foreground section will be mirror-imaged. (And writing that has made me aware that I haven’t mirror-imaged what I have done on the left hand tower.) Some unstitching to do next, then.
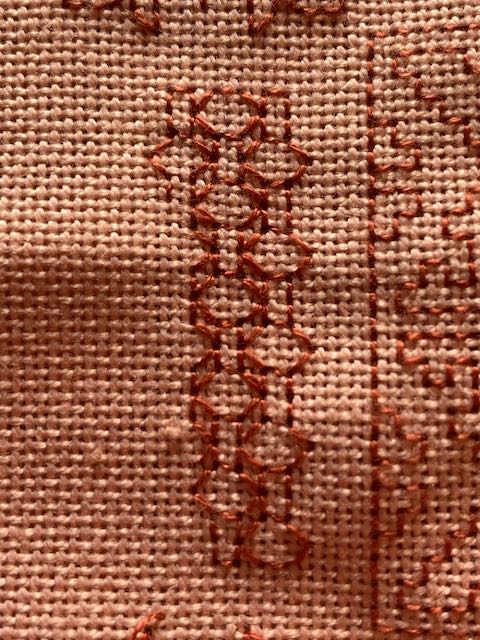
I’ve done some more on my blackwork sample piece that’s not black, which I started with Liz Almond at the Spring Gathering a couple of weeks ago. The central motif was relatively simple to be able to spot mistakes before doing very much, and it was obvious which stitches were the ones that needed unpicking. The little square motif below was not so easy, in spite of looking small and simple. The diagonal stitches threw me a couple of times. There are four….. one down, three more to go!
Every time that I thought I’d cracked it, I made a silly mistake, so there was quite a lot of unstitching. Even on the fourth corner, I managed to do two stitches over three threads instead of three stitches over two threads. It looks right, the pattern is right, it joins up and nobody has spotted it (yet) until I’ve managed to find it again and point it out. So I’ve left it. I’d already finished off a thread and started a new one before I realised.
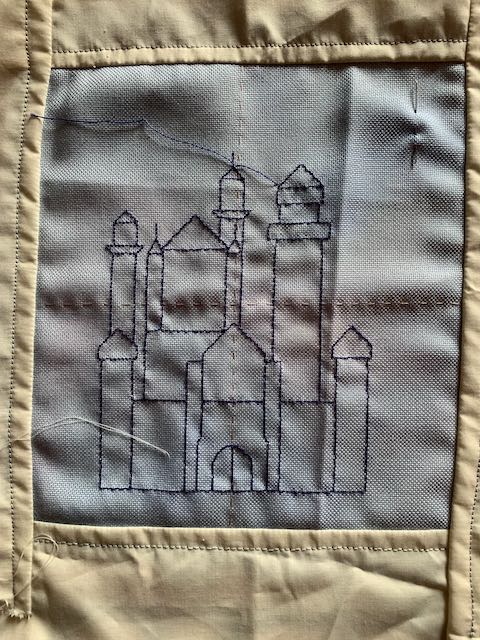
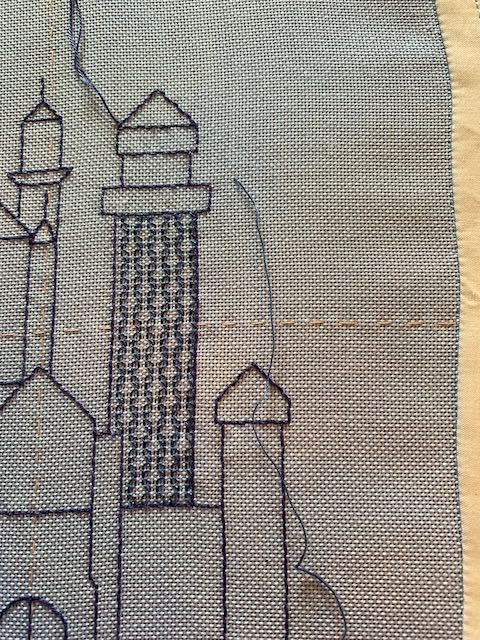
I then ended up spending quite a long time on Liz’s website, and reading a couple of blackwork books. I’m still struggling to make decisions on how to progress my Blackwork Palace Project which continues in Finished bubbles and more.
I thought I’d shown a photo of the outline finished, but it seems not. It stalled again here, which was one of the reasons I chose to do Liz’s workshop.
It will be in shades of blue, and I’ve gathered various threads.
I also looked at Sarah Homfray’s blackwork on YouTube. Some very useful basics, such as starting in the middle of each area to be blocked in, both vertically and horizontally, so patterns look even. She demonstrates how to work various diapers (patterns). This is the beginning of one of the patterns from Liz, but worked in one colour rather than two that she’d used. It’s come on slowly, but I think it will work for one of the towers.
I’ll test out at least three more diapers between the corners. In spite of taking the hoop off each time I finish working, the fabric is marking, so I intend to put the castle on a rectangular frame before continuing with it.
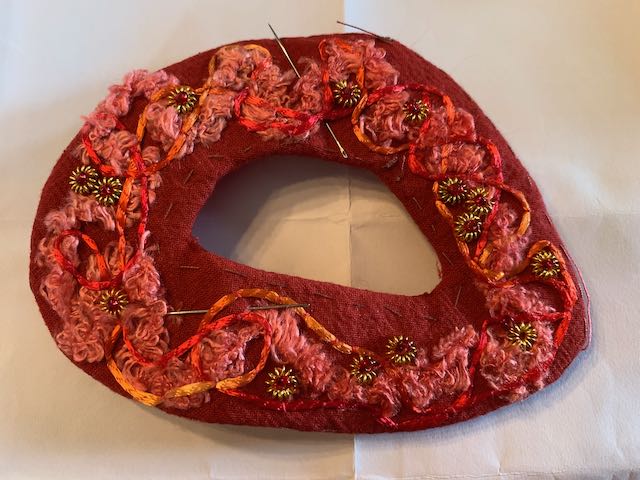
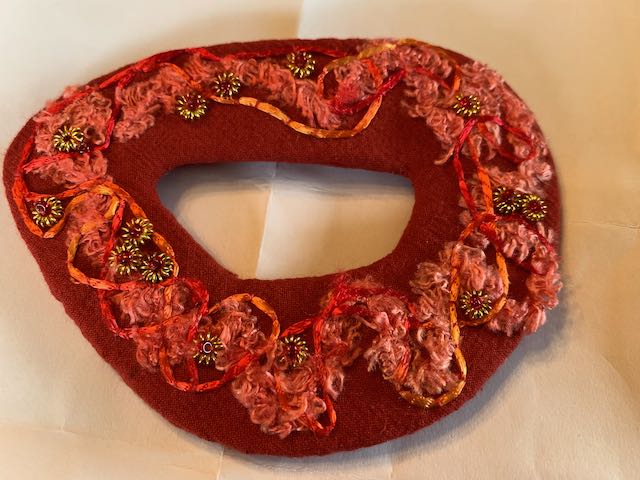
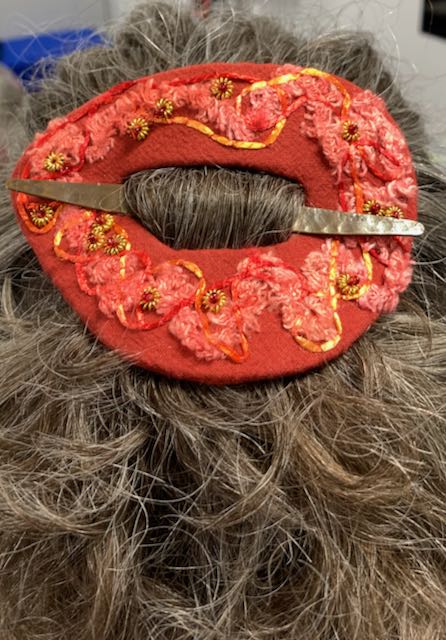
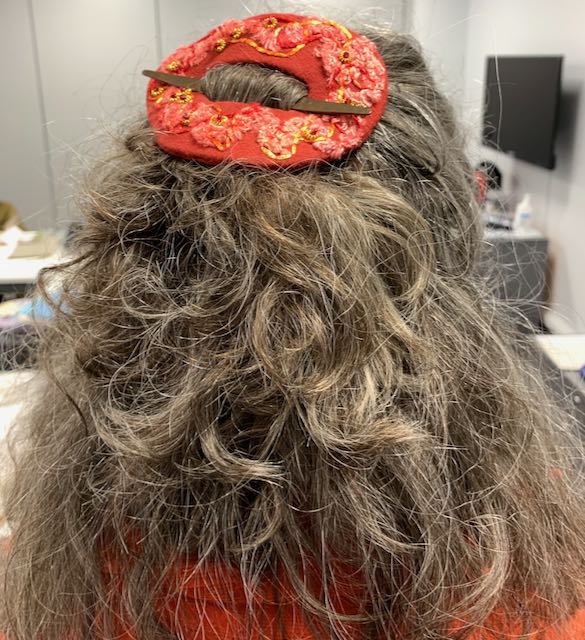
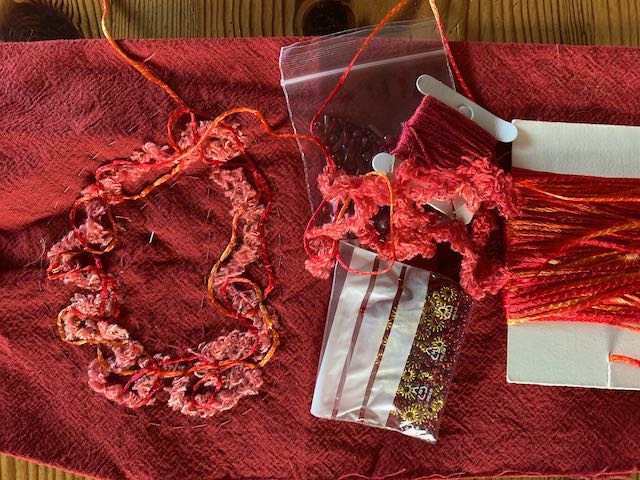
I continued my hair slide at “In the stitch zone”, having decided in the end to use the little coiled rings and stitch a red bead in the middle of each one. I’ve spaced them singly, twos close together and a three, placing them all fairly centrally, thinking that they are less likely to get tangled in my hair than near the edges.
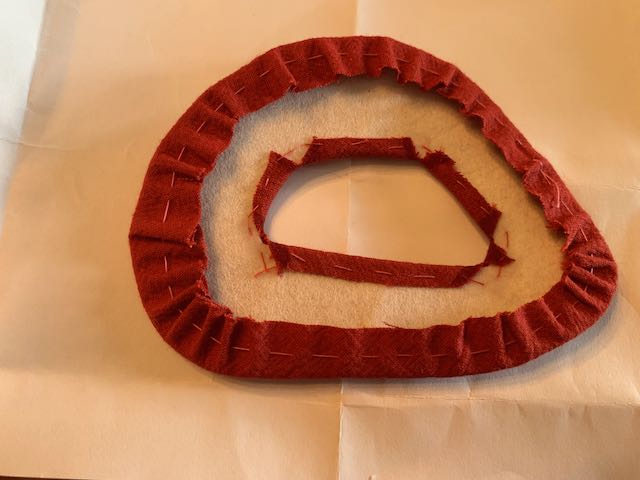
I cut out two pieces of pelmet vilene and a piece of red felt, intending to put the layer of felt behind the stitching. I roughly pinned them together to check how it would work.
I did a row of running stitches around the edge and centre hole, with a good secure knot at the beginning to be able to gather it up over the vilene. I did the back first to check it would work.
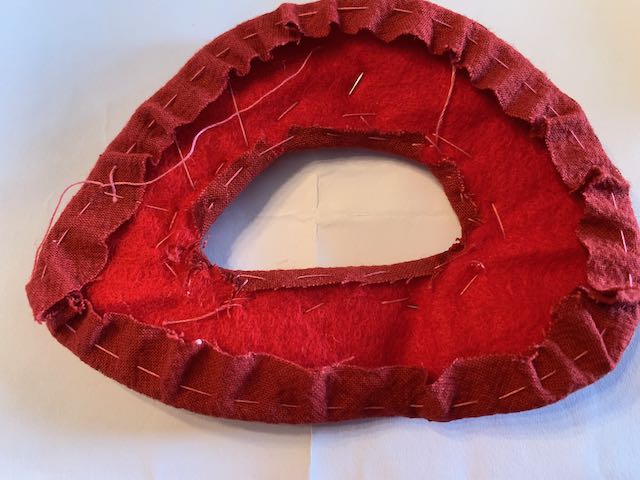
Then I did the front, and it was almost done before I realised I’d put the felt over the vilene. I didn’t want to unpick it, so the felt is between the two layers of vilene which seems to work fine.
I put a tiny bit of PVA on the back, over where I had snipped to get a neat finish, but unfortunately it seeped through a little. Not a problem, it would be against my head, and would probably dry invisibly (well, almost). I slip stitched / ladder stitched the front to the back, in the middle and round the outer edge.
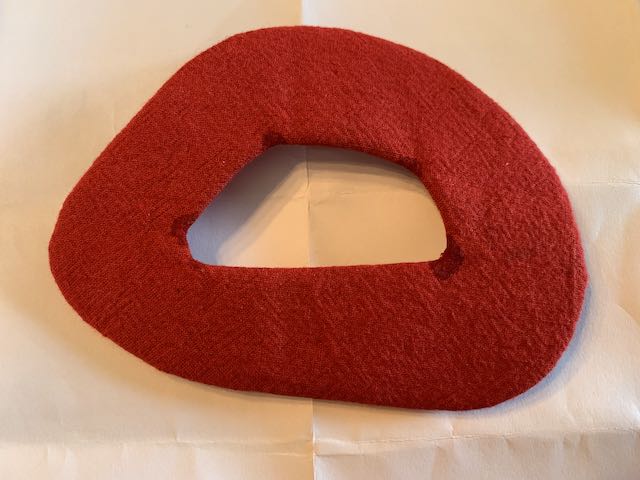
The slide is finished, and it’s used up a few bits of my stash that I wasn’t sure what to do with.
I’m pleased with the colours and textures, and wore it to the session this week. A few of the group noticed, and Alex took some photos for me.
It works with the orange things that I wear as well as the red!
Last Saturday was the first Spring Gathering of YHEG (Yorkshire and Humberside Embroidery Group) at the Regan Centre at Riccall. The venue is used for the Summer Gathering, what used to be Regional Day of the Embroiderers’ Guild, there were workshops morning and afternoon, and the usual lovely lunch.
I chose to do Liz Almond’s blackwork sessions, one in the morning and continuing for the afternoon session. Most of the other workshops were just for two hours, so you could choose two different ones.
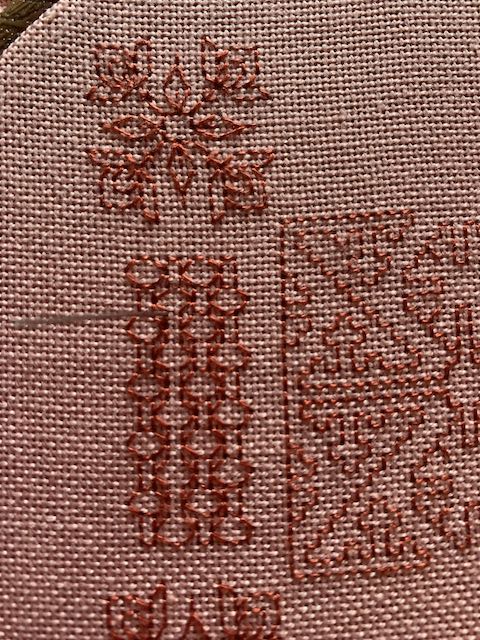
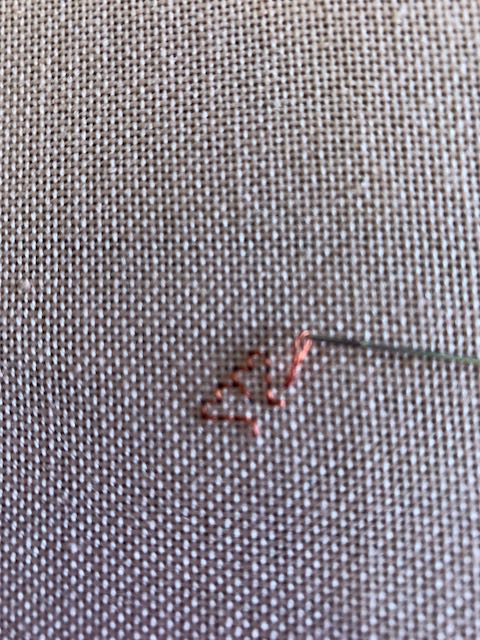
I’ve not done much blackwork and not particularly successfully – the usual counting problems! But I really want to finish my blackwork castle from “In the stitch zone” last summer. I’ve only done the outline so far, and thought this would be the push to pick it up again.
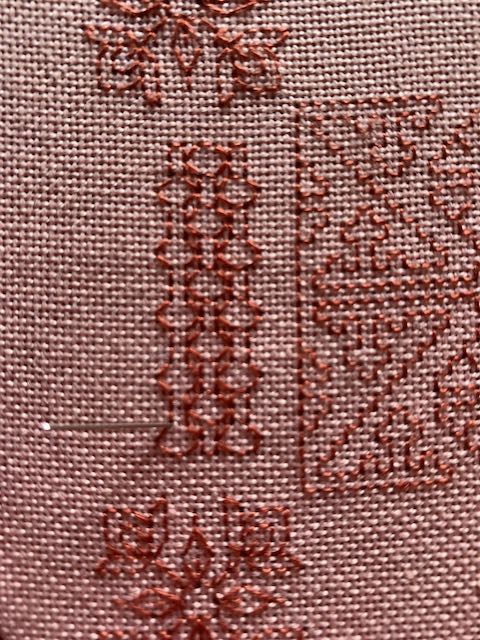
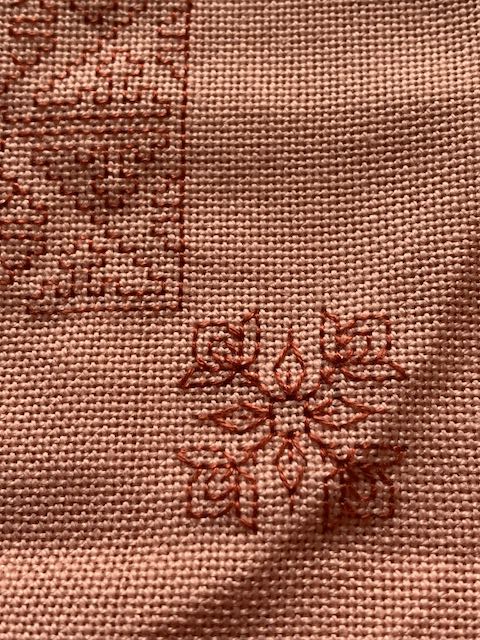
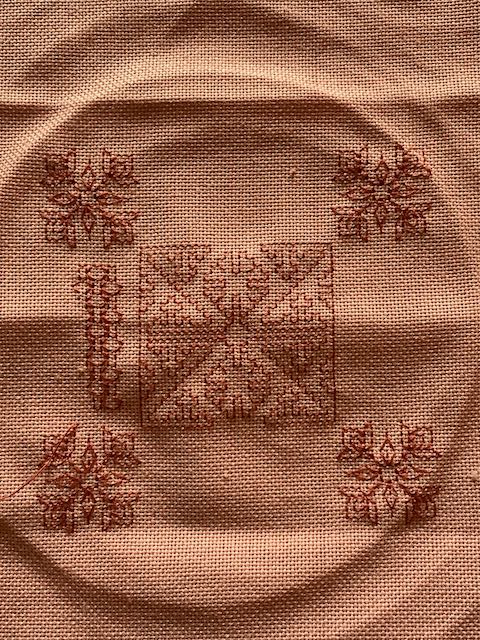
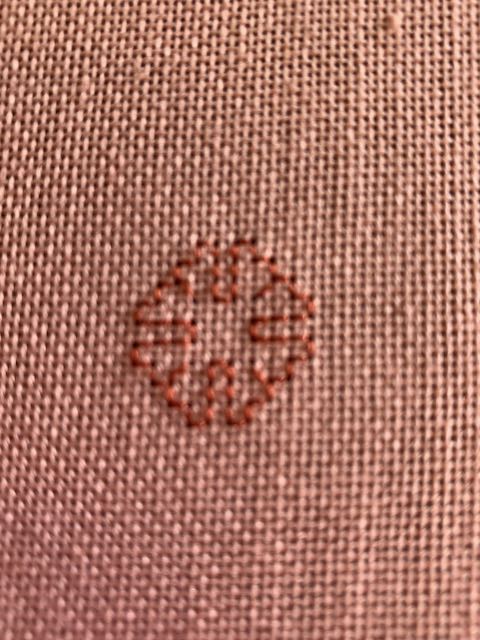
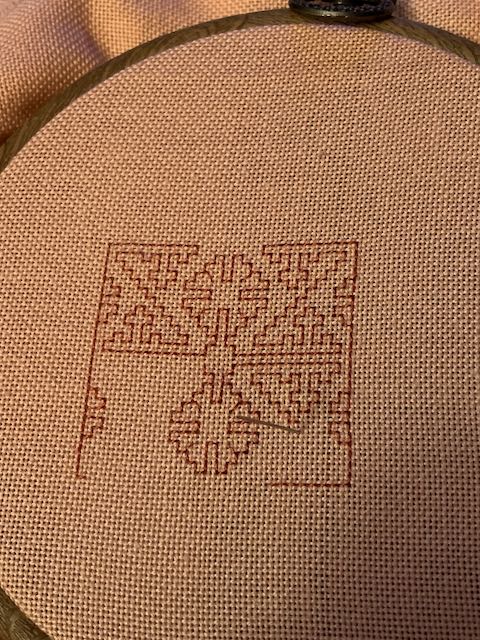
Liz had got a pack for each of us, with fabric, needles and enough patterns to keep us going for six months (she said!). More like six years, I thought! We could stitch on Aida in the kit, or swap it for a piece of 28 count Jobelin if we wanted to. I thought it was an ideal opportuntity to try it. But there was no white or cream, just a pinky peach, which I wasn’t sure about at first. But after a rummage through Liz’s bag of floss I came up with a pinky chestnut that I found was kinder on my eyes. (The last photo is the nearest in colour.) Blackwork doesn’t have to be done in black.
The pattern that I chose to follow was intended as a bookmark, with the motif repeated several times. This is just a tiny part of it.
I started off ok, with backstitches following the pattern……
…..until I got to the top of the second set of steps and turned left. I soon realised I’d miscounted and done one step too many, which meant the pattern was too far out from the centre motif. Fortunately it was soon unpicked and corrected. This is where I’d got to at the end of the sessions.
There were also sales tables from many of the individual stitch groups, always good for a bargain. Not that I needed anything, but who can resist?
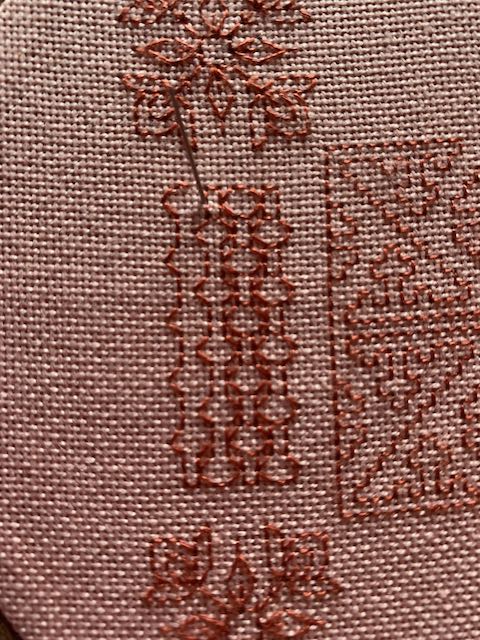
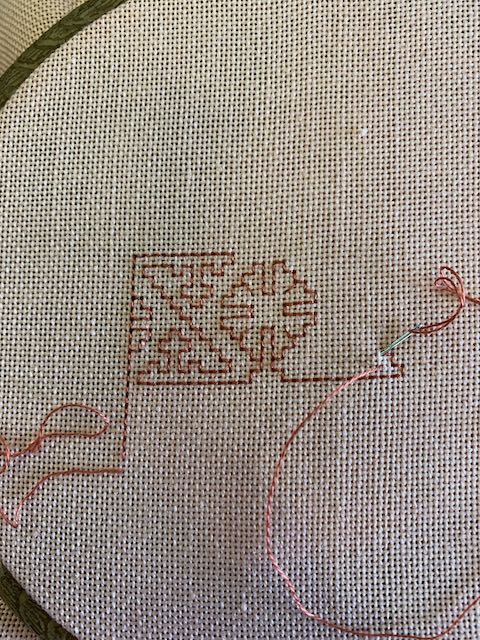
I have got back to it during the week ……
…… and finished off the first block, apart from x-stitches or beads in the middle of the two central motifs and the centre square. I’m not going to do the bookmark as the pattern, but work outwards from here.
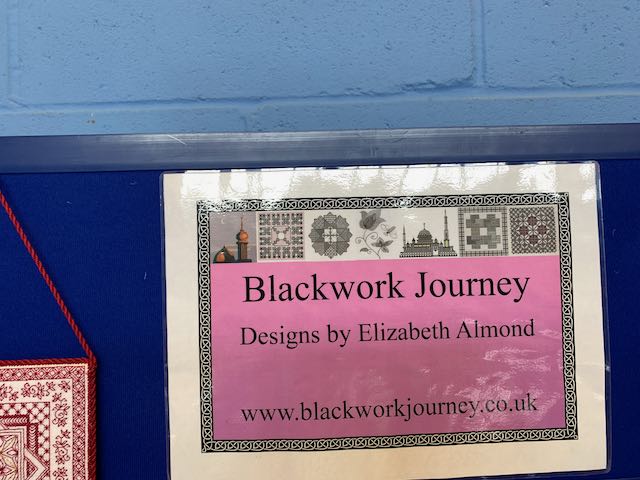
Liz had a huge amount of samples and finished pieces of work, and told us about her website with lots of information, freebies and patterns. I spent several hours browsing on Monday evening and I’m planning on going back soon http://www.blackworkjourney.co.uk
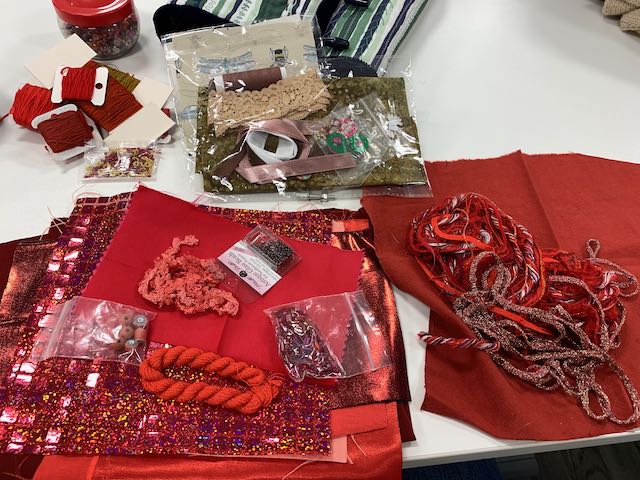
This week at “In the stitch zone” we started a new project, an Upcycled Mandala Brooch. As usual I was grabbing bits of fabric, threads and notions of various types in the last minutes before leaving home, and I ended up with three inspiration type packs, still leaving me with far too much choice and stuff, but not sure what I was really wanting to do.
Alex showed us a few examples and made suggestions of shape and size, and mentioned that they could be attached to a couple of different types of brooch backs, a hair slide or bobble.
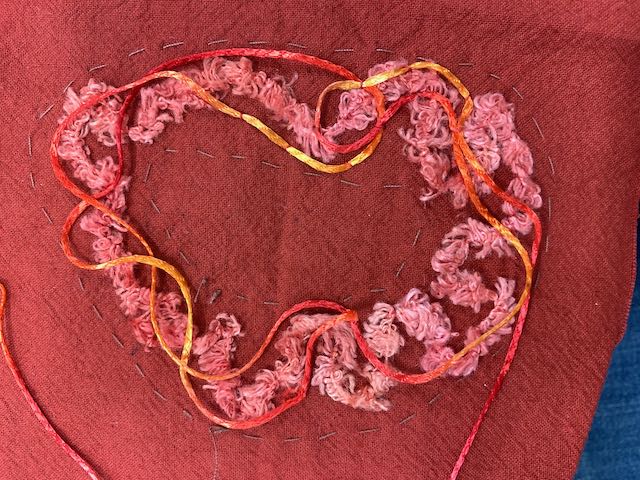
I settled on a rusty red piece of dyed(?) calico out of the red pack, and then decided I didn’t really want another brooch, but a hair slide similar to my felted one would be useful. I then went off piste even more with an irregular shape. The tacking lines are the outline of the finished slide (it has a straight piece that goes under my hair in the middle section). The fluffy yarn was only suitable to couch with, but gives a nice texture. The variegated ribbony yarn was best couched with the closely woven calico too.
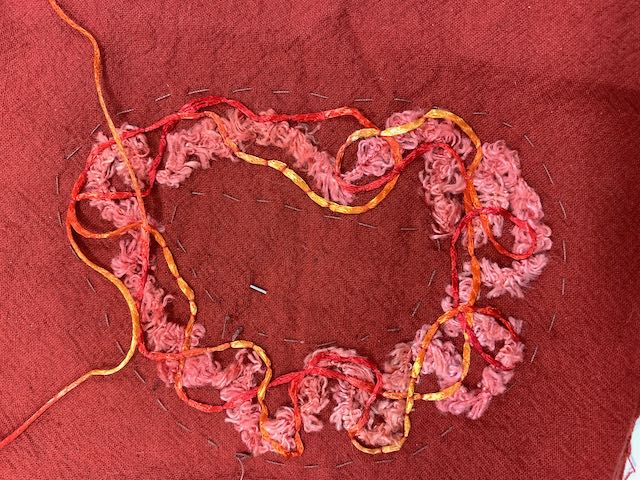
By the end of the session I had almost couched it all down. The under-and-overs remind me of Celtic knotwork, easier to manipulate than draw!
I had got some beads and other bits with me in the red pack, but think the little gold ones mght get caught up in my unruly curls. Alex had asked what we thought about having another week on this project, as a few folk hadn’t been able to come, and the project for the following two weeks will only take a week to do. We all agreed this was a good idea, and it also means I can find other bits to add when I have a better look in my stash now I know what I’m aiming for.
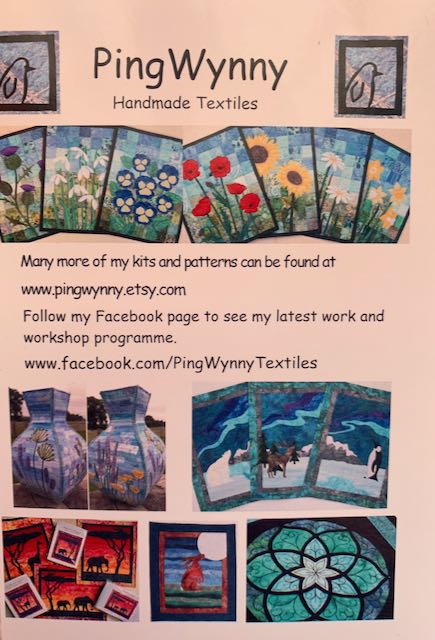
The talk last month at Seata was by Gillian of PingWynny (Handmade Textiles). It was also a “Show and Tell” of a huge range of her beautiful work, quilts, cushions, pictures / panels, 3D vases, mainly in bright, vibrant colours and fabrics, a mix of machine and hand stitching. Gillian also told us about her workshops and classes, one of which is a 15-minute drive away once a month…. and the one on Wednesday evening this week was on fabric painting, something which I love and haven’t done for ages. Too good to miss.
The only thing I needed to take was fabric, either silk or cotton, and frames / hoops. Last minute as always, I was scrabbling about for suitable cotton and my frames. I’d bought a box of slot-together ones from a sales table for 50p, already coloured with paint, so not going to mess up good ones. Perfect.
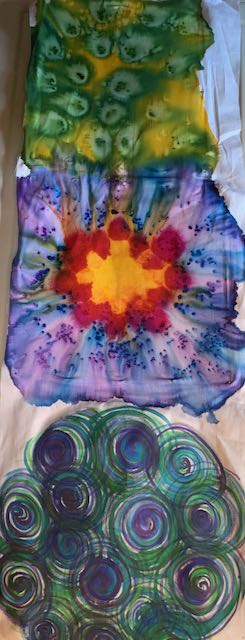
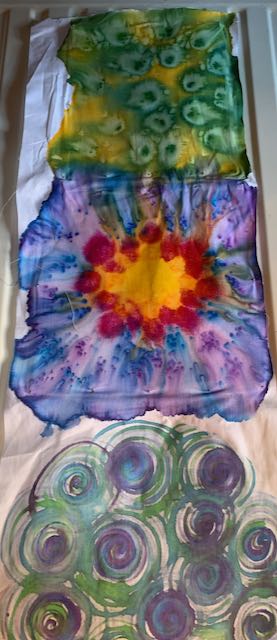
Gillian was providing the paints, brushes and salt, mainly Setasilk and a few Maribou (which I have previously used on silk). I wasn’t aware that they could be used on cotton. They are all iron fix.
After a quick demonstration and showing us some of her examples, we were ready to start.
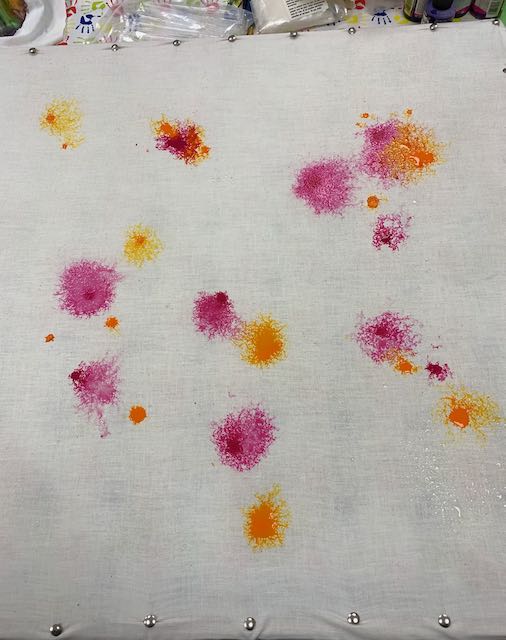
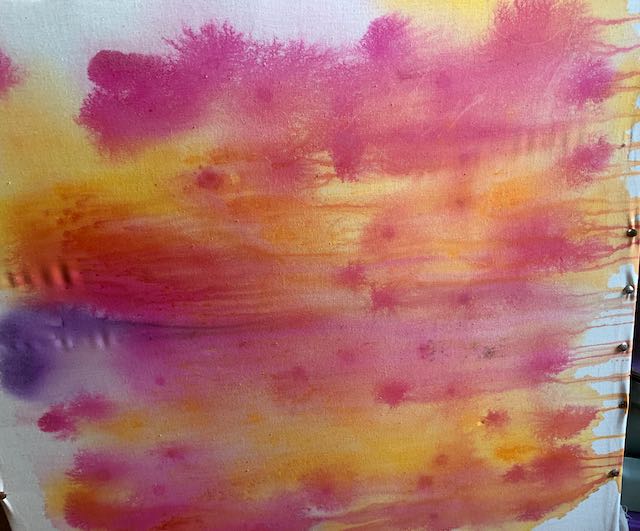
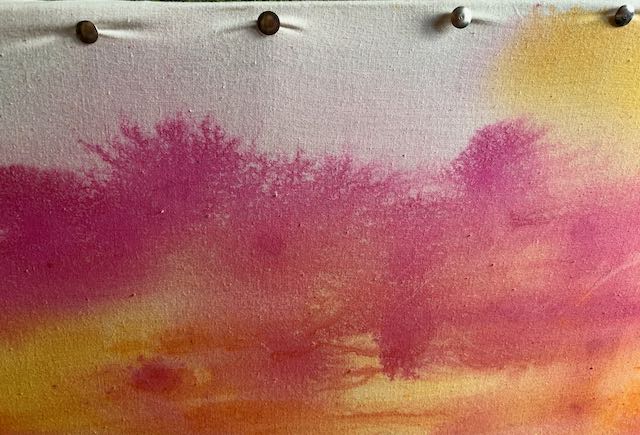
Rather than cutting my fabric, I attached my strip to two frames and made a start, with the green and yellow one first, basically in blobs, and adding salt at the end, then the middle one working the colours out from the centre before adding salt. These two were done on damp fabric (just a fine spray of water). Gillian lent me a hoop for the bottom one, which was done with spirals of colour on dry fabric and then wetting the darker areas to encourage the paint to spread. I was so engrossed in what I was doing that I forgot to take photos, so these were taken when the salt was removed once it was all dry.
The wrong (?) side of the fabric gives a more subtle colour.
I’m especially pleased with the spirals.
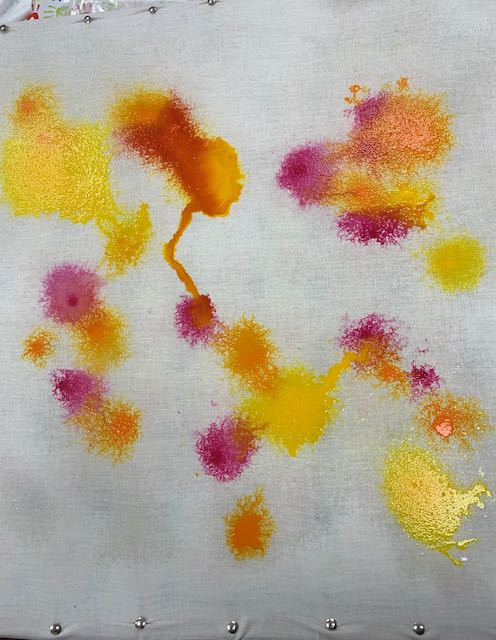
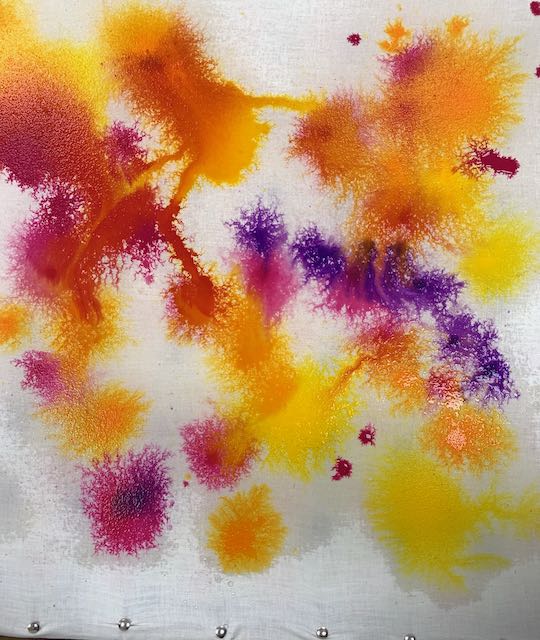
I’d also taken a very large frame with a fine piece of calico stretched over it, which Gillian asked if I was going to use. Yes, using some of the techniques again with a different palette. I blobbed colour and then sprayed with water, which made the paint spread into interesting tendril effects.
More paint, more water ……
…… more colour……
…… another colour, I needed to be careful that the purple wasn’t too close to the yellow, because I didn’t want mud!
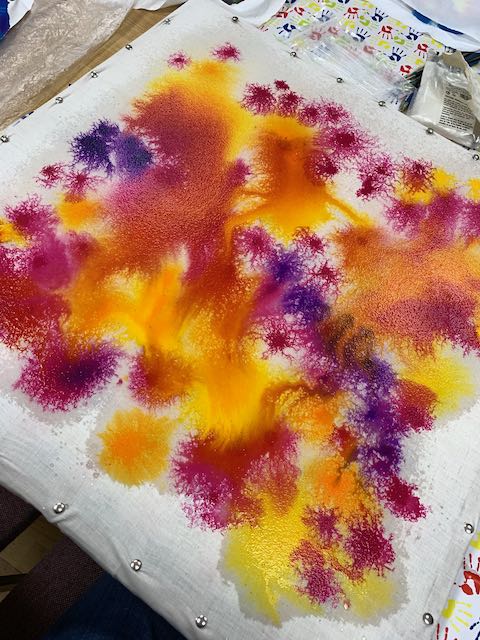
Well, a little mud. It was very wet at this stage, so a little salt, and then a hair drier to move some of the water. I was really pleased with the results, but had to put it in the car to bring it home.
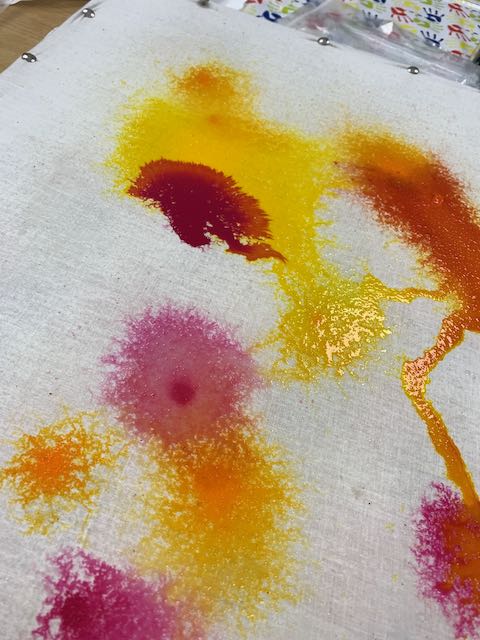
And by the morning, it had become this. I still like it, just not quite so much.
It’s a shame that very few of the tendrils remain. That’s the nature of the beast, you never know exactly how it will turn out, but it is also what makes it fun and exciting. It all needs ironing now.
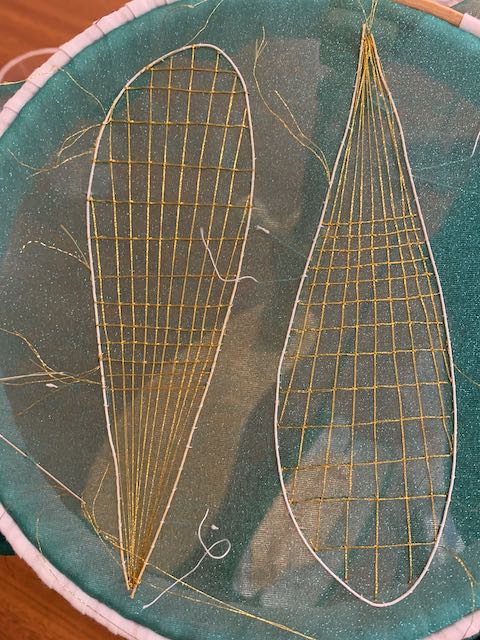
It was way back in February 2023 when I started this dragonfly piece, and it progressed in March 2023 (Dragonfly 2) until other things took over.
It continued briefly in May 2023, when some more of the horizontal gold threads were couched down across the vertical threads intersections.
At some stage between then and February this year, I must have finished the couching, but there’s no photographic record to show when!
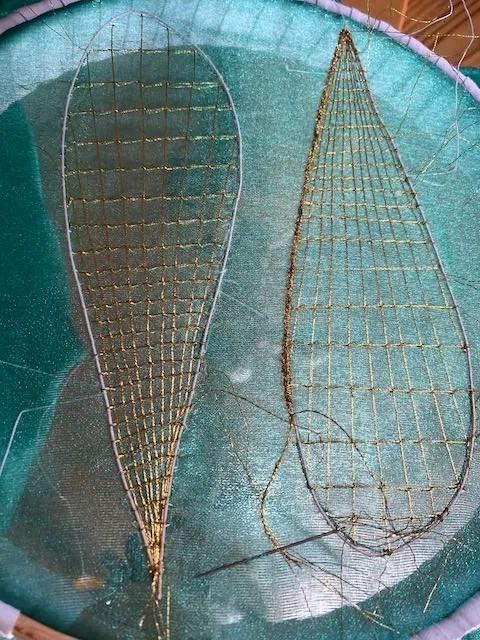
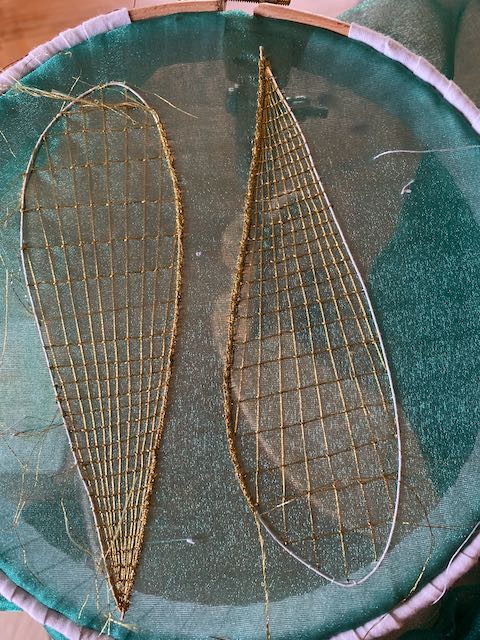
I started buttonhole stitching around the cake-wire, capturing the excess threads in to the stitching, partly to thicken the line slightly, but mainly to make sure that it was all secure before cutting off the ends of the thread. It’s a fairly slow process, as the stitches are tiny and close together; also the thread, of which I’m using two strands, is inclined to shred after a while.
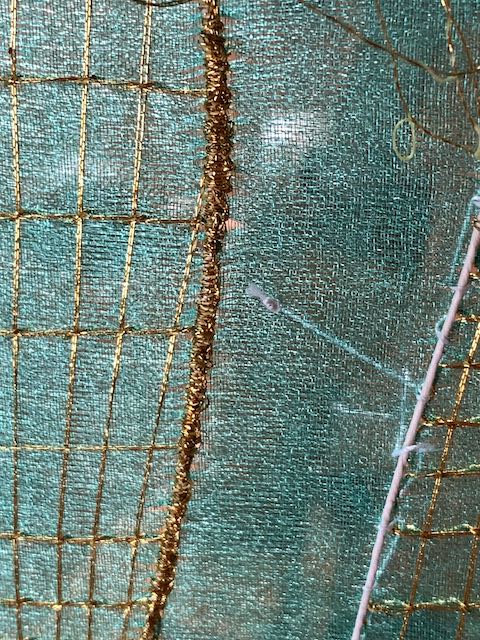
A close-up image, showing a few holes in the organza on the outer edge, so tiny that you can’t see them in reality. But this isn’t a problem, as once the buttonholing is finished it will be cut out up to the wire.
I’ve started on the second wing, but there’s still a long way to get round them both.
I’m pleased with how it’s looking so far, and the colour looks much more vibrant in reality.
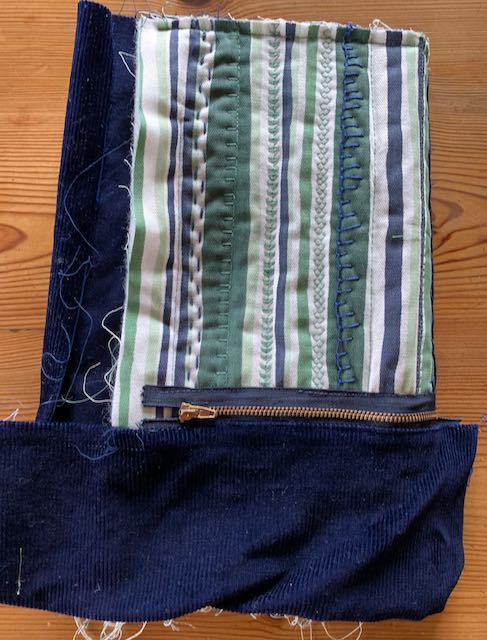
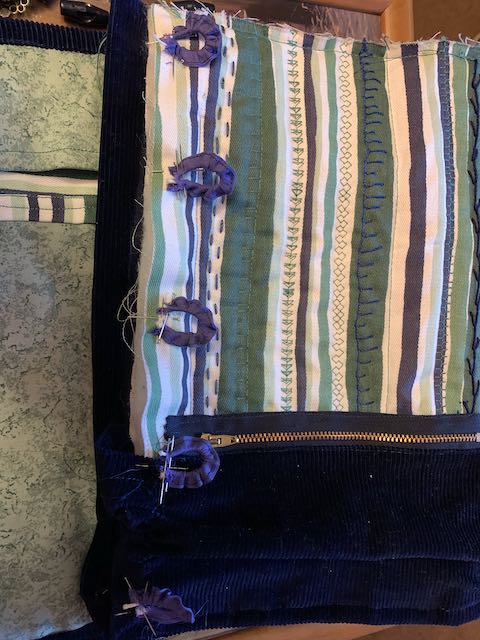
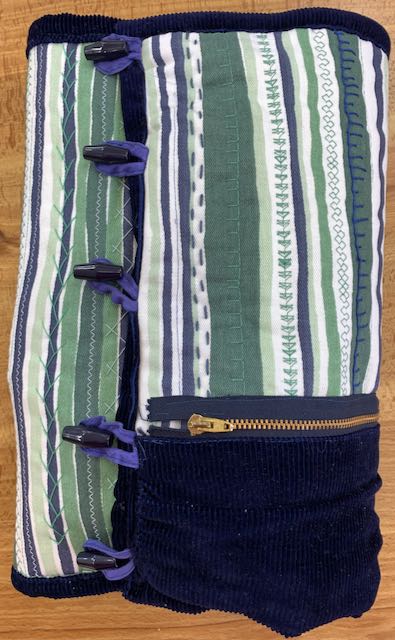
I cut off some of the excess navy needlecord on the left hand side, and folded the pocket section on to the lining (it needed a bit of fiddling to mitre the corner). The rest was ironed in half, then folded over to make the binding. It was quite bulky and, after trying to pleat / fold the excess on the pocket, I decided the easiest way would be to do a long machine stitch and gather it up like a sleeve head. This would make it even on both sides, and leave the pocket big enough for my glasses or phone.
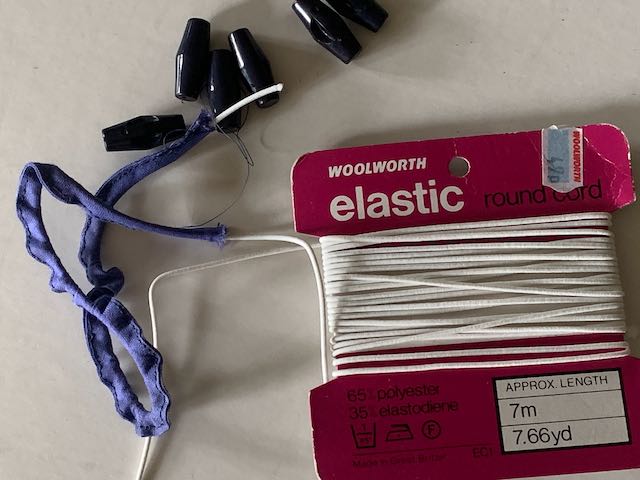
Before it could be stitched down, I made some elasticated loops to go round the navy toggles found in my button box. I used this old round cord, threaded through bias binding stitched in half .
I used a mattress needle to thread it through, in the end cutting the bias into two and half inch lengths before threading the elastic.
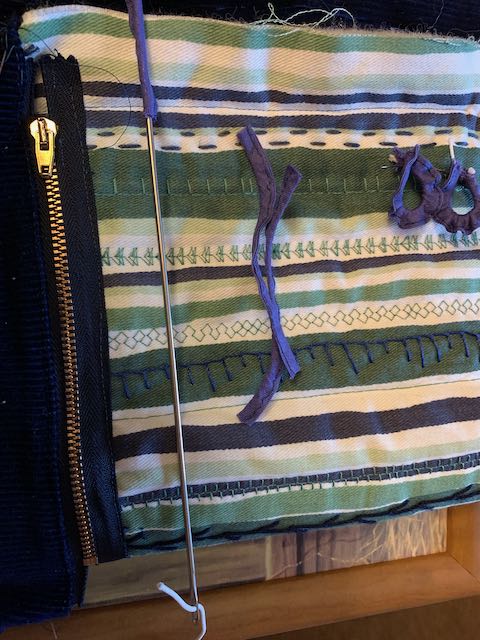
I pinned them in place and machine stitched them all down……
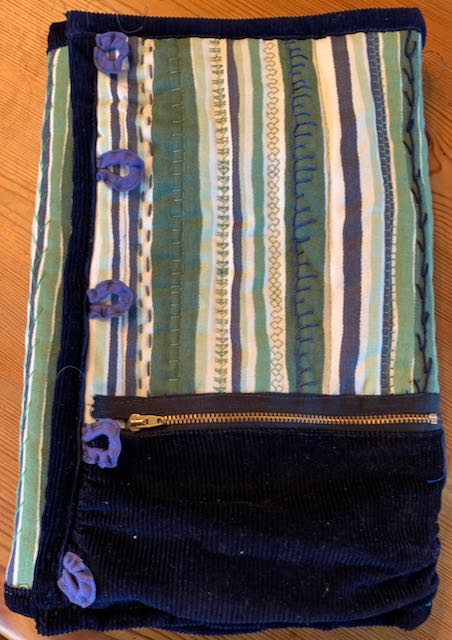
……..before folding over the binding and stitching it in place. Then another piece of binding was put across the top, the right hand side of the pocket was turned in and hand stitched in place.
I then put things inside……
……. so that I could see where the toggles needed to be stiched. I’ve decided not to wash it for the moment in case the navy cord does run. (Alison suggested putting white or pale work in a plastic bag just to make sure it doesn’t pick up any colour.)
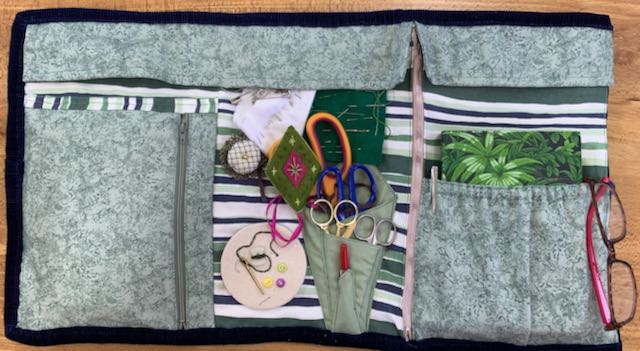
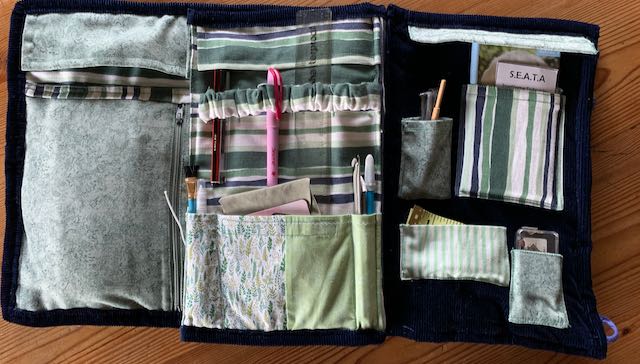
When they’ve seen it, several folk have said it’s bigger than they’d realised from my blog posts. When it’s opened out, it measures 34cm high (13 1/2 inches) by 61cm (24 inches) across the three “pages” and closed 23cm (9 inches). Yes, it is fairly hefty, but I should be able to take out with me all that I might need at various groups and classes I go to. Things will no doubt get tweaked and added to, but it’s finally finished and ready for use.