Archives for posts with tag: pockets

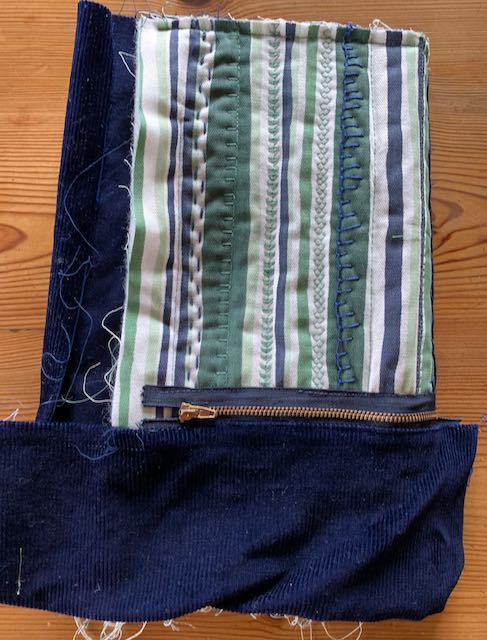
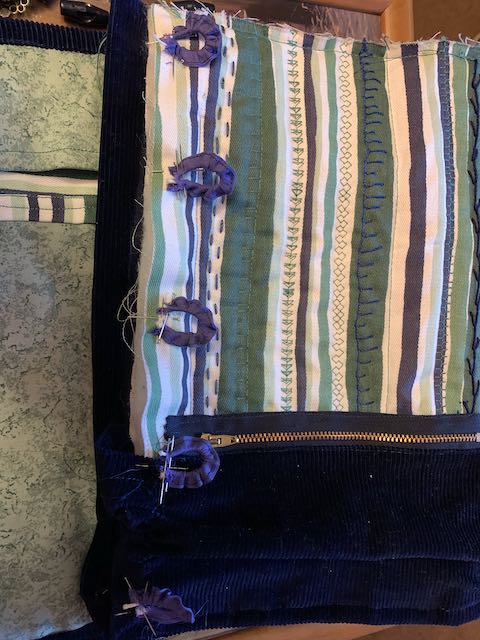
I cut off some of the excess navy needlecord on the left hand side, and folded the pocket section on to the lining (it needed a bit of fiddling to mitre the corner). The rest was ironed in half, then folded over to make the binding. It was quite bulky and, after trying to pleat / fold the excess on the pocket, I decided the easiest way would be to do a long machine stitch and gather it up like a sleeve head. This would make it even on both sides, and leave the pocket big enough for my glasses or phone.

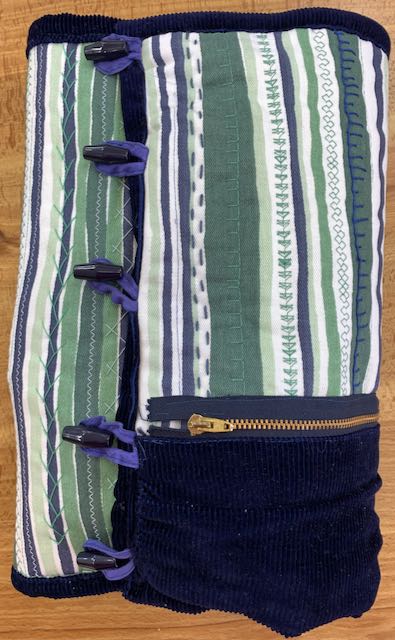
Before it could be stitched down, I made some elasticated loops to go round the navy toggles found in my button box. I used this old round cord, threaded through bias binding stitched in half .

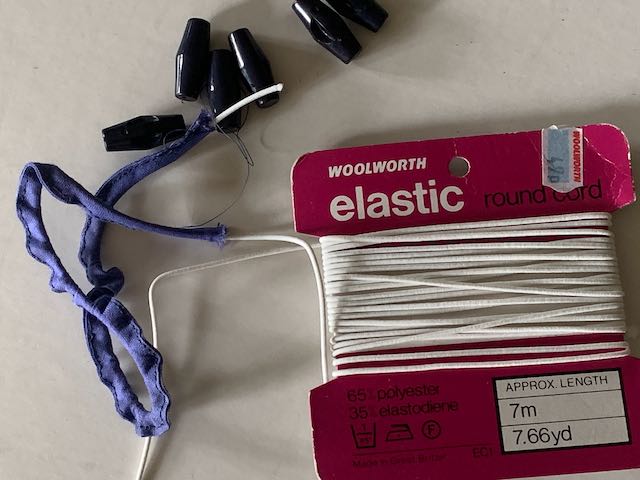
I used a mattress needle to thread it through, in the end cutting the bias into two and half inch lengths before threading the elastic.

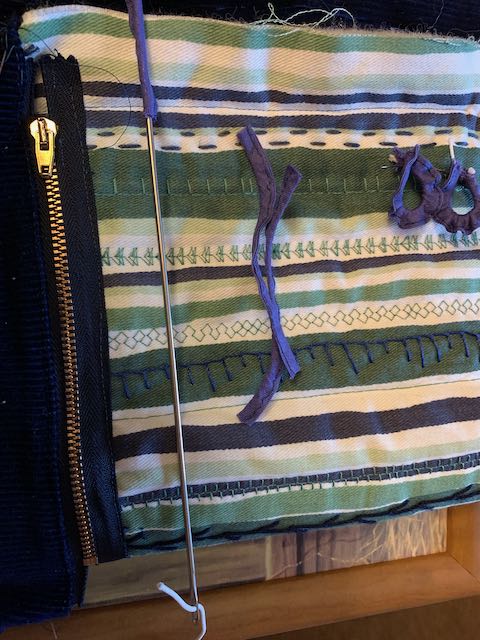
I pinned them in place and machine stitched them all down……

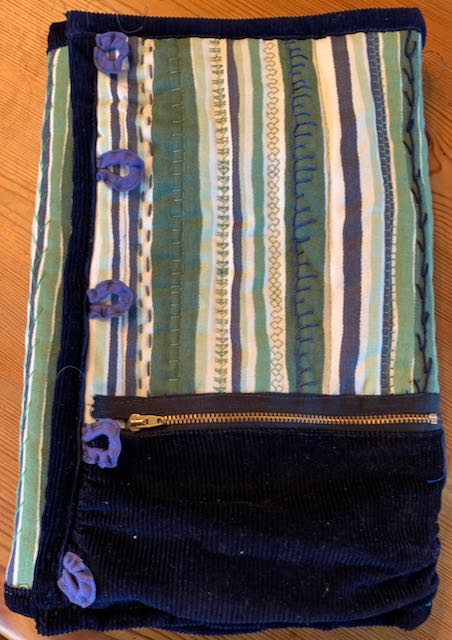
……..before folding over the binding and stitching it in place. Then another piece of binding was put across the top, the right hand side of the pocket was turned in and hand stitched in place.

I then put things inside……

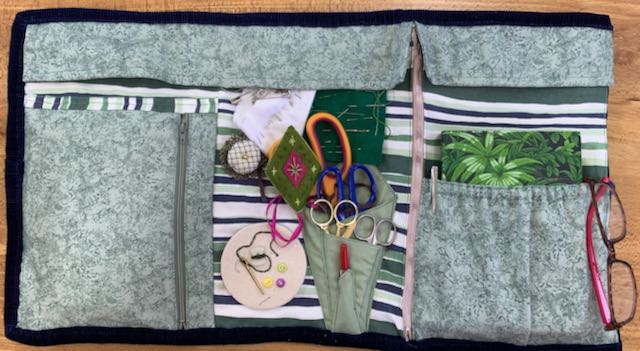
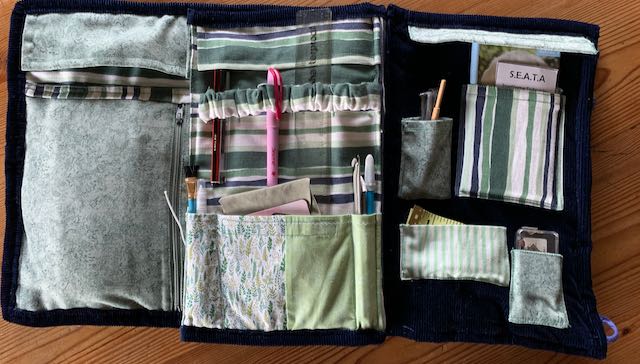
……. so that I could see where the toggles needed to be stiched. I’ve decided not to wash it for the moment in case the navy cord does run. (Alison suggested putting white or pale work in a plastic bag just to make sure it doesn’t pick up any colour.)

When they’ve seen it, several folk have said it’s bigger than they’d realised from my blog posts. When it’s opened out, it measures 34cm high (13 1/2 inches) by 61cm (24 inches) across the three “pages” and closed 23cm (9 inches). Yes, it is fairly hefty, but I should be able to take out with me all that I might need at various groups and classes I go to. Things will no doubt get tweaked and added to, but it’s finally finished and ready for use.

What a frustrating week on my hussif! It’s very much been one stitch forward, two stitches back, with lots of unpicking!

It started with the bottom left pocket (above) which was very messy and lopsided, as I said last week. It’s now much better, as the photo shows, with just ends to tidy up.

Then I started on the binding, strips of 2 1/2 inch wide fine navy needlecord, ironed in half, then both edges folded in to the middle (fold line) on the wrong side. I tried pinning, but it was so thick in places that the pins wouldn’t go through easily. I gave up on that idea and, placing the fold against the edge of the hussif and wrapping around the binding to the front and back, started machine stitching with the longest stitch on the machine, manipulating it as I stitched. The side I could see worked really well, but the other side was frankly a mess, because the inside fold had moved unevenly. I’d only done the bottom (three pages) so unpicked it all. Being more careful, I started again. It was awkward to stitch over the thicker areas, but this time I kept checking the back as I went until I’d got to the thinner bits….. only to find the bobbin had run out, just after I’d stopped checking.

Third time lucky, it all looked better.

I then did the top. It looked fine, the only problem was that the width of the fabric was about an inch short to meet up on the long side with the strip from the bottom. I’d mitred the corners pretty well, so just a little piece to cut, iron and attach.

While trying to attach this piece I realised that the binding wasn’t tight up to the edge in places. More unpicking, and in the end of the whole lot. By which time the ends of my fingers were blue, colour coming off the cord. I’m hoping that a colour catcher will work in the washing machine once it’s all finished, as I didn’t fancy unpicking the extra page, the pockets and the zip on the cord.

I decided that I was going to have to pin and tack the binding before re-machining. The pins were really hard to put through, and the tacking became a tiny stitch into the cord and, travelling diagonally with my needle to do another tiny stitch on the other side, totally invisible. By the time I’d done three pages, my fingers and thumb felt very sore and bruised.

The second edge I pinned through one side of the binding and some of the layers, and then pinned the other side the same. Then I stitched through in the same way, much easier on the fingers, especially as I used a thimble (which I don’t really get on with normally).

It’s now ready to machine stitch. I could just leave the hand stitching, but feel it will wear better if it’s machined.

It’s getting there slowly. I just need to be patient….. and keep at it……

Several years ago I found this orange scissor-tidy in a charity shop for (I think) £1. It has been very useful, because it holds three pairs of scissors: big dress-making ones, a pair for cutting paper and a small embroidery pair.

When looking to continue with my hussif earlier in the week, I found another part-made pocket in a mucky green and thought I’d make it in to a free (loose) zipped page. While looking for a zip the right size, I decided it would be about the right size to make a smaller version of the scissor-tidy that would fit in my sewing kit. When I measured the orange one (22cm by 18 cm), I realised it was almost the perfect size. I tried folding it and somehow it didn’t quite work in the same way. I didn’t want it to go to a point, and thought I could cut the bottom off to attach it where it would eventually get caught in the binding.

I machine stitched the two remaining raw edges (two sides) and bagged it out, and pressed it and top-stitched all round the edge. I gave the slightly rectangular piece to Colin to “play” with and he suggested folding the bottom point up rather than cut it off. It isn’t as bulky as the orange one as there’s no wadding in it, so it could work. Then I realised that it could just make a tiny pocket that would hold a quick unpick perfectly.

Where to put it in the hussif? The most logical place seems to be where the felt is……

…… but it would be easier to put a zip in first. The elasticated pocket is not quite big enough for the cutting mat once the “page” was attached to the main piece. So I needed another zip, which would mean that I would be able to access the inside on the large piece and the elasticated pocket side of the “page”, possibly to keep fat quarters or other fabric and calico. The side of the elasticated pocket was fixed in place as the zip went in.

I’ve taken off the bottom piece of felt, and machine stitched down the scissor-tidy. The whole thing seems to have taken on a life of its own, and what started off as a project to finish before starting anything new this year has grown. It is making progress, albeit more slowly than I’d anticipated, but it should mean that everything is all together when going out stitching, the theory being that the kit and a plastic wallet should be all I need! It still needs a solution for pins and needles, and I don’t want to assemble it until all the bits are attached inside.

I’ve made some progress on my hussif / housewife sewing kit this week, although it’s really much too big to be classed as a hussif. I’ve done some more hand stitching on the outside / cover to make it slightly less bulky: parallel running stich, feather stitch and herringbone so far.

I decided a zipped pocket would be a good idea, big enough to hold a small hoop and threads. The fabric is quite firm, but two layers would mean that it would be sturdier, and that there would be no loose ends or fraying seams inside. I wanted the zip to open from the top downwards, and thought it would be easier to put things in and out if the zip was well to one side and, being right handed, it would be better if it was on the right. The zip (from my stash) was a perfect colour, but not long enough to make the pocket full length, to hide the raw edges, hence the stripey binding at the top. It was a new way for me of sandwiching the zip between two layers of fabric (RS together), then folding back and top-stitching. It was certainly easier and there was no problem of it being visible in this. I also found more stripey fabric to make another “page”.

Talking through my ideas with a few friends confirmed some of my thoughts. The extra page would be better with some pelmet vilene sandwiched in the middle. Was it going to be rolled or flat?

Definitely flat. I’d thought another pocket would be useful, to put in a small cutting mat or a sketchbook (or both), also some flaps at the top to stop things falling out, which was something Alex had found annoying on one that she’d had.

Which pockets to go on which side?

Also how to fasten the pockets? Velcro on the larger pocket in the middle on the right hand side, the small pale green one is fairly tight, probably for fabric markers, pen and pencil; the little leafy one is a bit looser. The big pocket has elastic at the top to hold the cutting mat / sketchbook firmly.

To the outer edge above the zipped pocket, I’ve attached double some very old round cord elastic from Woolworth’s (49p). I want to fill some metal bobbins that are not the right size for my sewing machine with a variety of colours (white, grey, black, navy, cream, beige, green, brown and red), and stitch on a button to loop the elastic round.

I’ve also covered a piece of wider elastic to hold things in place: ruler, rotary cutter, tape measure, etc.

To stop things falling out I’ve made flaps, double sided and top stitched round the edge to go along the top of each page. I was going to “bag it out”, but have decided it will be better to bind the raw edges, less bulky, and that will also make it slightly larger.

It’s nearly there on the inside, just a scissor holder, pin cushion and needle holder.

It’s certainly made a change to use the sewing machine more.