Archives for category: design

Last Saturday was the first Spring Gathering of YHEG (Yorkshire and Humberside Embroidery Group) at the Regan Centre at Riccall. The venue is used for the Summer Gathering, what used to be Regional Day of the Embroiderers’ Guild, there were workshops morning and afternoon, and the usual lovely lunch.

I chose to do Liz Almond’s blackwork sessions, one in the morning and continuing for the afternoon session. Most of the other workshops were just for two hours, so you could choose two different ones.

I’ve not done much blackwork and not particularly successfully – the usual counting problems! But I really want to finish my blackwork castle from “In the stitch zone” last summer. I’ve only done the outline so far, and thought this would be the push to pick it up again.

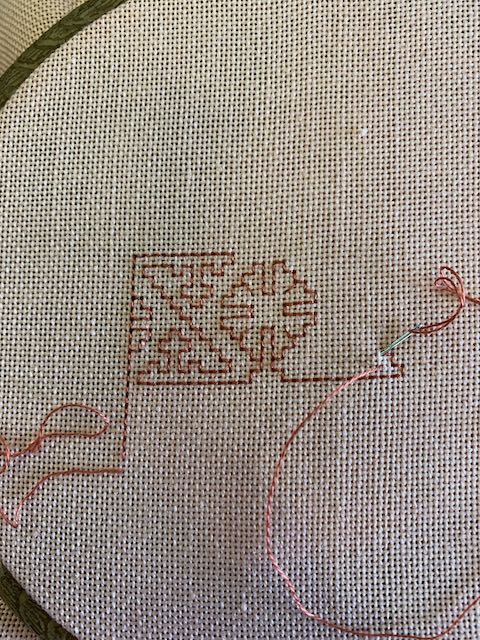
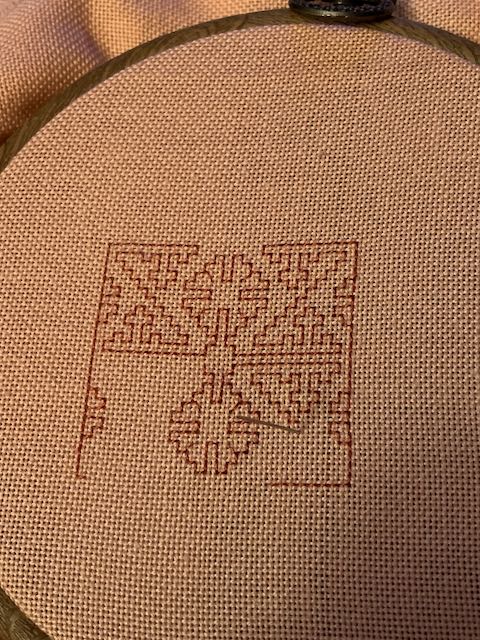
Liz had got a pack for each of us, with fabric, needles and enough patterns to keep us going for six months (she said!). More like six years, I thought! We could stitch on Aida in the kit, or swap it for a piece of 28 count Jobelin if we wanted to. I thought it was an ideal opportuntity to try it. But there was no white or cream, just a pinky peach, which I wasn’t sure about at first. But after a rummage through Liz’s bag of floss I came up with a pinky chestnut that I found was kinder on my eyes. (The last photo is the nearest in colour.) Blackwork doesn’t have to be done in black.

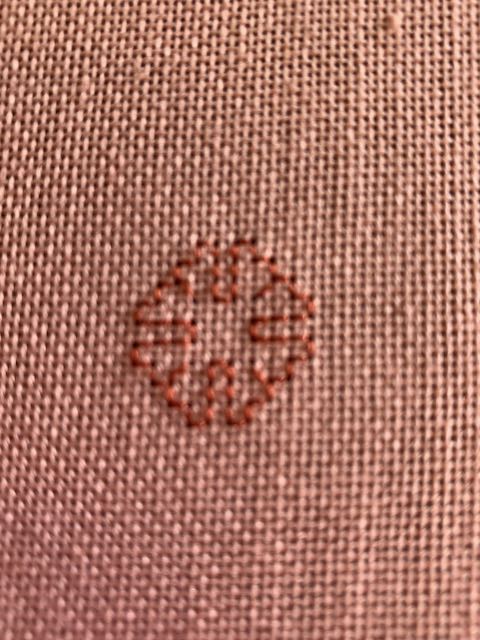
The pattern that I chose to follow was intended as a bookmark, with the motif repeated several times. This is just a tiny part of it.

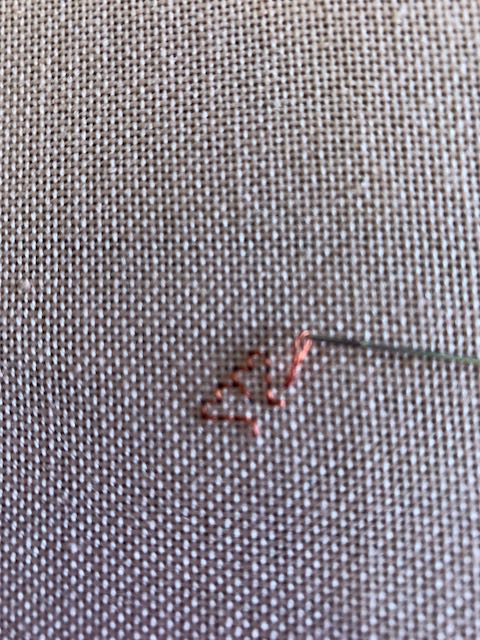
I started off ok, with backstitches following the pattern……

…..until I got to the top of the second set of steps and turned left. I soon realised I’d miscounted and done one step too many, which meant the pattern was too far out from the centre motif. Fortunately it was soon unpicked and corrected. This is where I’d got to at the end of the sessions.

There were also sales tables from many of the individual stitch groups, always good for a bargain. Not that I needed anything, but who can resist?

I have got back to it during the week ……

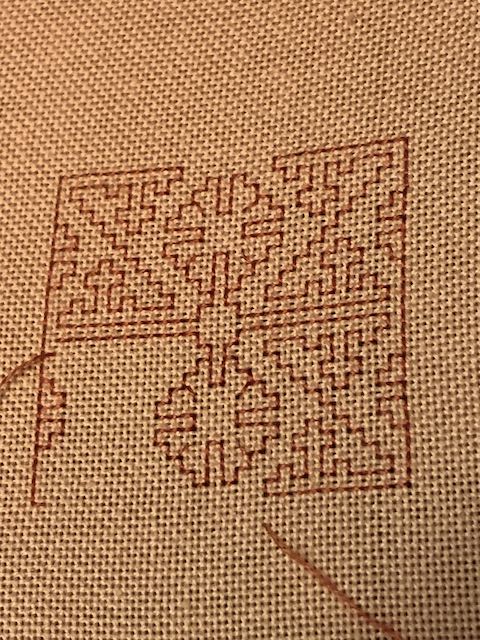
…… and finished off the first block, apart from x-stitches or beads in the middle of the two central motifs and the centre square. I’m not going to do the bookmark as the pattern, but work outwards from here.

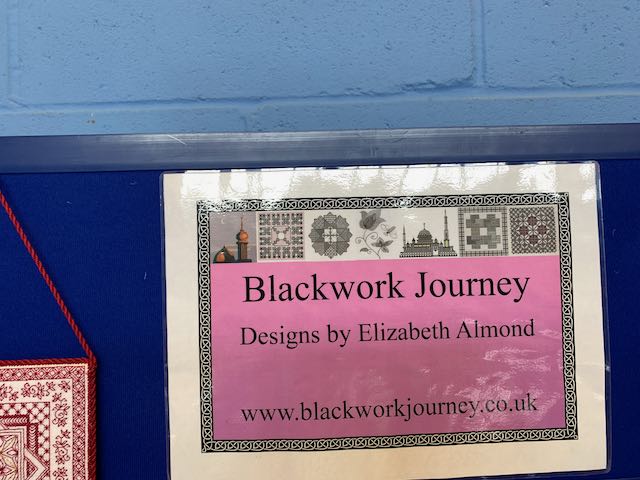
Liz had a huge amount of samples and finished pieces of work, and told us about her website with lots of information, freebies and patterns. I spent several hours browsing on Monday evening and I’m planning on going back soon http://www.blackworkjourney.co.uk

At S.E.A.T.A. (Scunthorpe Embroidery and Textile Association) last Saturday, we had a lino-printing workshop with Hannah Turlington. I was keen to get started so had signed up for the morning session.

Hannah showed us some of her work, and talked about a few ways of repeating the design. She demonstrated two techniques for us to try. Firstly, some soft cut lino, then cutting out shapes from styra foam which was stuck on to a piece of card.

I started on the lino, drawing a section of a simple doodle from a sketchbook, before realising that it wouldn’t repeat. I managed to remove the lines with a bit of elbow grease and water on a paper towel.

The whole doodle is only about 3 inches square.

While it was drying, I started on the styra foam with a simplified version of a lupin leaf I’d drawn en plein air last summer.

Hannah had done a geometric design, and cut several pieces before sticking them on to card. I was about to cut each petal individually, but realised it would work better to cut out the whole flower. This is after I’d finished printing with it.

In my head I had figured out my design for the lino to make it repeat on the corners. Here’s the block after printing with it.

There were three colours to choose from: deep pink, a dark blue and a deep turquoise. I soon started mixing the pink and blue to get various shades of purple on my test pieces. The lupin leaves became over-printed flowers on a scrap of fine cotton. It would have worked better if I’d had the patience to iron it first!

The lino print worked as a repeat, making another flower in the middle…….

…….but less well as a brick (half drop).

We each had a canvas bag to print on, and a piece of lining paper to put inside to stop the print going through. On the first side I used a mixture of both blocks. It’s rather messy where ink that I’d got on the card has left marks around the flowers, and the lino could do with a few bits carving out. The over printing in the middle didn’t work quite how I expected either.

The second side was a happy accident, as the lino block slipped out of my fingers as I went to place it for the first print, and landed at an angle. I continued with it, to make each print at an angle to the previous one leaving negative space in between. It was a bit tricky to get it right where it touched two other prints, but I liked the way it turned out and deliberately left white space on opposite corners. I’ll just have to make sure that I carry it this way out!

As usual I learned a lot, and want to do more. Thank you, Hannah, for sharing your knowledge and enthuasiasm.

This must be a first: I have actually finished my pages for the Saturday travelling book pages swap tomorrow. It has been in an envelope ready to go since Wednesday! Pre-lockdown, I was usually still working on it on the Friday, sometimes until after midnight, and glueing it in the book on Saturday morning before leaving home for the meeting, often with the book open on the back seat of the car so it couldn’t stick together and to help it dry quicker, then putting it open on the table, not so that everyone could see it but so that the glue could continue to dry.

I’d had ideas a couple of weeks ago, “Re-use, re-cycle, re-love” was right up my street. I love playing around and thinking about possibilities on the given theme, often the reason I was executing at the eleventh hour, with too many ideas and possible ways to take it. But this time I’d made a start on it A bit here and there and then did some research on the William Morris “Strawberry Thief”.

I then got back to the stitching. My initial idea of a Morris-style design was eluding me, in spite of my quick pencil sketches of real leaves, partly because the finished piece is only just under A5, and the scale of the cushioning pad made life-size strawberries a much better option. As I was stitching the first one down on some much-washed old sheeting, I realised that if I left it loose, it almost looked as if you could pick it.

I left the other two only partly anchored down too, one slightly under the other using a gardening book as reference to see how they grow. A row of stem stitch for the central vein down each leaf, tiny pieces of the paper for the hulls, and they almost look good enough to eat.

I added some darker green stems and stalks appropriately in stem stitch in fine perlé, and tore the last edge to fit the page. It looked a bit crumpled and not really firm enough just to put double-sided tape on the back for whoever picks the envelope to attach it to their book, but I wanted to keep the frayed edges.

So I’ve stretched it on to a piece of mount board (having signed it, as requested), leaving the soft edges and putting more tape on the back of the mount board.

My A5(-ish) piece for the inspiration / technique page.

If I sound a little smug, I’m not really, as last month I decided at the last minute (late Friday afternoon) that I needed to be kind to myself and not even do it. Again a first. The way of working has changed since Covid. Instead of there being a group where the book gets passed to the next person on the list and you take the book from the person above you on the list, we are now doing two pages, putting them in a sealed envelope and leaving them on the table for everyone who has taken part to take one at a pre-designated time.

There are several benefits to this new method: less handling of books, the possibility of dipping in and out as time, inclination, and inspiration strike, no making sure it gets to the meeting if you are ill or on holiday (you can ask somebody to take and pick up for you if you wish), and less likelihood of feeling intimidated by what precedes you in the book.

There is also a pot to put in suggestions for the following month’s theme, which is drawn out just before we collect an envelope.

It wasn’t that I wasn’t inspired by the December theme “Northern Lights”, but Christmas things took over. I was also struggling to get out of my head a mental image (and possibly a photo or video clip) of Miles (our son) lying on a pontoon beside a lake in Finland. It was minus 5 degrees and he had bare feet (why?). He was watching the Northern Lights, and was so enthralled that he was oblivious to the cold!

A friend who also wanted to take part, but hadn’t managed to fit it in either, has agreed to do a piece for the two of us to do a direct swap. I have started it, but thought it best to get the “Re-use, re-cycle, re-love” piece done first.

I’ve found silk scraps, and a backing fabric with the colour and texture that I’m happy with, less so the lines woven through it, but they will be mainly covered.

I’ve started stitching into it, but it’s not yet working how I see it in my head. It feels altogether too static. I’ve looked at photos on the internet which just feel the same; many are beautiful, but don’t capture the things Miles described. I need to watch something on the telly to get it right.

I have now stretched it on to a frame about the size of the finished piece, which has helped. But there’s a way to go yet, so we won’t be swapping tomorrow.

The lime green clump at the centre bottom is just frayed threads that have got “stuck” to it, but somehow help with the feeling of movement. Would it work to couch them down lightly, a little higher and right? Maybe.