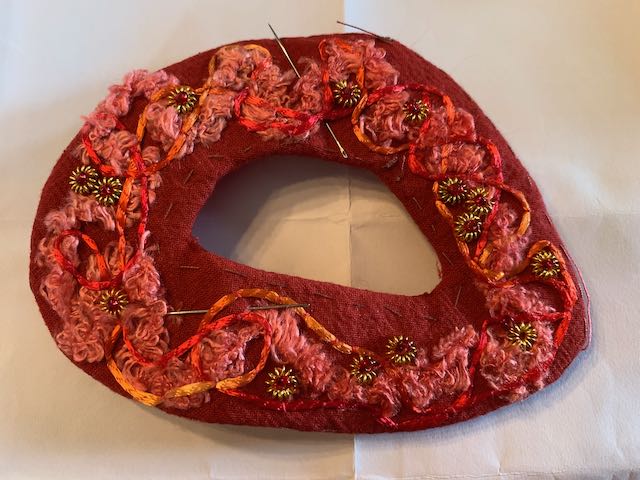
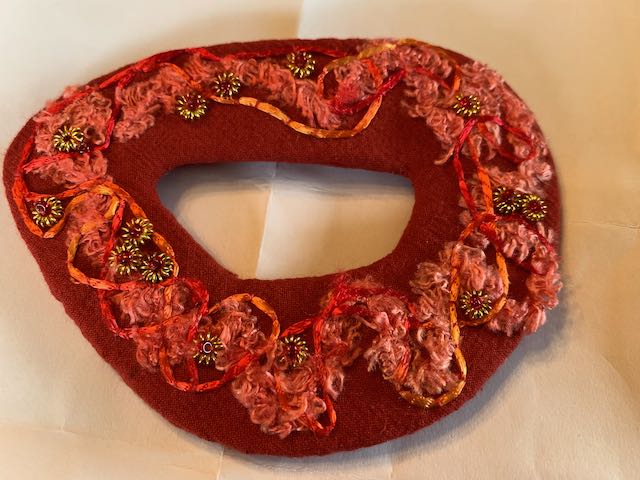
I continued my hair slide at “In the stitch zone”, having decided in the end to use the little coiled rings and stitch a red bead in the middle of each one. I’ve spaced them singly, twos close together and a three, placing them all fairly centrally, thinking that they are less likely to get tangled in my hair than near the edges.
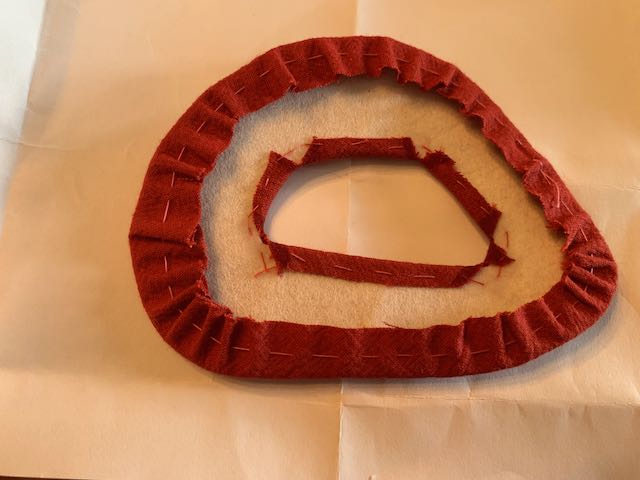
I cut out two pieces of pelmet vilene and a piece of red felt, intending to put the layer of felt behind the stitching. I roughly pinned them together to check how it would work.
I did a row of running stitches around the edge and centre hole, with a good secure knot at the beginning to be able to gather it up over the vilene. I did the back first to check it would work.
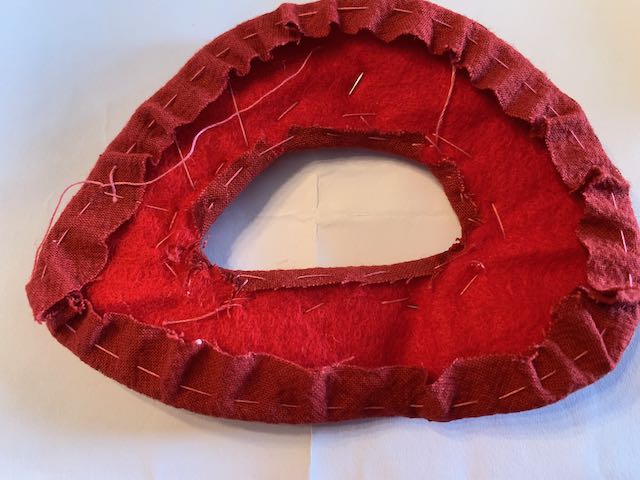
Then I did the front, and it was almost done before I realised I’d put the felt over the vilene. I didn’t want to unpick it, so the felt is between the two layers of vilene which seems to work fine.
I put a tiny bit of PVA on the back, over where I had snipped to get a neat finish, but unfortunately it seeped through a little. Not a problem, it would be against my head, and would probably dry invisibly (well, almost). I slip stitched / ladder stitched the front to the back, in the middle and round the outer edge.
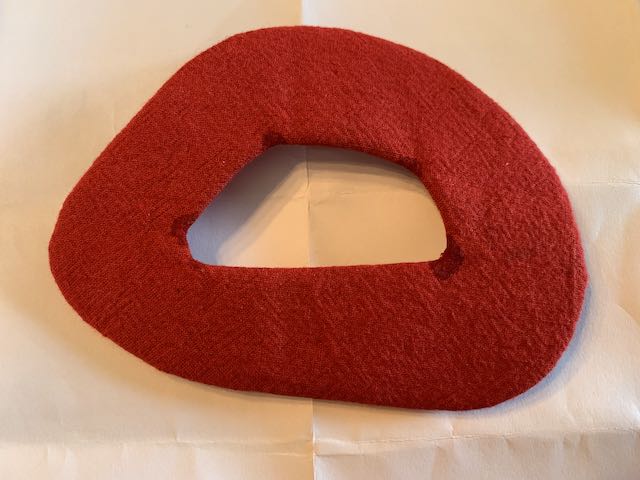
The slide is finished, and it’s used up a few bits of my stash that I wasn’t sure what to do with.
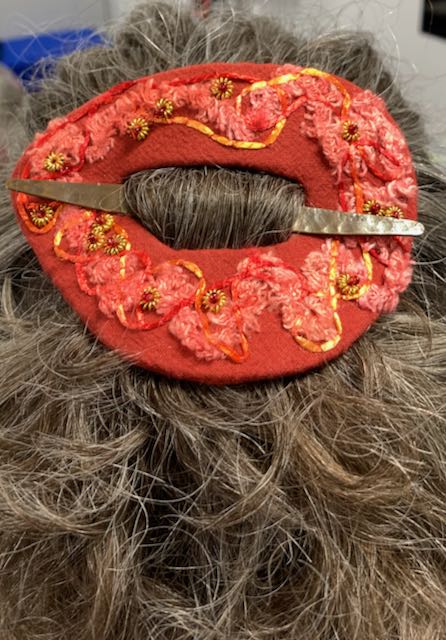
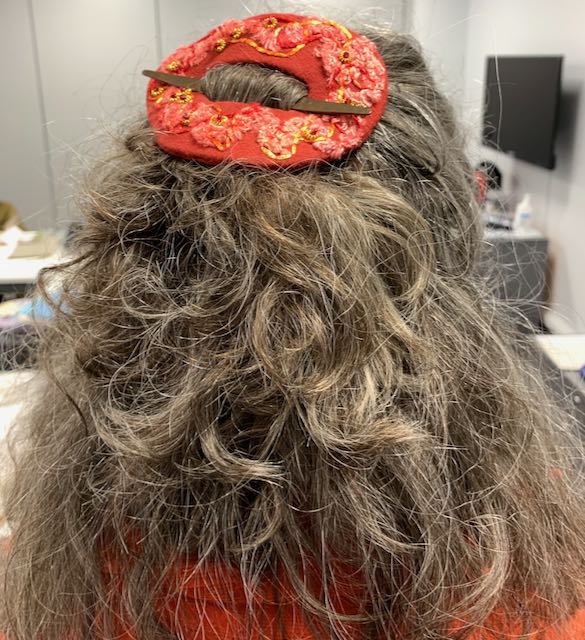
I’m pleased with the colours and textures, and wore it to the session this week. A few of the group noticed, and Alex took some photos for me.
It works with the orange things that I wear as well as the red!
Last Saturday was the first Spring Gathering of YHEG (Yorkshire and Humberside Embroidery Group) at the Regan Centre at Riccall. The venue is used for the Summer Gathering, what used to be Regional Day of the Embroiderers’ Guild, there were workshops morning and afternoon, and the usual lovely lunch.
I chose to do Liz Almond’s blackwork sessions, one in the morning and continuing for the afternoon session. Most of the other workshops were just for two hours, so you could choose two different ones.
I’ve not done much blackwork and not particularly successfully – the usual counting problems! But I really want to finish my blackwork castle from “In the stitch zone” last summer. I’ve only done the outline so far, and thought this would be the push to pick it up again.
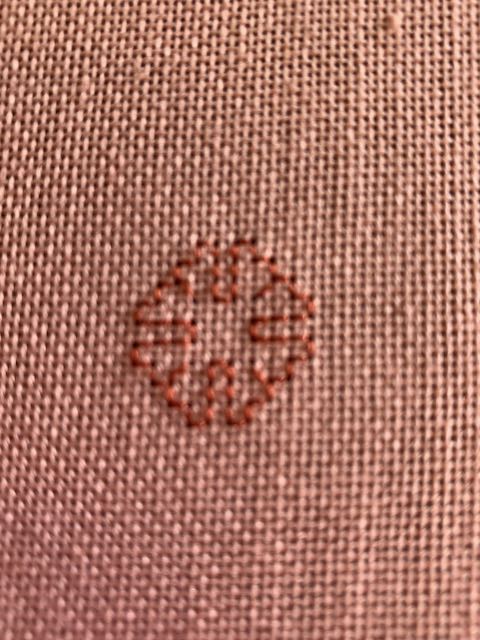
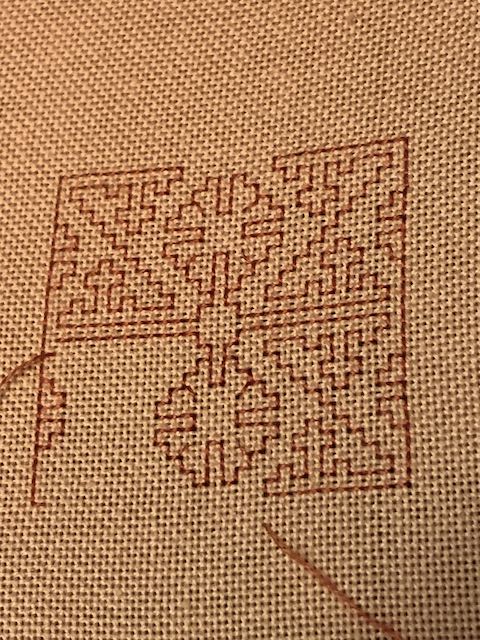
Liz had got a pack for each of us, with fabric, needles and enough patterns to keep us going for six months (she said!). More like six years, I thought! We could stitch on Aida in the kit, or swap it for a piece of 28 count Jobelin if we wanted to. I thought it was an ideal opportuntity to try it. But there was no white or cream, just a pinky peach, which I wasn’t sure about at first. But after a rummage through Liz’s bag of floss I came up with a pinky chestnut that I found was kinder on my eyes. (The last photo is the nearest in colour.) Blackwork doesn’t have to be done in black.
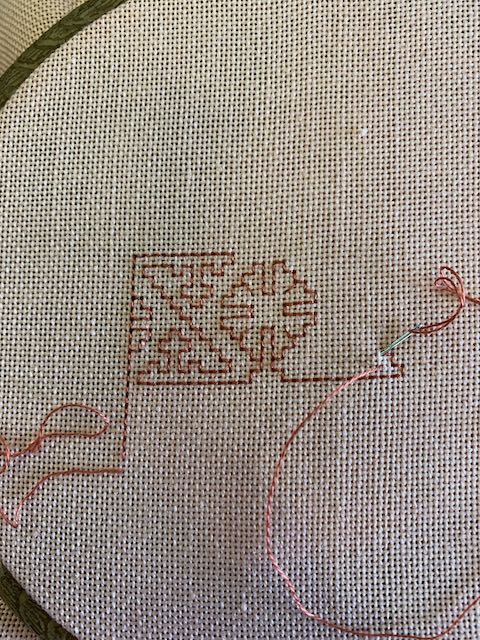
The pattern that I chose to follow was intended as a bookmark, with the motif repeated several times. This is just a tiny part of it.
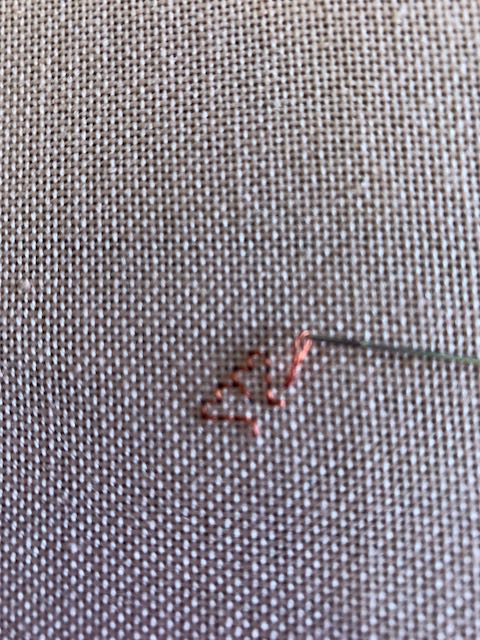
I started off ok, with backstitches following the pattern……
…..until I got to the top of the second set of steps and turned left. I soon realised I’d miscounted and done one step too many, which meant the pattern was too far out from the centre motif. Fortunately it was soon unpicked and corrected. This is where I’d got to at the end of the sessions.
There were also sales tables from many of the individual stitch groups, always good for a bargain. Not that I needed anything, but who can resist?
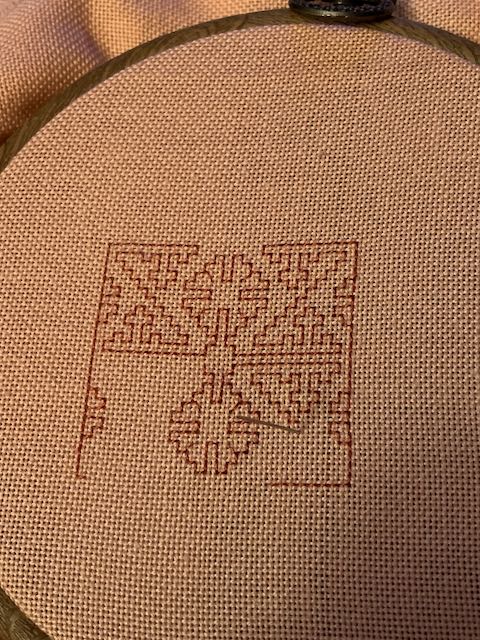
I have got back to it during the week ……
…… and finished off the first block, apart from x-stitches or beads in the middle of the two central motifs and the centre square. I’m not going to do the bookmark as the pattern, but work outwards from here.
Liz had a huge amount of samples and finished pieces of work, and told us about her website with lots of information, freebies and patterns. I spent several hours browsing on Monday evening and I’m planning on going back soon http://www.blackworkjourney.co.uk
In my stash I’ve found the perfect piece of old gold velvet to back the cushion and to frame the piece of nearly finished canvas work. It was just about big enough if I was careful with my cutting, even allowing for making sure the pile is all running the same way.
It was very much a case of measuring twice (O.K., several) times to work out how best to cut it. Once I’d trimmed the raggedy and uneven edges, I cut a long strip off one side for the short sides, along the canvas work once I’ve finished it. It’s not quite square. Then a zig-zag stitch along the raw edge, that will be folded under for the lower edge of the zip. I found one in my stash just the right length, if slightly pale. It’s totally hidden, so it’s not a problem.
I also found four different reels of gold Sylko thread that were all a pretty good match. That’s just as well because I’ve almost used up the one on putting in the zip and neatening the raw edges, which are the only bit where you will actually see a row of stitching.
I decided to use the oldest one, which also had the least on it. This was a bit of a trip down memory lane, with the Woolworth’s label saying 6 1/2; now is that “p”, or “d” which would date it pre-1971? Cheaper than I remember them, but on a plastic reel so nowhere near as old as some of my wooden reels of Sylko.
They had such wonderful names too: “Mustard Gold”, “Classic Gold” and “Old Gold”. Unfortunately the one on the top left has lost its name label.
I’ve put the zip in, the second side is pinned below. It’s the bit that I thought I was most likely to procrastinate about, so I’ve not finished the canvas work yet.
I don’t put in cushion zips in quite the conventional way, but make the top flap longer to make sure you don’t see the zip. This also means that it doesn’t catch on furniture or clothes. The back of the cushion is ready to assemble once I finish the front.
I’ve looked at the three possible colours to finish the canvas work along side the velvet ….
… and decided on the middle browny one. The light green is the same as the zig and wouldn’t give much contrast, as the wool would lie in the same direction, and the dark green I felt was too contrasty with the velvet.
I’ve laid a strip of velvet vertically and horizontally at the side of the canvas, and think it will all work. I just need to finish off the canvas work and assemble it all, a much less daunting prospect now that I’ve done the cutting and put in the zip.
Last Saturday at Linconshire Textiles we had a talk by Amanda J. Clayton, called “My Blue Suitcase”. Her work is beautiful and her talk was thought-provoking and inspiring. I’m pleased I made notes, not only so that I can reread them at my leisure, but also to answer to and for myself some of the questions she posed. She has previously been accused of name-dropping, but again I found this interesting and useful, some familiar names, but many new ones to look up and research for myself.
I hadn’t signed up for the workshop on the Sunday, but after such an inspiring talk I wanted to do it. Fortunately, there were spaces left, so Elaine and I decided we would go. All we needed to do was to gather together the items on the requirements list.
The fabrics above are some of the neutral coloured fabrics I hauled from my stash, also various threads (didn’t use any of my own) and a favourite leaf, as had been suggested.
I’d found these old pressed acer leaves.
The largest, reddest acer is the one that I decided to use……
and “another” (no idea what it is) found a week or so ago, and put on one side for safe keeping. They have wonderful textures.
We worked on a strip of silk organza, so lovely to stitch into that I bought two more at the end of the day!
We traced or drew the leaf on to the organza with a blue water soluble pen, and did a running stitch outline. Amanda had very generously brought 15(?) threads for us to use and try out. I started with silk floss, something I usually avoid as my hands are too dry and rough. (Amanda’s quick tip of wetting the length of thread slightly made a huge difference.)
The next one I tried was silk organzine. I think this is the nicest thread I have ever used, and will treat myself to some. Here’s just another outline.
I used it again for the next leaf, an outline and added veins.
The next one, I tried a different silk floss, an outline then filling in the leaf shape with more running stitches following the outline shape. The transparent cloth means it can be viewed from both sides, so the ends of the thread need to be considered. Knots or not?
It was at this point that I decided I liked the faint blue outline, as did Norma who was sitting next to me. After discussion with Amanda, I may whip the stitches with a very fine pale blue metallic thread that I have.
Amanda then demonstrated looking at negative spaces and filling them in, and applique, cutting out several leaves togther. We could buy a pack of tiny squares of a range of things that she uses. They looked too beautiful to use! But also they are in the order of the list, many that I don’t know and I want to be able to take my time with and label for future reference.
I layered up a selection of the things from my stash and started paying with them, overlapping and moving them around. I’ve not finished this section yet.
This is where it had got to at almost the end of the day.
But before we finished Amanda wanted to show us trailing stitch, sometimes known as couching – satin (Mary Thomas Dictionary of Stitches).
Once it’s finished it can be cut out – I haven’t got to that scary stage yet.
It was a great stitching day. Amanda was a very good tutor, and very generous with her threads, knowledge and ideas. We came away with good instructions, more hints and tips to be able to continue with the piece and develop our own ideas. It certainly fired up both Elaine and me, and we bounced ideas off each other all the way home. Amanda’s website is well worth a look: Amanda J. Clayton.
I’m back working with my favourite shades of spring greens. It’s quite fitting some days, other days it still feels like winter. At Lincolnshire Textiles we are working on another communal piece for an exhibition in summer 2024. The cartoon was there last month for us all to pick a section to work on. It’s mainly blues, and apparently only four sections are green. Of course I chose one of the green pieces. Not only is it one of my favourite colours, but also I would have a suitable piece of background fabric and threads in my stash.
The pattern pieces were all drawn out with a directional arrow showing which way it needs to be worked, and a snippet of painted paper or a piece of thread to show the colour to use. I’d thought about it on and off over the month, sorted out fabric, backing fabric and threads, found a big hoop to work in, and traced my pattern piece ready to stitch round. None of my ideas for a design had seemed quite right until the middle of the night before last week’s meeting, when it just popped into my head: bubbles, circles in different sizes, textures, threads and stitches.
I’ve not got a finished picture in my head, but it is evolving as I go along, and it will, each circle responding to what is there so far.
I was just about to start tacking round the pattern shape, when Jo came and asked if I would like the same piece of green fabric that the other three green sections are going to be worked in. Yes, please! The piece I had, I didn’t really want to use, as I liked it so much and I’d been trying to place the pattern to leave as much as possible for another project. Also the piece that she’d offered is cotton and more stable, and will be easier for the assemblers to work with.
The bottom circle was my first. I wanted it to look like a pencil sketched circle that you keep going lightly round until the shape is right, but doesn’t translate to stitch. I tried to couch down where the threads overlap, but it just looks botchy. The one on the right, I tried putting in a few tiny stab stitches and then threading the single strand of stranded cotton through the stab stitches, nearer to what I had in my head, particularly after adding some tiny gold couching. The small circle, I wrapped round my finger and then couched it down with fine gold thread.
I’ve couched down a loose spiral in a perlé thread, a blanket stitch circle and a running stitch one.
This one was a tiny strip left over from a quilt. I did a running stitch up the centre and gathered it up, joined it into a ring and stab stitched it down.
More bits left from a quilt were cut into circles and attached in two ways using running stitches, another one made into a tiny suffolk puff, a ring of detached chain and one of a slubby yarn couched down on the bottom right.
This where it’s got to so far. As I’ve taken photos, the light has changed so much during the day that you would think it was four different background fabrics. Lots more to do yet, but it’s finally on its way.
When Alex first talked about the Spring Board Project I was really keen and fired up about it, a different word each week to prompt a small piece of work which would cumulate into a finished book of some sort. Each week in her newsletter Alex sent us some images and links for the following week’s word. We could all interpret it in any way we chose, something new or not, a stitch or technique, simple or challenging.
Somehow I got off on the wrong foot, having missed a couple of weeks at the beginning of the term, and then often felt over-whelmed by the amount of choice and possibilities for each word that I wanted to try.
I tended to try something experimental that didn’t necessarily work very well, then started working on the pieces of felt I’d done with Karen Lane last summer. It was a bit of a cheat really, using several words on each piece Colour and texture and “Moving on”
Then I found an vintage inspiration pack at Hemswell. The colours caught my attention (the photo at the top), and when I turned it over and saw the fern it just had to come home with me.
It has already been opened and has sparked ideas for the book, and made me want to start with the words all over again. It all needs ironing, of course, but just this piece will do the covers (stretched over mount board) and a couple of pages.
The whole lot talks to me. The more I look at the one on the bottom left, with the rusty coloured hazelnuts, the more it seems familiar. Something my Nanna had in the early 70s? The only one that doesn’t (at the moment) fit in with my vision for the project is the top left fabric. The hanky may become “Fold” and some of the other fabrics layered and stitched for “Cut”. That was another problem I had with it, some techniques cover more than one word, it could also be “Layer”. Decisions, decisions.
I also looked out some paper and old paintings that might be incorporated.
I made a start on some of the words again. “Scrunch”, a piece of hand-dyed scrim from my stash on a piece of brown felt.
It works up very differently from silk velvet which I have used previously with this technique. A few beads or not?
I also remembered that at a S.E.A.T.A. session last summer I tried a tiny piece of weaving in just the right colour. It’s about the size of a 2p piece, and the purple on the left might get taken out or changed in some way.
It has felt like starting a new project, exciting and stimulating, but it’s still a PHD (project half done), and I haven’t started anything new yet this year.
At Karen Lane’s textile group this week I was very much influenced by the colours I’ve seen around me the last few weeks, particularly during my walks in Broughton Woods.
I’d selected the colours from my stash of fleece before I left home: oranges, yellows and browns, no greens!
I started with dark brown for the background, working first vertically then horizontally, but fanning out at the ends to give a softer edge when it’s finished. I had several shades of brown, building up the layers before I started adding yellows and rusts randomly across the piece.
Although I was being loose in using colour, I did try to keep each layer even across the whole length. After several layers in each direction I started to get looser with my teased-out fleece.
Then added some loose leaf shapes, trying to make sure the layers were in a different direction from what was directly below.
I had no idea if this would work, but thought that there were enough layers going vertically and horizontally lower down to keep it all together once I started to felt it.
I added a few wispy bits of dark brown to add some contrast.
I then started adding hot water and soap to pre-felt it. I liked the wispy edges, but knew they would disappear as the process progressed.
I do like the wavy edge. The brown looks like a leaf skeleton, which I thought could well disappear later……
……. but I was pleased to find it was still obvious once it was fully felted.
I didn’t want a scarf, more a cowl, so the finished length was more than I wanted. Karen confirmed it was OK to cut it at this stage. This is the cowl end.
And I plan to cut this more or less in half and make into hand warmers. They aren’t going to be symmetrical, and will need some crochet or something to make them big enough.
The warm colours will add to the feel of warmth from the cosy felt on grey days.