Archives for posts with tag: canvas work

I did start writing my blog last week, only to find half-way through that I couldn’t insert any more photos – it was full. Over the years that I have been doing it, I have used 3GB of space.

Ironically, that post was called “New beginnings”, and this was the first paragragh:

“September for me has always signalled new beginnings, new classes, return to old groups and classes, but with new projects, fresh starts. This year has been no exception. Much as I have enjoyed staying focused on one project for more than a month (Bargello cushion), it is not my normal modus operandi. Starting new work I find exciting and stimulating, one idea leading to another, swapping from one piece to another as the mood or muse takes me.”

I had limited time when I was writing and have done a bit of research on the wordpress.com site during the week, still not really feeling any the wiser. I’m not sure how to connect a new site to this one and, as regular readers will know, many of my projects evolve over weeks or months. Nor do I know how to retain my followers. I don’t have many, and don’t really want to have to pay for a site. Even if I do, it seems as if I will be in the same situation in 12 months’ time.

So I decided that, instead of reducing the number of photos on “New beginnings”, I would show the finishing of my abstract Bargello cushion. The photo at the top shows the canvas work finished and trimmed, ready to attach the velvet that was cut and the zip that was put in a couple of weeks ago.

I did the side pieces first, machine stitching right up to the hole that the last canvas stitch went into.

Then I did the top and bottom, making sure the velvet was still all going in the same direction. As always seems to happen on squares or rectangles, three corners sat beautifully neatly and one wasn’t quite right!

It meant a little unpicking and re-stitching, before top-stitching to anchor the velvet through the canvas for added strength and to reduce the chance of fraying in use.

The front and back were attached together. The colours are truest on this next photo.

Then all it needed was putting in an over-large feather cushion to give a nice squidgy feel.

I’m really not sure where to go next with my blog, but hope I will be able to sort something out. Another possibility, at least for now, is to delete some of the older photos to make some space.

I have enjoyed writing it over the years, it has encouraged me to stay focused and document some of my work, particularly since I resurrected it at the beginning of lockdown; I believe last week was the first I’ve missed since then. It has become part of my weekly routine and I would / will miss it. I would like to thank all my readers, particularly for the comments and suggestions from some of the regulars.

Thank you all. Hope to write again next week.

In my stash I’ve found the perfect piece of old gold velvet to back the cushion and to frame the piece of nearly finished canvas work. It was just about big enough if I was careful with my cutting, even allowing for making sure the pile is all running the same way.

It was very much a case of measuring twice (O.K., several) times to work out how best to cut it. Once I’d trimmed the raggedy and uneven edges, I cut a long strip off one side for the short sides, along the canvas work once I’ve finished it. It’s not quite square. Then a zig-zag stitch along the raw edge, that will be folded under for the lower edge of the zip. I found one in my stash just the right length, if slightly pale. It’s totally hidden, so it’s not a problem.

I also found four different reels of gold Sylko thread that were all a pretty good match. That’s just as well because I’ve almost used up the one on putting in the zip and neatening the raw edges, which are the only bit where you will actually see a row of stitching.

I decided to use the oldest one, which also had the least on it. This was a bit of a trip down memory lane, with the Woolworth’s label saying 6 1/2; now is that “p”, or “d” which would date it pre-1971? Cheaper than I remember them, but on a plastic reel so nowhere near as old as some of my wooden reels of Sylko.

They had such wonderful names too: “Mustard Gold”, “Classic Gold” and “Old Gold”. Unfortunately the one on the top left has lost its name label.

I’ve put the zip in, the second side is pinned below. It’s the bit that I thought I was most likely to procrastinate about, so I’ve not finished the canvas work yet.

I don’t put in cushion zips in quite the conventional way, but make the top flap longer to make sure you don’t see the zip. This also means that it doesn’t catch on furniture or clothes. The back of the cushion is ready to assemble once I finish the front.

I’ve looked at the three possible colours to finish the canvas work along side the velvet ….

… and decided on the middle browny one. The light green is the same as the zig and wouldn’t give much contrast, as the wool would lie in the same direction, and the dark green I felt was too contrasty with the velvet.

I’ve laid a strip of velvet vertically and horizontally at the side of the canvas, and think it will all work. I just need to finish off the canvas work and assemble it all, a much less daunting prospect now that I’ve done the cutting and put in the zip.

I still had eight “holes” to fill in when I left off last week, and I made a start on the largest. I didn’t want to do just a continuation of the two patterns either side and for them to join up somewhere in the middle, so I changed direction with the greens. This gave me a guide line.

After a few rows of green I wanted a change of colour. On the row of brown, I realised I’d made another (!) mistake and had done only one stitch instead of two, which altered the angle of the curve. As I started unpicking I decided I liked it, so continued instead.

On the left-hand side I started stepping down to one stitch earlier on each subsequent row……

……. then back to the greens, and it soon became this (the light changing as I work).

On the next hole, I followed the zig down, using the same colours and stitch length as on the right (as if they go underneath).

So one hole became two!

On the left I continued with the caramels, following the existing pattern (and on the right, not shown).

I followed the escaping hexagons idea with the caramels …..

…. which became this.

It needed a green outline on the right, and the green pattern finishing off.

A few more filling-ins, and I was down to the final hole.

A different pattern …..

…… and the middle is finished. I love the colours and textures. “It’s orderly chaotic”, as commented on last week’s post by Amanda from viewfromourhill.wordpress.com; the ordered chaos which is the story of my life, which at times becomes disorganised chaos. There’s certainly a lot going on.

The three skeins of wool that I’d ordered from Etsy arrived early on Monday morning; the dye numbers are much higher, so presumably newer packaging than in the kit.

I was keen to finish the border, and it was only when I was nearly all the way round that I realised that I have had my usual counting problem: seven staight stitches instead of eight! The darker green had to come out, and the light green as well, almost back to the corner.

It was soon rectified, and progress commenced with a different pattern.

I also noticed that lines and colours didn’t quite look right on my DD pattern, so I unpicked the dark green and used the mid green to re-stitch …..

…. then filled in the rest of the gap with greens. I also put some more straight lines into the corner.

I added some more rows of steps, before putting in stripes of green in varying widths .

I didn’t want to continue the honeycomb pattern right across the panel, so let the stitches escape ….

…… and filled in with the colours of the honeycomb.

It keeps getting turned around to work on, just to make reaching easier, but it also helps with assessing the overall balance. This triangle looked too even …….

……so I added a brown stripe, followed by ……

…… more greens and brown, coming from the other direction.

This is where I’ve got to so far, and the orientation as I envisage it when finished. I think I’m going to have plenty of wool, but want to finish the stitching while I still have the opportunity to get more brown if I need it. I don’t have enough green for the other half of the border as planned(top left). It will take most of a skein, but I do have a choice of brown, dark green, either of the caramels or repeating the existing green, but I haven’t decided yet. I think it will be easier to assess once it is all filled in.

A couple of folk (thank you) suggested Etsy for the Twilley’s stranded embroidery wool, and I’ve found the green (45) that I’d run out of so far. There were three skeins, and I asked if by any chance they had any of the other numbers; yes, number 49. How I didn’t spot it is beyond me, but turns out there are only 2 green, so I have a brown (49) on its way too. There’s more 49 available, so I need to get on with it quickly to see how many I might need: a good excuse to stitch.

I have been making progress anyway, athough I’ve done a couple of stitches too short (spot above!). I’ve been trying to use the tangle of threads left in the middle, which is how it was when I bought it in the charity shop. Some were on the back, and kept catching when I was working, so I brought them through to the front.

I have also tried to continue to the border with the patterns I’ve started, before running out of any more colours. In the end, I put in a tacking stitch to show where the lines and corner are. Now I’m waiting for the wool to arrive to finish the last few stitches in this corner.

Then I added some dark green, both sides of the pattern.

I used some of the ends to finish this section.

Now it’s just the green (45) to finish the row.

A couple of short bits and I just got there.

I wasn’t sure how to progress here but, seeing that I had three strands of the lighter caramel all attached, I decided to come down in steps …..

…… to the corner.

And I filled in the wavy lines to meet it. I’m trying to balance the colours and patterns to use the skeins that I have left and the ones that are in the post.

I’ve been working back in my colour palette comfort zone since I finished the Bargello pincushion. I’ve had it propped up where I could see it while working on other things, and I wasn’t quite sure where I was going with it, but I wanted to include my initials somehow after seeing “A Pot-pourri of Patterns” ……

…….. in Julia Hickman’s book “Tapestry and Beadwork” years ago.

I started working at a different angle after having another look at the book.

Then, seeing it propped a different way up (top photo), I realised that the big zig-zag almost looked like my stitched signature of two interlocking D’s. Two rows of straight stitches later and a bit of infilling, and my initials are almost hidden in the pattern.

I’ve made a start on a border, again inspired by the book. But I made it a stitch longer, which also affects the width.

Then I started filling in, to see how it will look.

And I’ve gone round the corner, but I’m going to change the corner from the one in the book.

I’m not sure if the border is deep enough, so may do with something round the outer edge. It will give me a boundary to work to, once I’ve gone all the way round.

Even a photo of a family of moor hens that I took this morning on the river bank in Brigg is the same colour palette.

I’ve continued with the abstract Bargello pincushion, mainly in shades of pink, but also made a level edge with mauves and purples at the top (or will it become the bottom?). I had done the longer stitch of pink, following the single stitch row of mauve, before I realised it would make the canvas piece too big for the pre-cut patchwork piece of cotton. I undid the pink, having counted the holes to make it square, but decided the canvas would fold over the three stitches of mauve. I should have counted and set my boundaries before I started with the fun bit, but was too impatient….. more haste, less speed. I did the fuschia pink pattern two stitches wide.

Then I followed that with a double row of yellow, picking up the colour from the variegated thread. Initially I thought it would be too dominant, but it balances out with the rows in the rectangles. For all the yellows I have, it was tricky to find the right shade, but in the end I was happy with the choice.

I continued to fill in the spaces with different shades, textures, matt and shiny threads, totally forgetting to take photos as I worked. I only remembered after I’d put the pale backing fabric behind the canvas (see Abstract Bargello), and machine stitched round following the edge of the canvas stitches, then the darker one for the real back leaving a gap to turn through and trimmed the corners.

I decided not to make the corners really square and left them nicely rounded, which somehow made it feel more cushiony. The top edge is ready to be ladder stitched once I’ve stuffed it.

Then I considered doing a beaded edging, and even sorted out beads, before I saw coral knot stitch being worked on another pincushion, and decided to do that. I tried a couple of thinner perlé threads then settled on two strands of perlé 5 in a dark purple, which tones with the back perfectly. By the time I’d got all the way round I’d got sore fingers. It was tough pulling it through all the layers, but I’ve learnt a new edging stitch and it’s finished, more than two weeks before I need it!

I’d planned on taking this charity shop find (from long, long ago) to work on at the Bargello sessions at Alex’s “In the stitch zone”, but as I wrote in last week’s blog post I managed to leave the frame on the settee at home.

It was already stretched on a frame and started when I found it. I thought it would cover the piano stool, but it ‘s not quite big enough. It could be extended by adding more canvas, but on looking at the piano stool the cover is perfectly fine as it is. The other alternative was to cover what was my Nanna’s foot stool but, on looking that out, again it’s not quite big enough; and the only thing wrong with it is that the edge needs a new trim.

So I’ve decided to make it into a big cushion, with the Bargello just in the middle of the top like the big canvas work cushion that I did several years ago (2014) (Finished canvas work cushion). It would seem the other later one that I did was when I wasn’t blogging. Another charity shop find?

The centre was done in honeycomb stitch, but I had always intended to do variations of Bargello to finish it.

I did a little reading about the technique and looked at a few books, and then decided rather than follow a pattern I would use the basic principles of zig zags but make it up as I went along. I did this pattern in pairs of stiches, but varied the length of the stitches on each row.

This one is one stitch wide (except where I’ve done two together by mistake, but for some reason the left hand edge is right!). Again I’ve varied the length of stitches on some of the rows.

And this one is three stitches wide with stitches of varying length in the green wool, and two wide on the caramel coloured stitches.

I’ve now done about as much as the centre hexagons that were done when I bought it. We have a catch up / own project week coming up, so I may continue with it then, but it’s easy to pick up when the light is not good, and I feel as if I should make use of the good light that we have at the moment.

We have a few new folk in the group, and it’s been suggested that we take some of the things we have finished or are WIP’s for them to see the sort of things that can be done. Plans are being considered for next term.

Alex has sent us all a list of things that we have done since the group stated pre-lockdown; some I had forgotten about, so once I sort them out they’ll pull me in several directions!

On Monday morning I was trying to sort out my many projects and only take the current one to Alex’s “In the stitch zone” on Monday afternoon. Threads, etc., that were finished with, were put back in the appropriate places, and I could actually travel light with only one bag, and not need to take the several WIP’s I’d taken the last few weeks when I’d just grabbed a bag as I dashed out of the door.

While eating my lunch, I’d even remembered that I’d left my basic sewing kit pouch upstairs when I’d gone up to use the sewing machine (before getting side-tracked on to something else).

Only to get three-quarters of the way there, I realised that the frame with the Bargello was still sitting on the settee, and I had no other project, fabric or threads with me! It wasn’t worth going home to fetch it, nor time. I knew Alex had some canvas and threads that she’d said we could use, and it was the ideal opportunity to make a start on the pincushion for the Seata birthday party at the end of July, something that I’ve known about for months but couldn’t make up my mind what to do. I’d had lots of ideas, but nothing that had really grabbed.

I picked a pretty variegated perlé thread (above) from Alex’s box, knowing I have a card the same at home. These were not colours I would normally work with, especially on natural coloured canvas, but I didn’t want to use white as it would show through too much. I didn’t want to follow a traditional Bargello pattern but to do an abstract Bargello pattern, so started with a zig and a zag before using up the first length of thread. I then started at the edge and worked down first, deliberately not making it a mirror image, and on the up going “underneath” like in Celtic knotwork.

Then I continued across the canvas.

A change of thread and I followed the bottom line, making two stitches level at the new bottom edge, which changed the angles of the zigs and zags. Then I put some long stitches in the right hand rectangle, before doing a single stitch with the mauve perlé. Once again I got so carried away that I forgot to take photos. Some of this was done at home, once I’d sorted out more threads.

Here are possible threads, but leaning towards the pinks and mauves at the moment.

The bottom row is two stitches wide, the same length.

I started putting in a row of pink at the top, but then realised it would be easier to make it the right size if I were to put in the bottom edge, having already decided on the width determined by the pre-cut quilt square of cotton.

Then I had to choose the piece of fabric for the back.

There were several contenders, but the others were too pink, too pale, too patterned, etc.

It’s coming along nicely, and at least I’m not rushing it at the last minute (at least not all of it).

I’ve been having a tidy-up and sort out recently, and have been trying to deal with things as I got to them rather than the out of sight out of mind technique: a slow process.

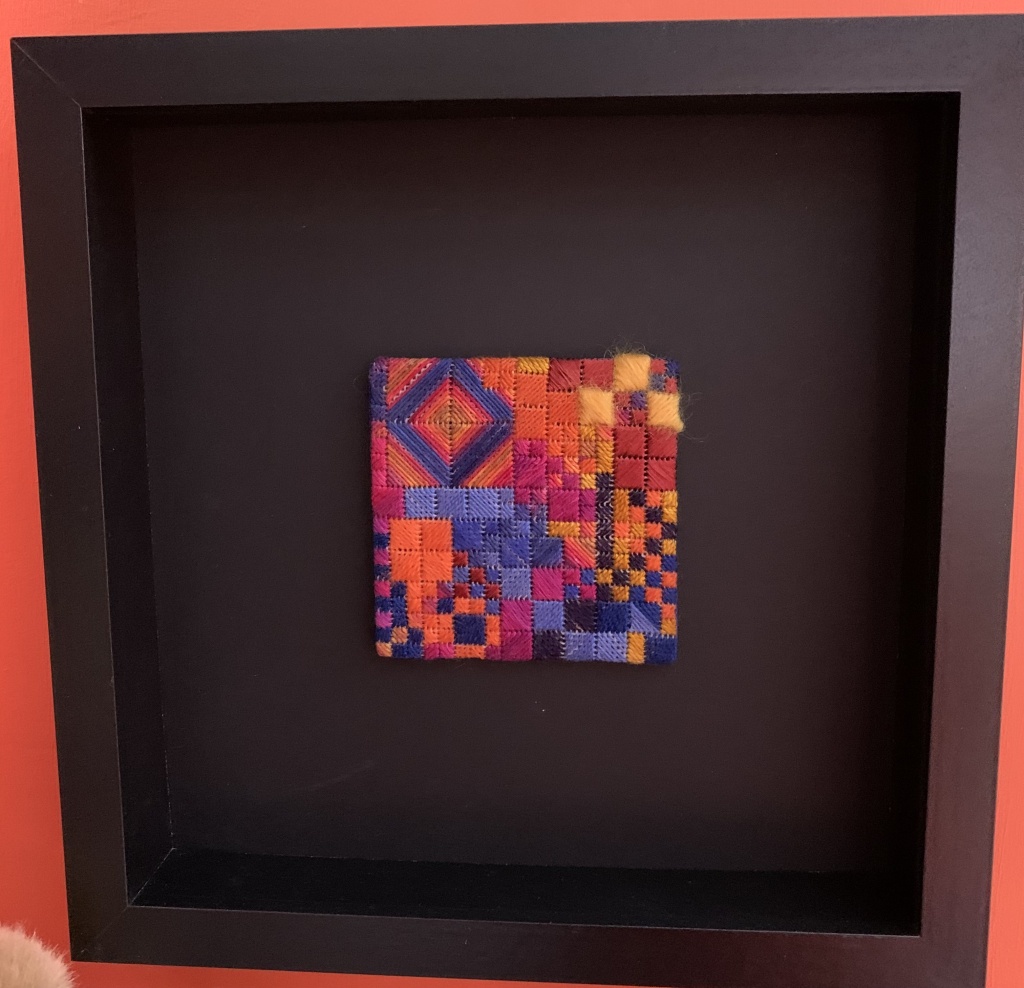
One of the things that I have finished is the cushion stitch piece from last year. Last seen last November, and it was finished then (at least the stitching, “Move it on”), but I was not sure what to do with it.

I finally decided to frame it in a black Ikea frame, but wasn’t sure whether to mount it traditionally with cream board up to the edge. I then decided it would look better laced over card and put on a backing board. Somewhere along the line, it became a piece of black mount board. It is stitched through to anchor it. The orange cushions echo the colour of the wall behind where it’s going to live, and it looks as if it’s always been there!

The threads that have been left together have all been put away in the relevant places, in case I decide to make it bigger.

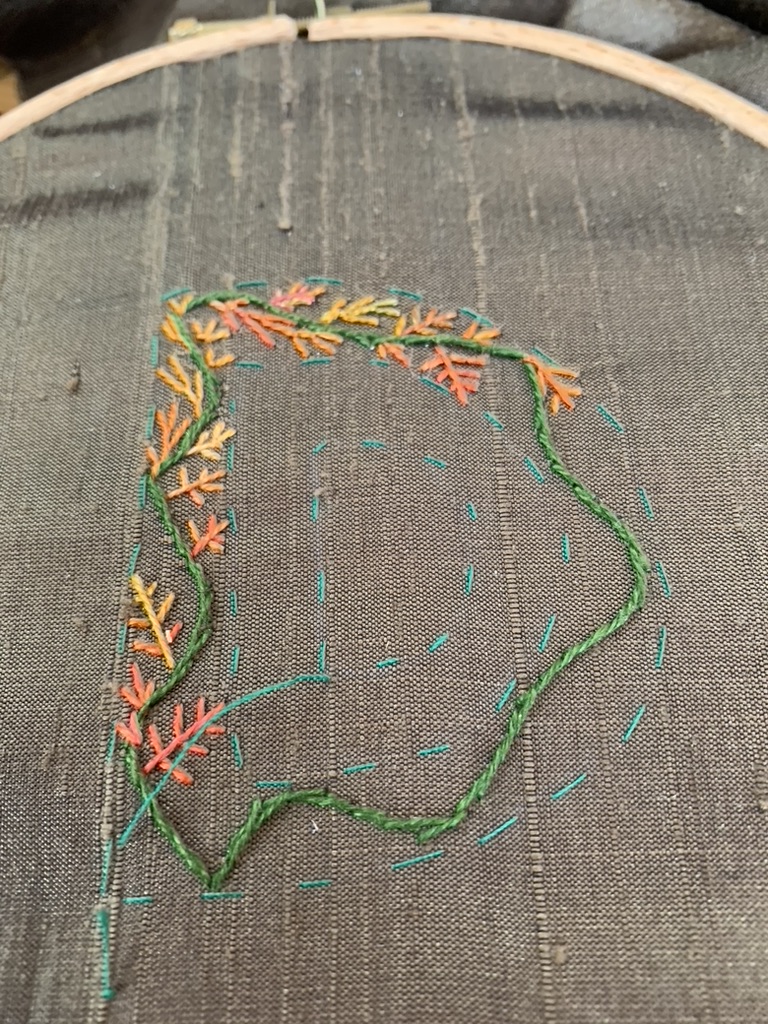
Another piece that has been around for a month or so was an encrusted letter that was started at Alex’s “In the stitch zone”. I went off piste having decided to do my initials DD one inside the other. The background is a beautiful piece of slubbed olive green silk. I tacked the outline of both Ds, then used stem stitch to work from one side to the other on the outer D. The vaguely leaf shapes were done in a lovely variegated thread that I had been rather frugal and precious with.

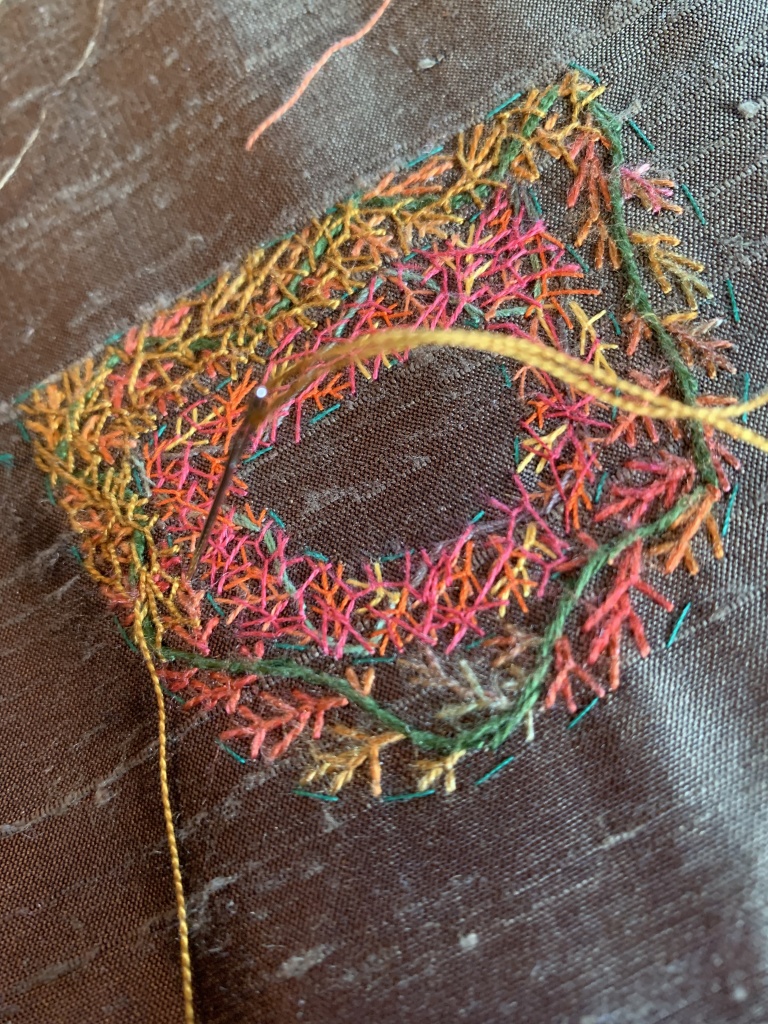
The inner D continued with finer perlé threads, but with no more photos taken until this week. After some discussion with Alex, we decided that I needed to echo the pinky reddish tone from the outer D. I got rather carried away with loose fly(ish) stitches going over the leaf shapes, adding more over the outer D as well, to give more definition up to the tacking outline.

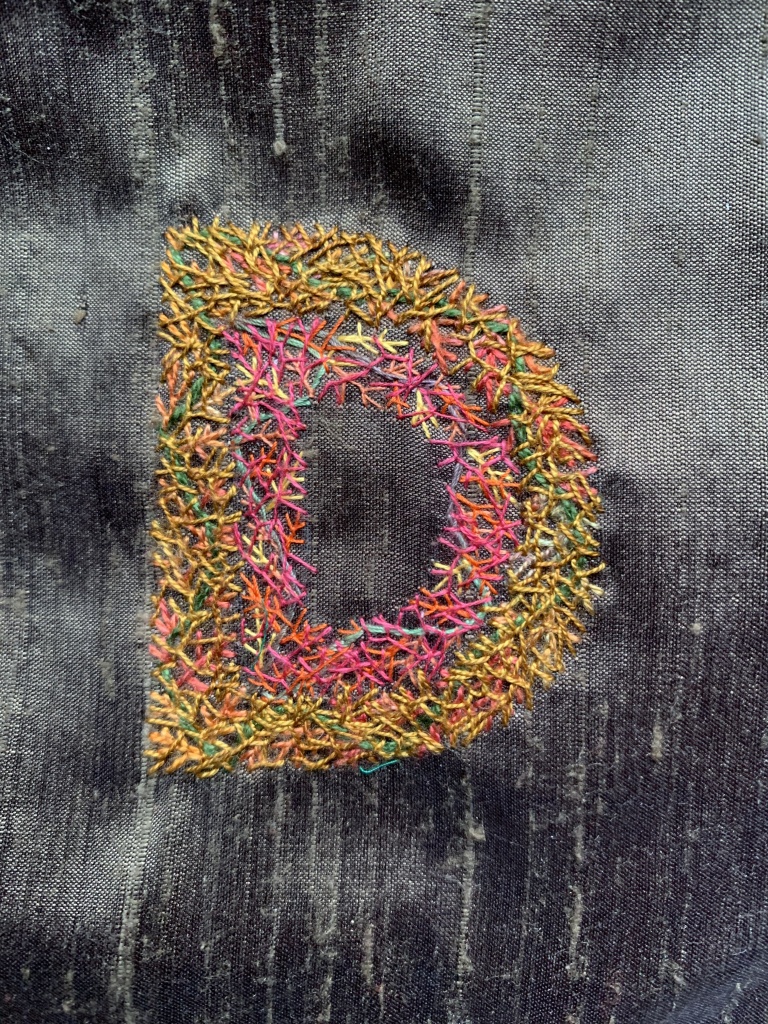
Alex said it made her think of the brambles of Sleeping Beauty’s castle. It’s finished, apart from taking out the tacking threads.

This is it with the tacking taken out. I’ve missed a stitch in the middle at the bottom!

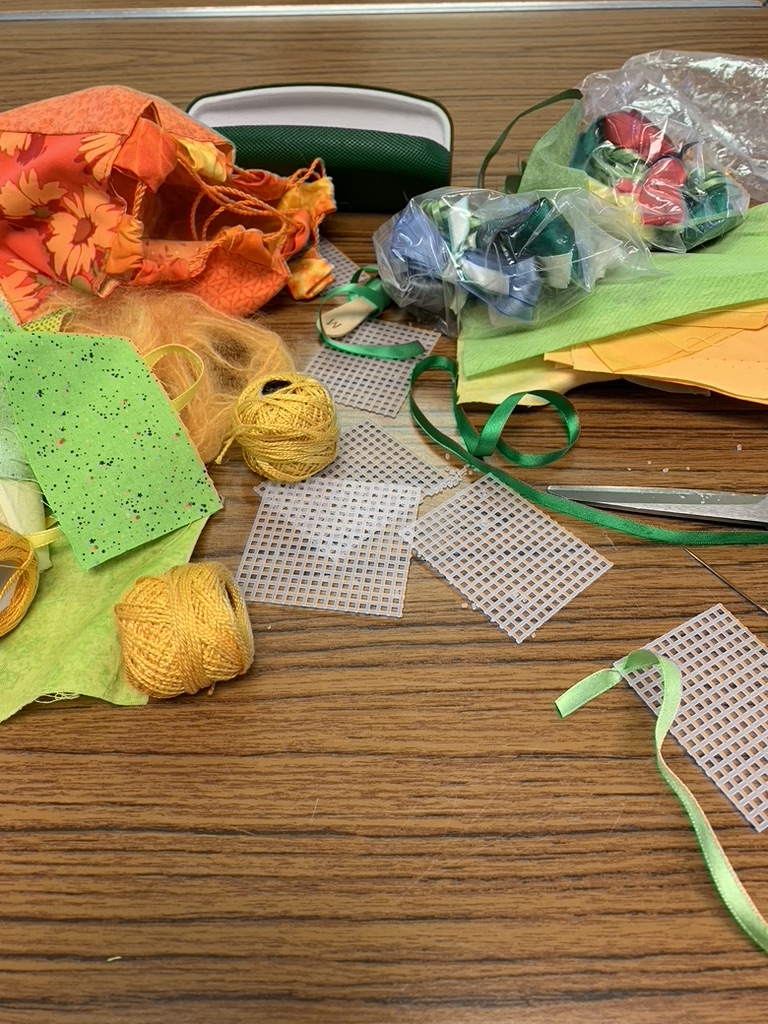
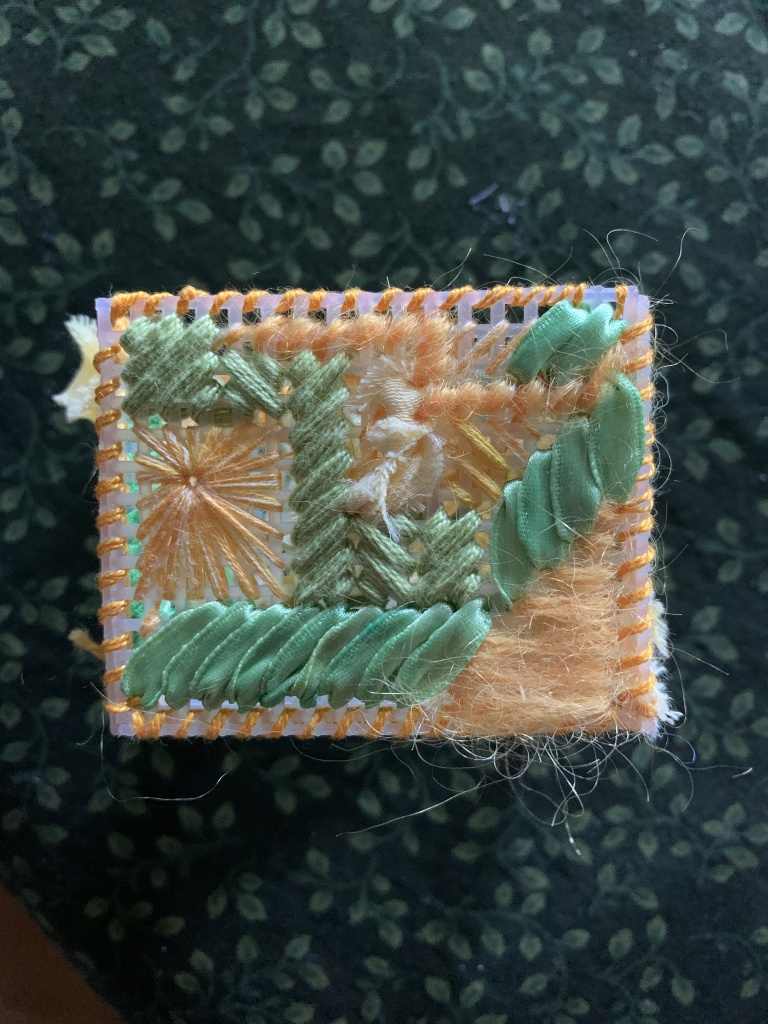
At Allsorts a couple of sessions ago we made tiny plastic canvas Easter baskets. I really dislike plastic canvas to work on, especially when it needs joining together, so I really messed around using scraps cut off other things and odds and ends of threads and ribbons in yellows and greens.

I continued it at home while chatting with friends, and much to my surprise some bits worked OK.

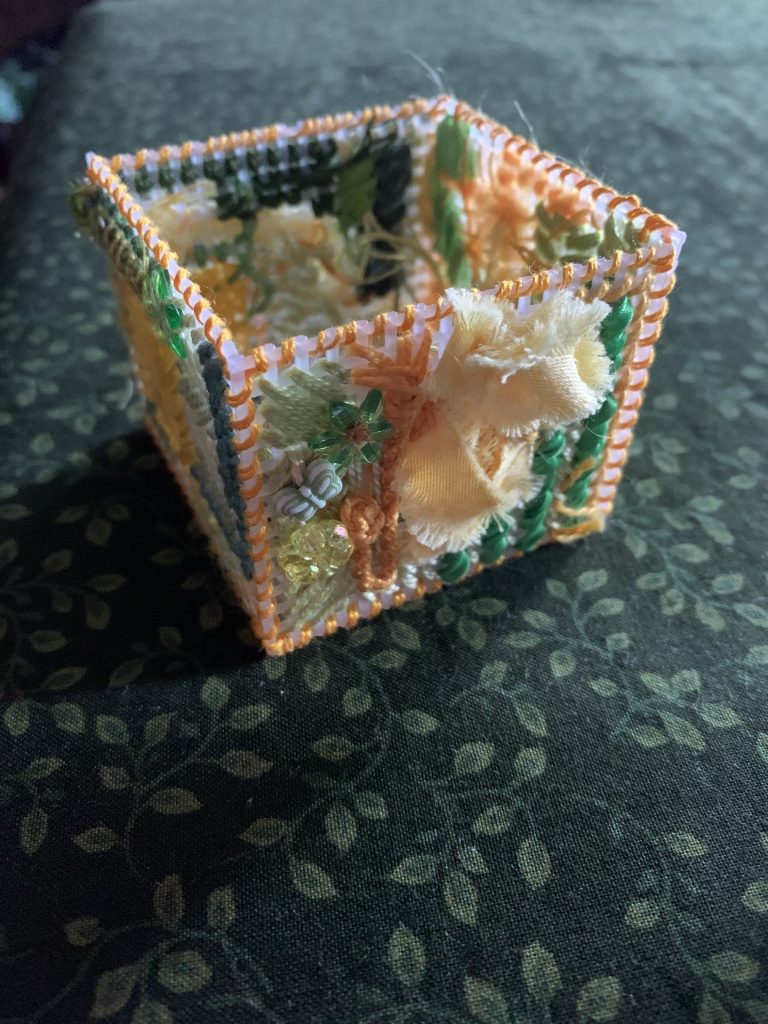
It even went together more easily than usual.

I ended up stitching it together and finishing it, apart from putting a lining in it: just shows it’s good to play and experiment!