Archives for category: scraps

“Birds, birds, birds” was the title of the worshop that we had with Jan Dowson a couple of weeks ago at Seata.

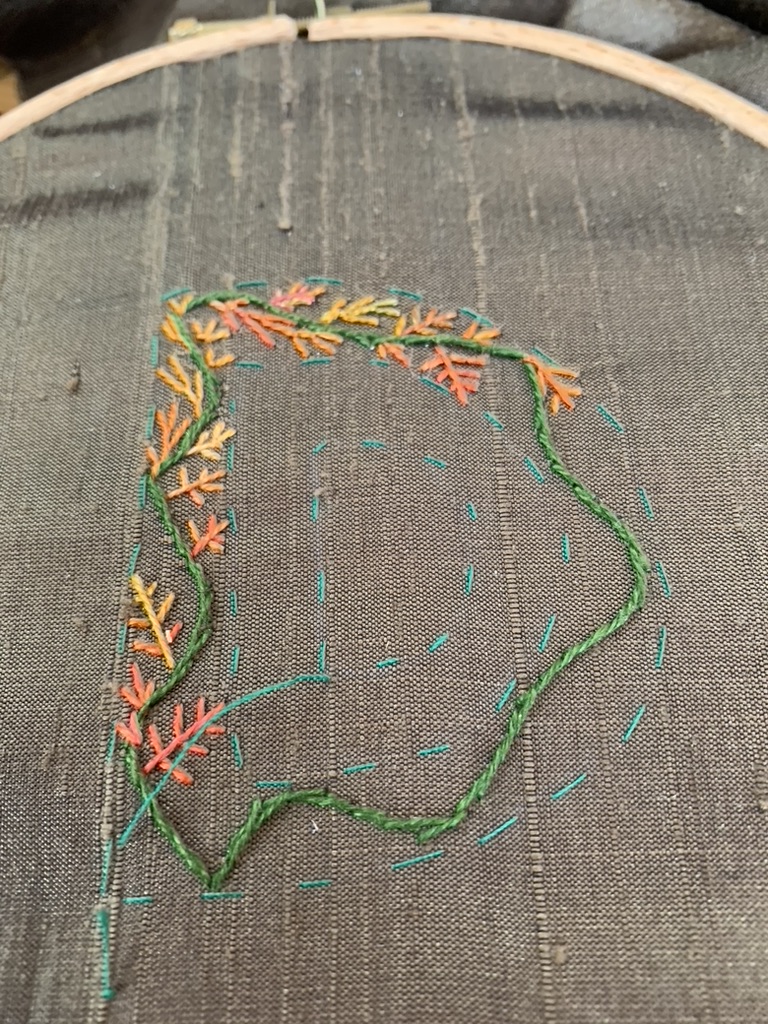
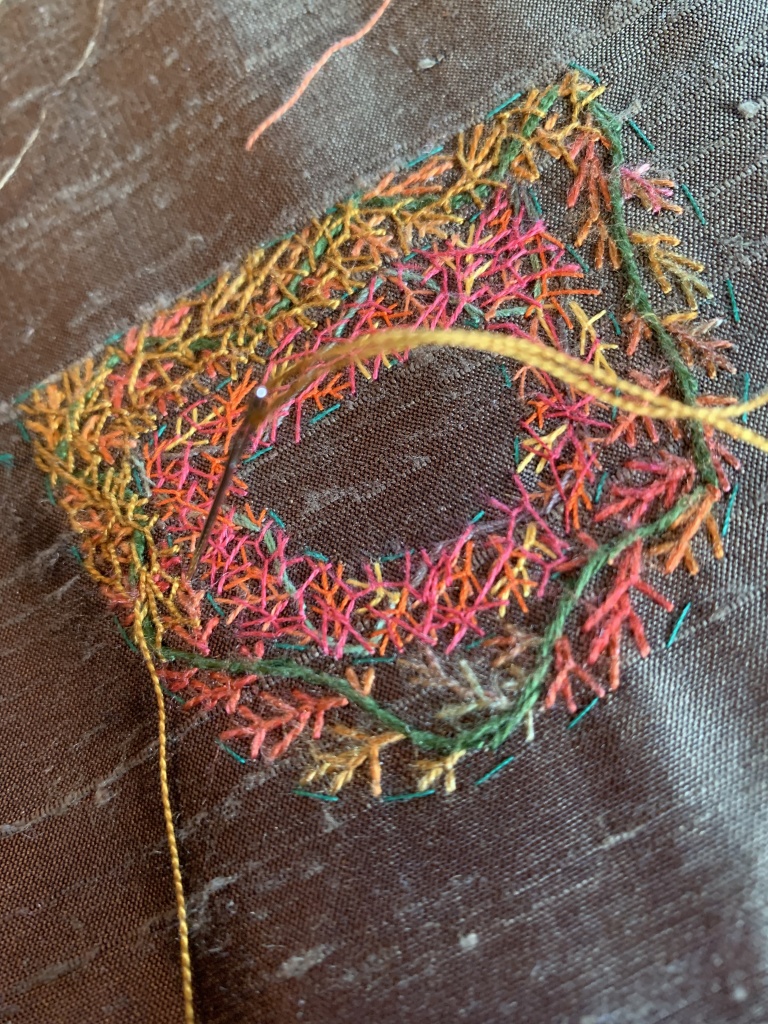
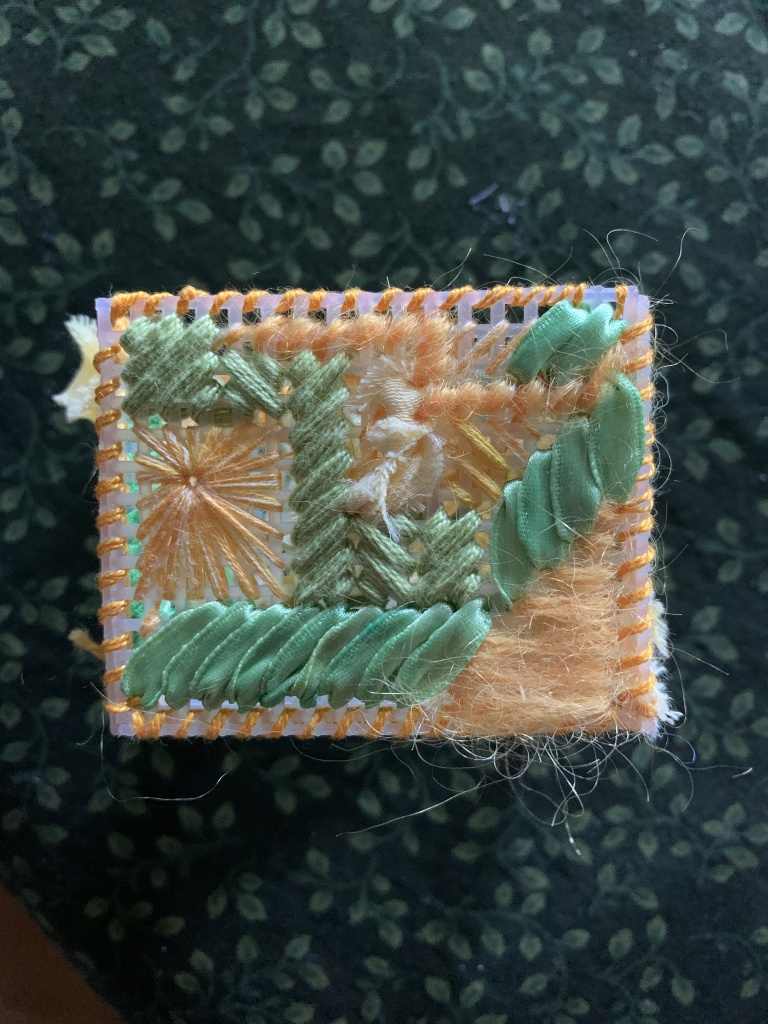
I’d met the challenge to myself of finishing the slow stitch landscape before Jan came. The last couple of sections at the top…..

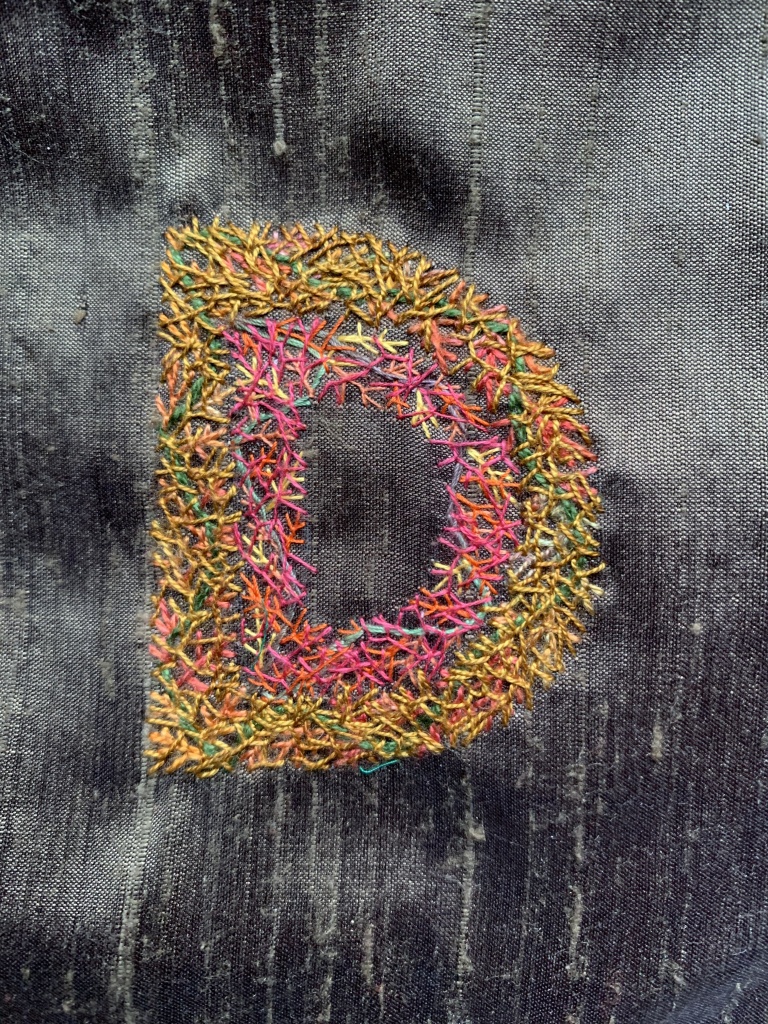
…….. and some more stitches on the stone wall at the bottom, and it’s done (apart from deciding how to hang it, probably from a branch).

Going out of the back door the next morning, I saw this skein of geese flying over. I’d heard geese for several days, but this was the first time that I’d seen any this autumn. Later, when looking at photos on my phone, I wondered what it was, because it looked like a line of stitches, and I couldn’t think what! It was only when I downloaded them on to the computer that I remembered, and it just seemed appropriate with the upcoming 3D bird workshop.

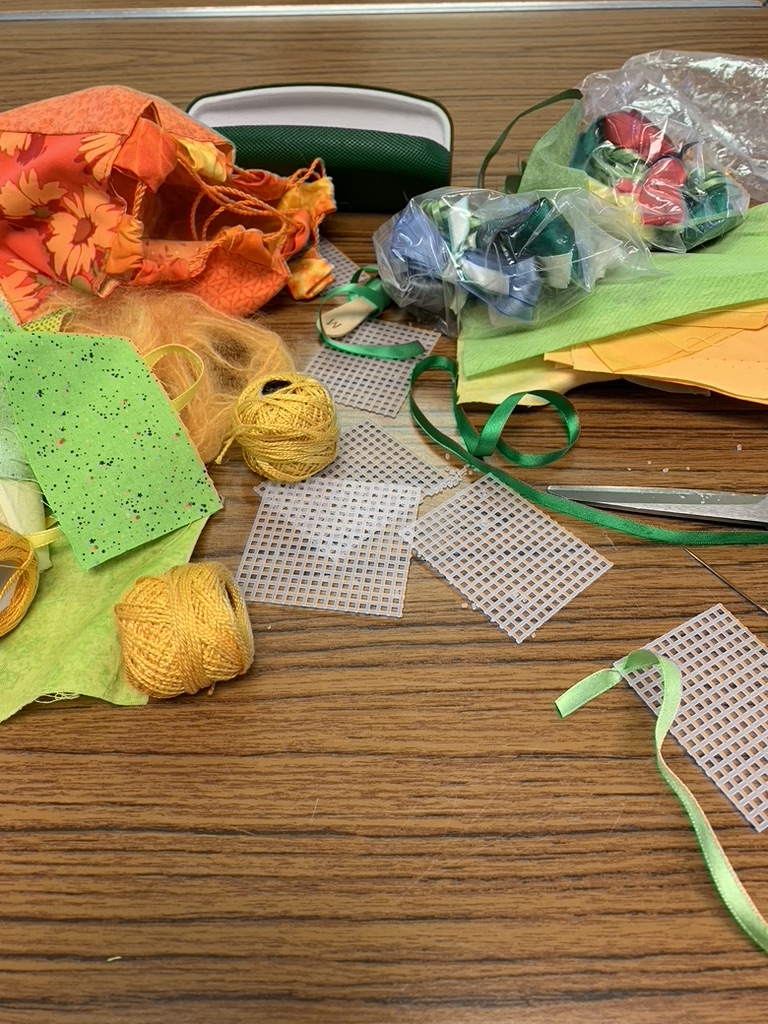
Jan had a pattern to trace and cut out, instructions, calico, legs, beaks and eyes for us all. The pattern included some tiny little gussets to attach to the main body and head. We could hand or machine stitch them together. I hand stitched / tacked the head one in place, then pinned the tummy pieces and decided to machine stitch it all. I did the head gusset and started turning it to the right side before doing the tummy pieces, all very awkward and fiddly, and only as I started to pin the two sides of the whole head and body together did I realise that I’d done the head one way and the tummy pieces the other. I decided rather than unpicking it ……

……I would make a feature of the seams on the head. The whole bird was then firmly stuffed before adding the legs. Jan’s husband Derek had made all the legs, twisting wire for the toes (claws)and legs. Tricky, but it seems he’s had plenty of practice. It was fiddly enough to cut them to the right length and twist them together at the top, once they had been pushed up through the holes in the calico, before more stuffing and ladder stitching the tummy gap. Much to my surprise it stood up and was quite stable.

Next the eyes and beak, which has some fluffy bits of feather stuck in where the beak goes in, before wrapping the legs in florist tape: still standing.

Now to start stitching tiny scraps of fabric to the body. I didn’t know what colour I wanted to make him / her, but no prizes for guessing! Time passed all too quickly, and this is the flock at the end of the day.

I had taken other colours possibly to use, but reverted to my favourite greens. It was lucky that we ran out of time, as I had about used all the scraps I had with me. I heard somebody mutter that mine had attitude and looked inquisitive. I haven’t done any more since, except finding some more green scraps ready to continue.

It was a great workshop – thanks, Jan. And it had pushed me into finishing the slow stitch landscape.

I’m still pushing the “not starting anything new” from No, no resolutions on 3 January, and working on existing projects. For several reasons, I’ve started working on my jacket again; the weather has had the odd warmer day and I can start wearing it again, albeit under my waterproof on a couple of occasions, and I’m using the jacket to follow the “in the stitch zone” sessions.

The first session was a re-cap on feather stitch. I’m working directly on to the sleeve, using a selection of weights of perlé, including a lovely Stef Francis variegated one that matches the colours on some of the applied pieces. I was working downwards (it’s easier to work it towards yourself) from the bottom of the sleeve…….

……. but really it’s going upwards.

I’ve got to the shoulder seam with some of the threads now, so it appears to be hanging / growing down from the seam.

I’m still working on this, but it’s easy to pick up and add to it. I’m planning on going between two seams on the sleeve.

The next session was the first of Colour-play photo palette: crazy patchwork. I’m going off piste as usual and using my jacket instead of a photo. I’d sorted out a selection of cotton fabrics that are colours in other pieces on the jacket. It’s good to be using and recycling / upcycling scraps from my stash. It’s really meant to be raw edge and the feather stitch goes over the join, but because it will be worn and washed, I feel it will be more robust to cover the raw edges; so I’ve ironed them and folded under a hem on one side.

My plan had been to put it almost like an elbow patch on the sleeve, but the consensus was that it didn’t look right.

I didn’t want to put it on the other sleeve, as that in my mind is going to be leaves from previous sessions in a variety of stitches, with reverse chain stitches linking them together.

The other front pocket was dismissed too, which leaves two panels on the back. After much shifting around of fabrics, the left side one ended up like this.

Some of the fabrics bring back good memories of friends. I’m not sure where the flowery piece came from. I love the pinking sheared edge which will be hidden by the feather stitch, but it looks better balanced this way up.

I was hoping to stitch it directly to the jacket, but Alex thinks it will be better to back it with calico and apply the finished piece. This also has the advantage that I can continue wearing it without fear of pins, needles or losing bits.

Alex had a very fine cotton (almost a lawn) that she gave me to use. It’s got a lovely little placket that I might salvage somehow!

It now has tiny stab stitches to tack / anchor it down, apart from the flowery piece which might get moved / applied afterwards to keep the zigzag edge. We have four more sessions on this project, so at the moment I’m only going to work on it in class.

I’m still working on my canvas work piece when not in class. It’s coming along, but more on that soon, hopefully a finish.

Last Saturday was the second Great Scunthorpe Embroidery Challenge, the winner to be decided by the members at the end of the day. This is now to be an annual event, and this time the theme was “Flower, bud, leaf or root”. No stitching was to be done before the start, but we could practise in advance and prepare backgrounds, etc.

The only thing that I had done was decide that I would do a flower, and that It would be suitable to attach to my colour-play canvaswork. I was still sort of meaning that I haven’t started anything new yet this year, working on finishing off a few things first!

That gave me a colour palette to work with. I stretched and painted a piece of white linen(?) with the same acrylic ink as I painted the canvas with a few weeks ago. I found some scraps of handmade felt from the felting workshop with Eve Marshall that would be just big enough to cut out some petals. I also found a partly-cut piece of chiffon scarf, but with quite a lot of the rolled edging on it, and the bag of threads that I’ve been using.

I planned on using the same back view of the aqualegia for my shape, and all set to go.

As often happens, I got carried away with my stitching and it was almost lunchtime before I remembered to take photos. I cut five separate petals from the scraps of felt and couched down the back of them with a bronzy / gold perlé. I was working in my hand, and manipulating it all as I went. The length of chiffon had the rolled edging on most of it, and I gathered it up as I stitched. When I offered it up on the pink background, it all looked a bit flat, so I took it off and stuffed a circle in the middle (underneath) with a little fleece to make it more 3D, and then re-attached the chiffon.

I strung several strands of beads from the Alysn Midgelow-Marsden kit to put underneath…..

…… and they are just visible through the chiffon. I just had time to attach it to the pink background (I’ve left all my threads ready to attach it to the canvaswork) before it was time for the judging.

We all have five beads and can choose how to award them, all for one piece, or spread out in ones or twos, and the winner is the one with the most beads. (They used to be put in saucers, but now we have little numbered cloth drawstring bags, so we can’t see who has got what.) As ever it was hard to decide how to distribute them. There was some fabulous work.

I’m not going to attach it yet, it would just be another area to catch my threads around. So, back to the canvaswork, also not sure yet how much of the pink backgound fabric to use. It will be easier to see how it will fit when I’ve covered more of the canvas.

Last Saturday at Lincolnshire Textiles, we had a workshop with Alysn Midgelow-Marsden, combining metal and beads with fabric and stitch. After a short explanation and demonstration, and a quick look at some of Alysn’s samples, we were all keen to get started.

Organic shapes were suggested, often a bit more forgiving if not perfect. I’d taken a lot of flower photos on my phone in the garden earlier in the year, and I thought that I could use one of those. I settled on these of Aquilegia, Columbine or Granny’s Bonnets, as they are commonly called. They are such complex shapes that I have never attempted to draw them previously …..

…… but luckily I’d also taken a back view, which was much simpler to draw.

We all had a pack with instructions, a piece of soft metal (mainly copper), some velvet, sari silk, scraps of scrim, etc., and a pack of mixed size beads. On each table there was a selection to choose from. The difficulty was choosing which colour pack to have, because several had various elements that jumped out at me. I settled on a burgundy velvet and a copper with several colours across it.

As often when I get excited and keen to make a start, I forgot to take photos. I’d already drawn with a stick, turned over, burnished, cut out and made some holes to stitch down through, before someone mentioned taking photos. This should have been the right side ……

…… but the back looked more like the shape of the back of the flower.

I tucked a scrap of fine silk under the metal, some scrim and a sari silk strip at the bottom, and started adding some beads, picking them up quite randomly to make little strings and loops.

A close-up photo of the textures and details.

I added more beads, and frayed out the edges on more sari silk scraps. The time went very quickly and it was soon time to pack up and go home, but I’d had a lovely day. Thank you, Alysn.

I want to find some of my own bits to add to where I’ve got to so far. I’m thinking that I’ll have some of the bits coming off the bottom, but not quite sure yet how it will end up.

Last Saturday we had a long awaited Hand Stitched Landscape workshop with Jan Dowson. On Saturday morning, I was still undecided about what to do, busily scrolling through my thousands of photos. For all the photos that I take, I don’t take many landscapes (or people). Most are details or macro / micro of flowers, fungi, stitching / textiles, work in progress. I narrowed it down and printed half a dozen and madly gathered scraps in the right colours.

We all gathered round at the front for a brief look at some of Jan’s work and techniques, and listened to instructions and the plan for the day. Jan handed out large sheets of heavy paper, goody bags with written instructions, a selection of scraps to add to our own and a pattern for a little bird.

We had to simplify our chosen landscape, a sunset over Scunthorpe steelworks.

Jan walked around, looking at our ideas and drawings, and making suggestions. When she saw my photo of sheep at Brampton Banks, near Hadrian’s Wall in Northumberland, she thought it lent itself to the technique better than the steelworks photo. It has more obvious horizontal lines, and would be easier to do for a first piece.

So I did a few quick sketches. The photo was taken further down the line, I’d got so involved with starting that I forgot to take photos until much later in the day.

Here are my scraps and Jan’s, mixed together as I started making choices.

This was much further on. I’d originally ignored the sheep, and started tacking down when Jan came round on another circuit, and said she had some printed sheep fabric I could use. I wasn’t convinced at first, thinking it would look rather twee, but cut out the smallest group of four, and then the two slightly larger ones for the foreground. I must say I was surprised: it brought the whole thing to life, and the scale worked. It now needs stitching. I’d just about got it all tacked down when it was time to stop for lunch.

The plan for the afternoon was to use scraps to form the little bird, and then stitch on feathers. I used a variegated perlé. He still needs legs and the eye stitching down, and I’m not sure if the eye placing is quite right, but the design of the silk scrap for the head has a centre where it fitted (see the photo above, with the paper bird pattern, in the yellow and blue piece). As always the day passed really quickly, and soon it was time to look at what everyone else had done and then pack up.

I also remembered to take my copy of Jan’s book and got her to sign it for me. Thank you Jan, and for a lovely day.

There’s a lot more slow stitching to go, but it’s something that can be picked up and worked on, now the main decisions have been made.

I’ve been having a tidy-up and sort out recently, and have been trying to deal with things as I got to them rather than the out of sight out of mind technique: a slow process.

One of the things that I have finished is the cushion stitch piece from last year. Last seen last November, and it was finished then (at least the stitching, “Move it on”), but I was not sure what to do with it.

I finally decided to frame it in a black Ikea frame, but wasn’t sure whether to mount it traditionally with cream board up to the edge. I then decided it would look better laced over card and put on a backing board. Somewhere along the line, it became a piece of black mount board. It is stitched through to anchor it. The orange cushions echo the colour of the wall behind where it’s going to live, and it looks as if it’s always been there!

The threads that have been left together have all been put away in the relevant places, in case I decide to make it bigger.

Another piece that has been around for a month or so was an encrusted letter that was started at Alex’s “In the stitch zone”. I went off piste having decided to do my initials DD one inside the other. The background is a beautiful piece of slubbed olive green silk. I tacked the outline of both Ds, then used stem stitch to work from one side to the other on the outer D. The vaguely leaf shapes were done in a lovely variegated thread that I had been rather frugal and precious with.

The inner D continued with finer perlé threads, but with no more photos taken until this week. After some discussion with Alex, we decided that I needed to echo the pinky reddish tone from the outer D. I got rather carried away with loose fly(ish) stitches going over the leaf shapes, adding more over the outer D as well, to give more definition up to the tacking outline.

Alex said it made her think of the brambles of Sleeping Beauty’s castle. It’s finished, apart from taking out the tacking threads.

This is it with the tacking taken out. I’ve missed a stitch in the middle at the bottom!

At Allsorts a couple of sessions ago we made tiny plastic canvas Easter baskets. I really dislike plastic canvas to work on, especially when it needs joining together, so I really messed around using scraps cut off other things and odds and ends of threads and ribbons in yellows and greens.

I continued it at home while chatting with friends, and much to my surprise some bits worked OK.

It even went together more easily than usual.

I ended up stitching it together and finishing it, apart from putting a lining in it: just shows it’s good to play and experiment!