I have been working away at my “bubbles ” piece over the last few weeks. Having been stitching on the widest middle section, it didn’t seem to be making much progress. It’s only when I looked back at going round in circles and bubbles that I realised how much I’ve actually done, also how much the light has improved and lasted longer in the day over the last few weeks. The colours of my photos now look much more how the piece looks in reality.
I’ve done a mixture of new and familiar stitches with some made-up or improvised ones, continuing to use a range of textures, in a narrow range of colours, as requested. I’ve added some more threads to my original selection.
I’ve used this lovely slubby one …..
……. to couch down the thick section with the thin section.
The chain stitch ring on the left was a stitch new to me, and it works like magic! Two different shades of green perlé threaded into the same needle, a normal chain stitch alternating the colour you wrap round the needle, and pulling through. I really couldn’t see how it could possibly work at all and, if it did, I thought the threads would knot or tangle as I pulled the needle through. No, it really worked easily and magically. I want to try it with more threads in my needle. And as you can see from the tacking lines I have nearly got down to the point.
I was pleased with these random long stitches across the ring so much….
….. that I did a smaller denser one.
Simple lazy daisy stitches ……
….look quite different when they are done much larger, and are arranged to look flower-shaped.
I’ve done some more french knots to use up the ends of some of the threads in my needle, and a whole bubble of french knots (see back at the top of the post). This is how much I’ve done so far. I can see other uses for some of the stitches, and better ways to use some – it’s sort of become like a big sampler. I’m still being patient and not putting on the sequins……. nearly there.
Who doesn’t like a little bit of magic? I always want to wave a magic wand to sew up knitting and weave in all the ends, and much as I love to stitch there is just something about sewing up knitting that I really dislike.
I have tried several methods in the past with various degrees of success. When I was machine-knitting, I often used the cut and sew technique, where you knit your piece of ‘fabric’ and then treat it almost as you would a dress-making fabric. My old Frister Rostermann Cub 7 machine, that I had for my 18th birthday, had a mock smocking stitch that was really good for neatening the seams. It had several points of contact, so there was no way even the finest knitting could come unravelled.
The first year I had my knitting machine (October half-term) I ambitiously decided that I would make all the family a jumper for Christmas; only a dozen or so. Once I finally got over the whole piece unceremoniously falling on the floor after the first few rows, caused by some simple thing I hadn’t registered the demonstrator doing that I wasn’t doing, I was up and running. The pile of fronts, backs and sleeves mounted up at the side of my chair, waiting to be sewn up. Colin was convinced that everybody would get jumper kits not jumpers. I even managed to knit one for Colin without him realising as I did it the same colour as another one. I did manage to get them all sewn up, but when I got to the stage where I could see I wasn’t going to finish them all, I roped him in to weave in the ends.
All finished and wrapped by Christmas Eve, I stitched up his when he had gone in to town for last-minute shopping. His mum spotted him going up the Grove to turn round just as I was putting in the last stitches. I hastily wrapped it and put the bodkin through the label, just as he came through the door. No need to write anything!
They all fitted perfectly except the one for my dad, which I’d had to adapt the pattern to make it several inches bigger round the chest. I did a tension square, and Colin checked all my sums, but I think it was the weight of the whole thing that made it like a mini-dress in length!
Back to the magic. Lincolnshire Textile group had a zoom workshop with Ann Pocklington a couple of Saturdays ago: how to weave a bag that didn’t need sewing up nor the ends weaving in; sounded good to me. Weaving is something I have wanted to try for ages. The sides and bottom are joined as you go.
A few days before, we were sent instructions to make our loom, using a piece of firm cardboard of the size we wanted our finished bag. The recommendation was not to do anything too big. I decided to make it big enough to hold my phone and my sun-glasses for when I’ve not got a pocket when I go out for a walk.
The top and bottom had a zig-zag pattern cut 1cm down at 1/2 cm intervals. It looks a bit the worse for wear now it’s been used. It helps to know which is the front and which is the back, so you should either write it on, unless as in my case the front and back were different. If you are right-handed, you have a tab at the top right, left if left-handed.
Front of loom
Ann then showed us how to warp the loom: starting top left with a knot, going down, through the notch at the bottom, up the back, round the front of the first zig, down the back, through the notch, up the front, across the back of the zag, down the front, up the back, until you have gone across alternately back and front; the right-hand side last one has a second warp going down with a knot at the bottom to anchor it in the last notch. Sounds a bit complicated but once you get going it becomes obvious (the front and back look the same, apart from the last double thread on the right at the front).
The thread goes alternately round the front and back notches, top and bottom
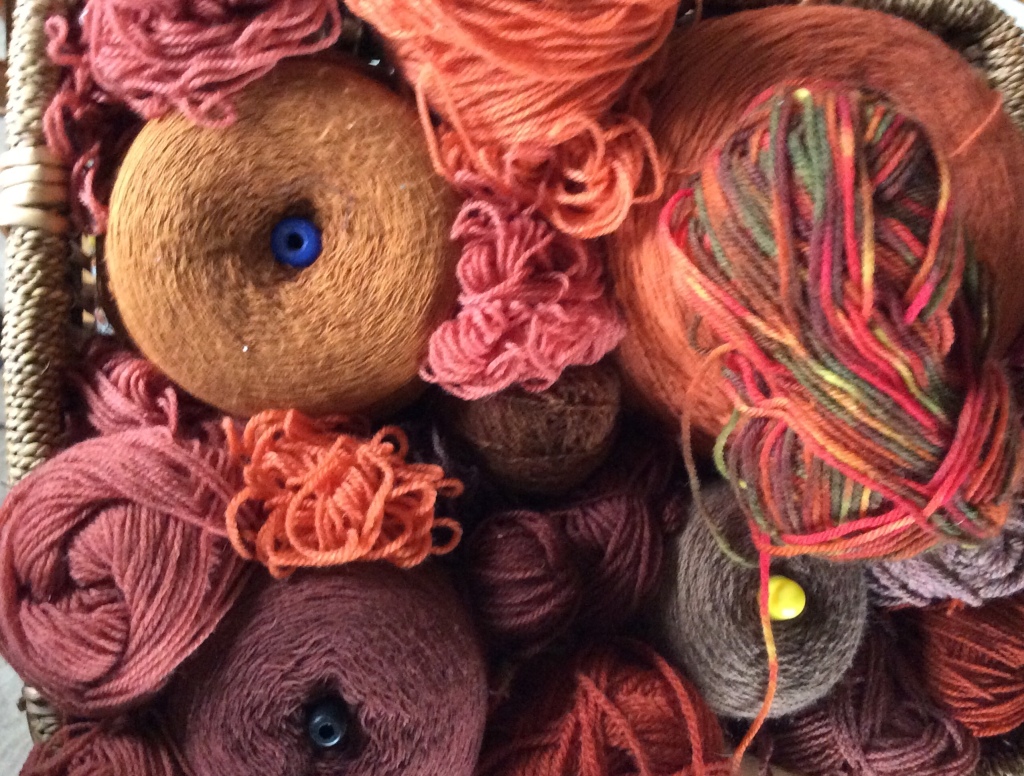
I used a fine dark green perlé thread for the warp, intending to use green yarn with the variegated thread above, along with some autumnal colours.
Greens I’d planned on using.
I’d started with the rusty colours at the bottom, and ended up continuing with them. I didn’t want it to look too stripy. I’d found a selection of greens and rusty colours, odd balls, leftovers from other projects, then remembered the basket of rusty coloured yarns I’d used on the canvas work cushion I did years ago. They worked well with the three variegated yarns I’d found. Great big cones from my machine knitting days (one day I’ll get back to it!).
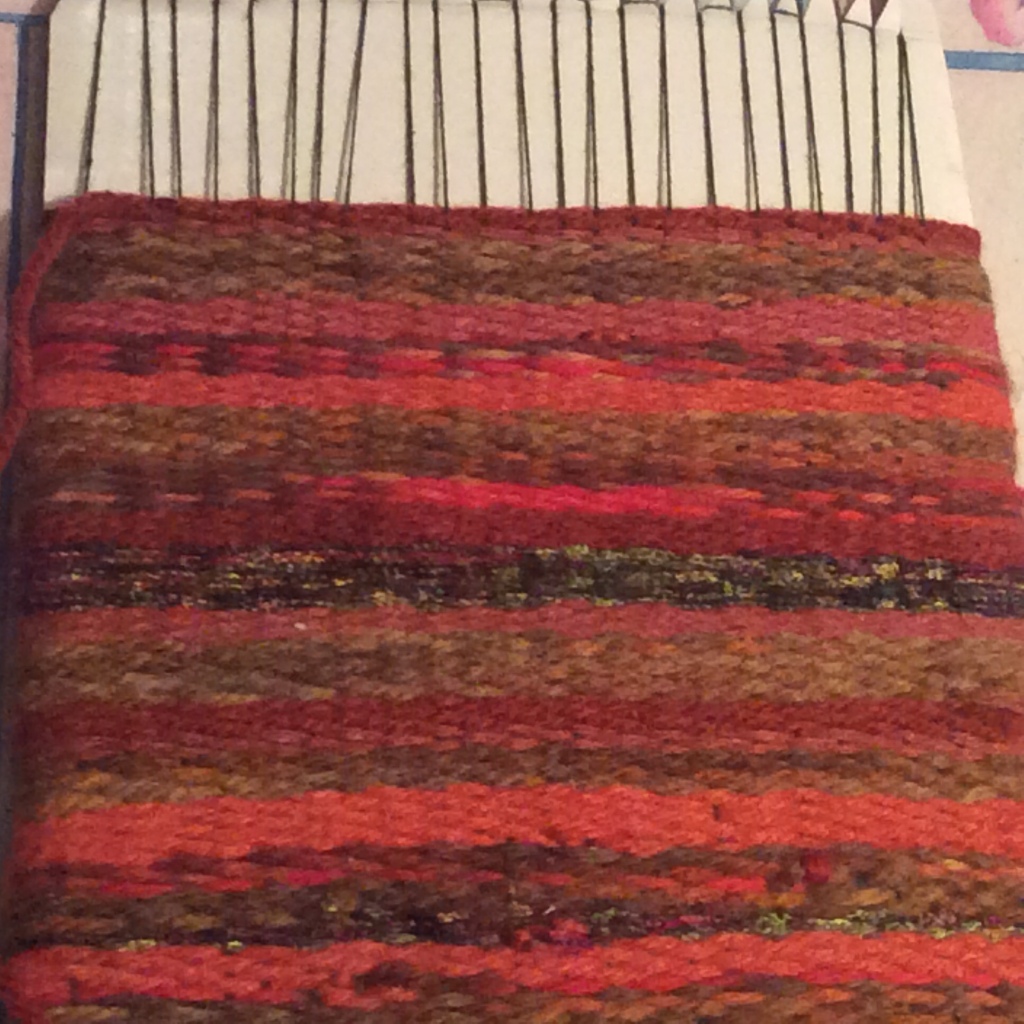
Starting to weave
The double line of thread on the right is so that you have an odd number of threads to weave through. At the end of the each row you turn it over so that you are weaving both sides, one row you are going over it, the next under. (I found I needed to pull it down tightly every couple of rows.) It took me a couple of rows to sort myself out and get it right. I used a wooden wide-toothed comb from the Body Shop to keep pushing the weft threads down tightly. It needs to be well packed down, because the bottom loops of the warp form the bottom of your bag, and you don’t want things to fall through. Going round to the other side makes your ‘join’ (seam) from front to back.
Back of loom
When you run out of thread you just overlap the old and the new for a few warps, and pack it down hard. It works better if they are random lengths so they don’t all fall in the same place.
Nearly at the top, but make sure you put in a few more rows than you think you need. This way you don’t have a floppy top, as when you do get to the top you just flick the loops over the zigs and zags. It makes it easier to take the cardboard out if you bend it a little as you slide the weaving down. And voila! You have a bag!
Needs another 8 or 10 rows yet.
It really does work like magic, no sewing up to do, nor ends to sew in. It took longer to do than I expected, although it was good to do in front of the telly. I don’t think I’ll be doing a huge bag any time soon, but I enjoyed doing it and I’m pleased with the result.
Now I just need to decide whether I want to hang it round my neck or tie it round my waist. My phone and glasses fit perfectly.
I’ve had another play with Brusho powders in the last few weeks. They are lovely to use, well a bit messy if you’re not careful with them!! But give lovely results if you can be patient and let them do their own thing. Working on well soaked damp cartridge paper that was blotted dry, I sprinkled small amounts of individual colours on separate pieces of paper, and left overnight. The powders spread out to produce lovely patterns, some of these looked like flowers. I find the best way to not touch them until completely dry (the magic continues to work until then) is to do use it just before I have to go and do something else. They also work well sprinkling several colours together but beware of using too many or it can become muddy – especially if you try to help!
I then scanned the pieces of Brusho-ed papers, it leaves a little residue on the paper which I didn’t want on this piece.
They were then cut to size, folded and joined together gradating across the spectrum.
The finished piece was hung from the ceiling where it twists and turns in the draft.